Q : What does the blinking LED on the modem indicate?
A :
LED | Status | Definition | |
Indicator | |||
|
| ||
|
|
| |
| Blinking (on for 100ms and | The modem is powered on | |
Green | off for 100ms; then on for | ||
| 100ms and off for 2700ms) |
| |
|
|
| |
Green | Blinking (on for 100ms and | The modem is registered to a GPRS | |
off for 2900ms) | (GSM/GPRS/EDGE) network | ||
| |||
|
|
| |
Blue | Blinking (on for 100ms and | The modem is registered to a | |
off for 2900ms) | UMTS (WCDMA/HSDPA) network | ||
| |||
|
|
| |
Green | On | The modem is connected to | |
a GPRS network | |||
|
| ||
|
|
| |
Blue | On | The modem is connected to | |
a WCDMA network | |||
|
| ||
|
|
| |
Sky Blue | On | The modem is connected to | |
a HSDPA network | |||
|
| ||
|
|
| |
No Colour | Off | The modem is removed | |
|
|
|
Q : How do I configure the settings to DiGi’s settings to enable me to connect?
A : The
Connecting the E219 with a PC
Note:
First, power on the computer. Then connect the E219 with the computer. Otherwise, the E219 cannot be installed normally.
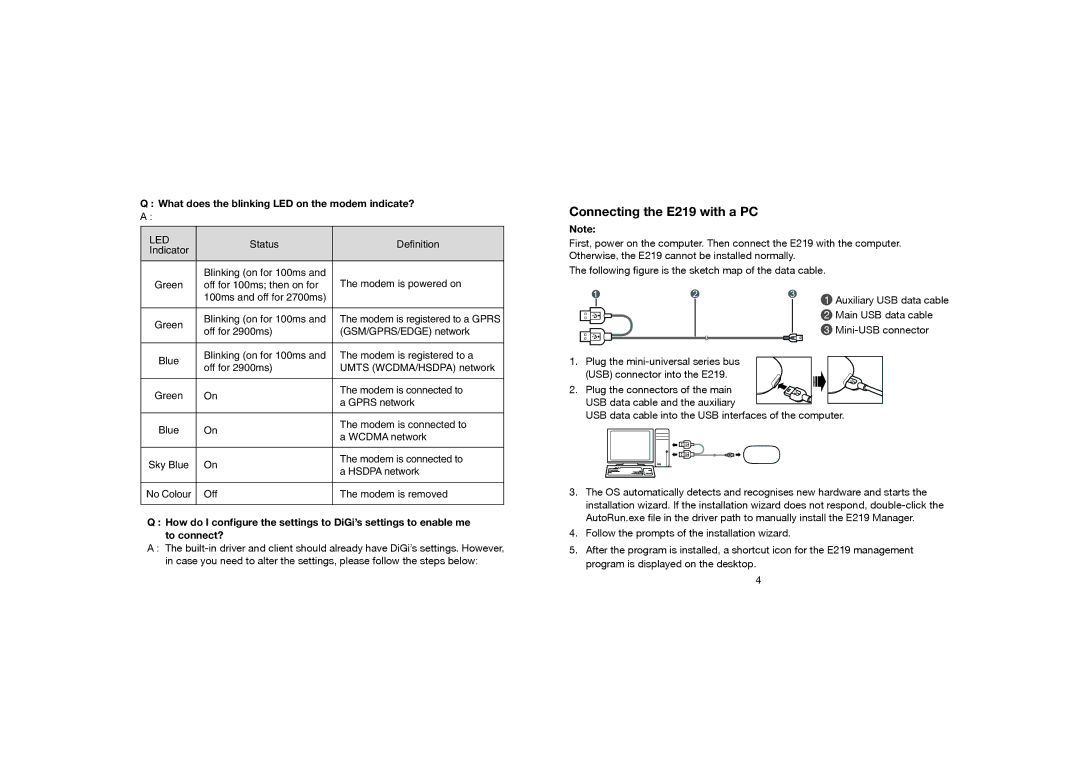
The following figure is the sketch map of the data cable.
1 Auxiliary USB data cable
2 Main USB data cable
3
1. Plug the
2. Plug the connectors of the main USB data cable and the auxiliary
USB data cable into the USB interfaces of the computer.
3.The OS automatically detects and recognises new hardware and starts the installation wizard. If the installation wizard does not respond,
4.Follow the prompts of the installation wizard.
5.After the program is installed, a shortcut icon for the E219 management program is displayed on the desktop.
4
