PIPING INSTALLATION
NOTE: The most effective means for preventing deterioration from accelerated corrosion due to galvanic and stray current is the installation of dielectric fittings/unions. The installation of these fittings is the responsibility of the installing contractor.
1.Connect the cold water inlet and hot water outlet to the appropriate connections as shown; refer to installation diagram.
2.Provide a shut off valve in the cold water line. Mark for future emergency use
3.If pressure reducers or any other restrictions are put in the cold water line, special precautions should be taken. Consult you local plumbing inspector
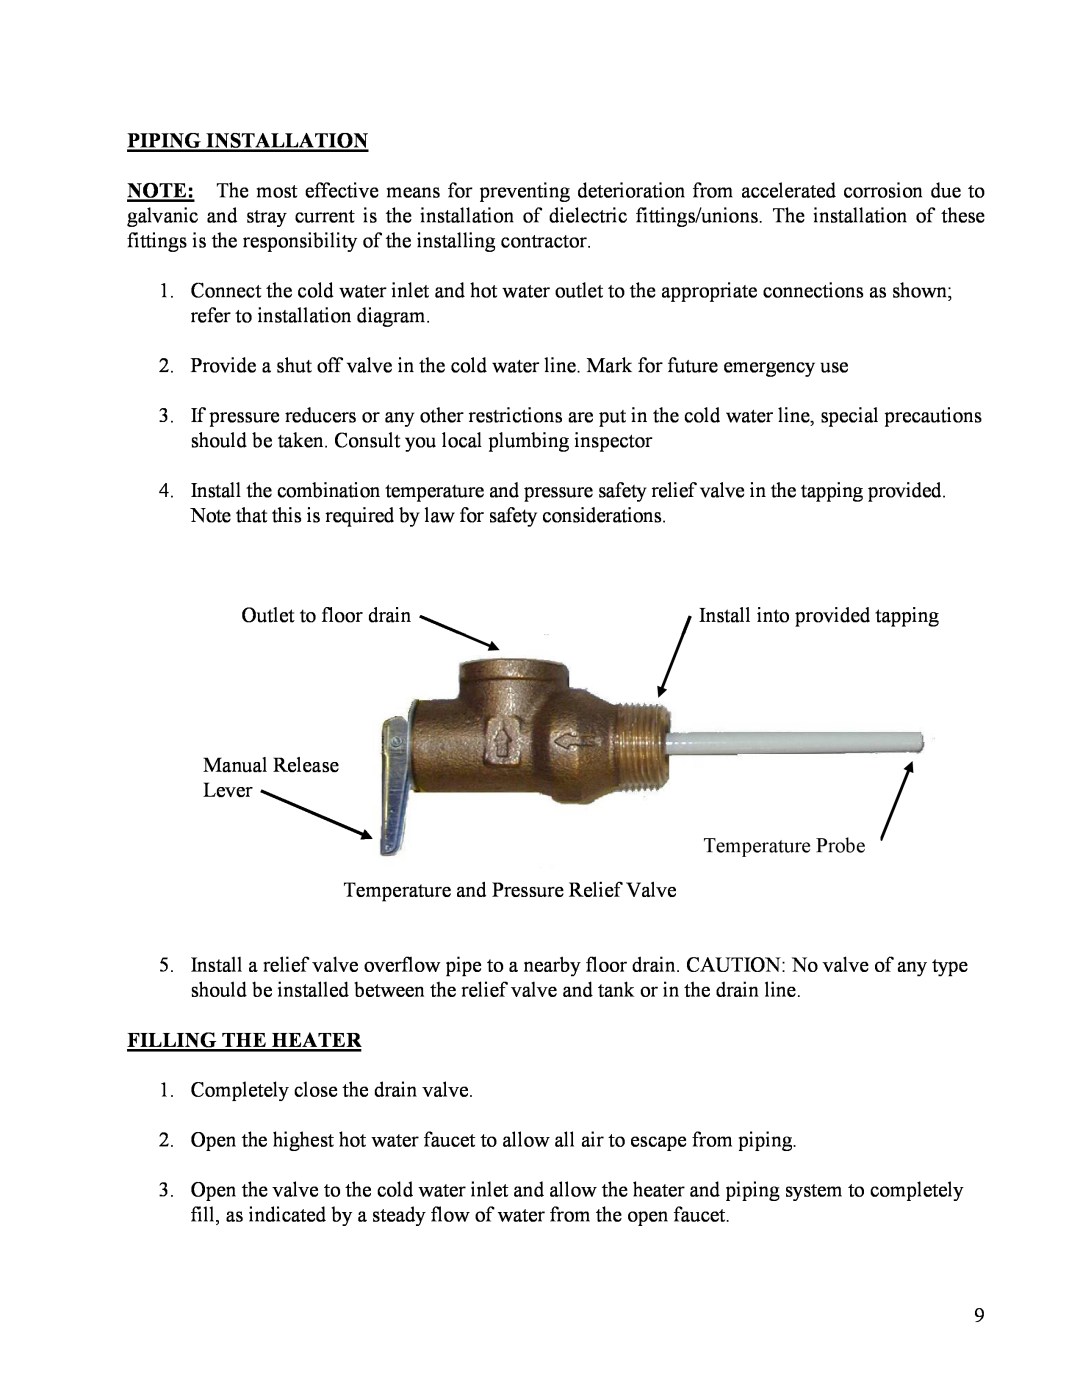
4.Install the combination temperature and pressure safety relief valve in the tapping provided. Note that this is required by law for safety considerations.
Outlet to floor drain | Install into provided tapping |
Manual Release
Lever
Temperature Probe
Temperature and Pressure Relief Valve
5.Install a relief valve overflow pipe to a nearby floor drain. CAUTION: No valve of any type should be installed between the relief valve and tank or in the drain line.
FILLING THE HEATER
1.Completely close the drain valve.
2.Open the highest hot water faucet to allow all air to escape from piping.
3.Open the valve to the cold water inlet and allow the heater and piping system to completely fill, as indicated by a steady flow of water from the open faucet.
9