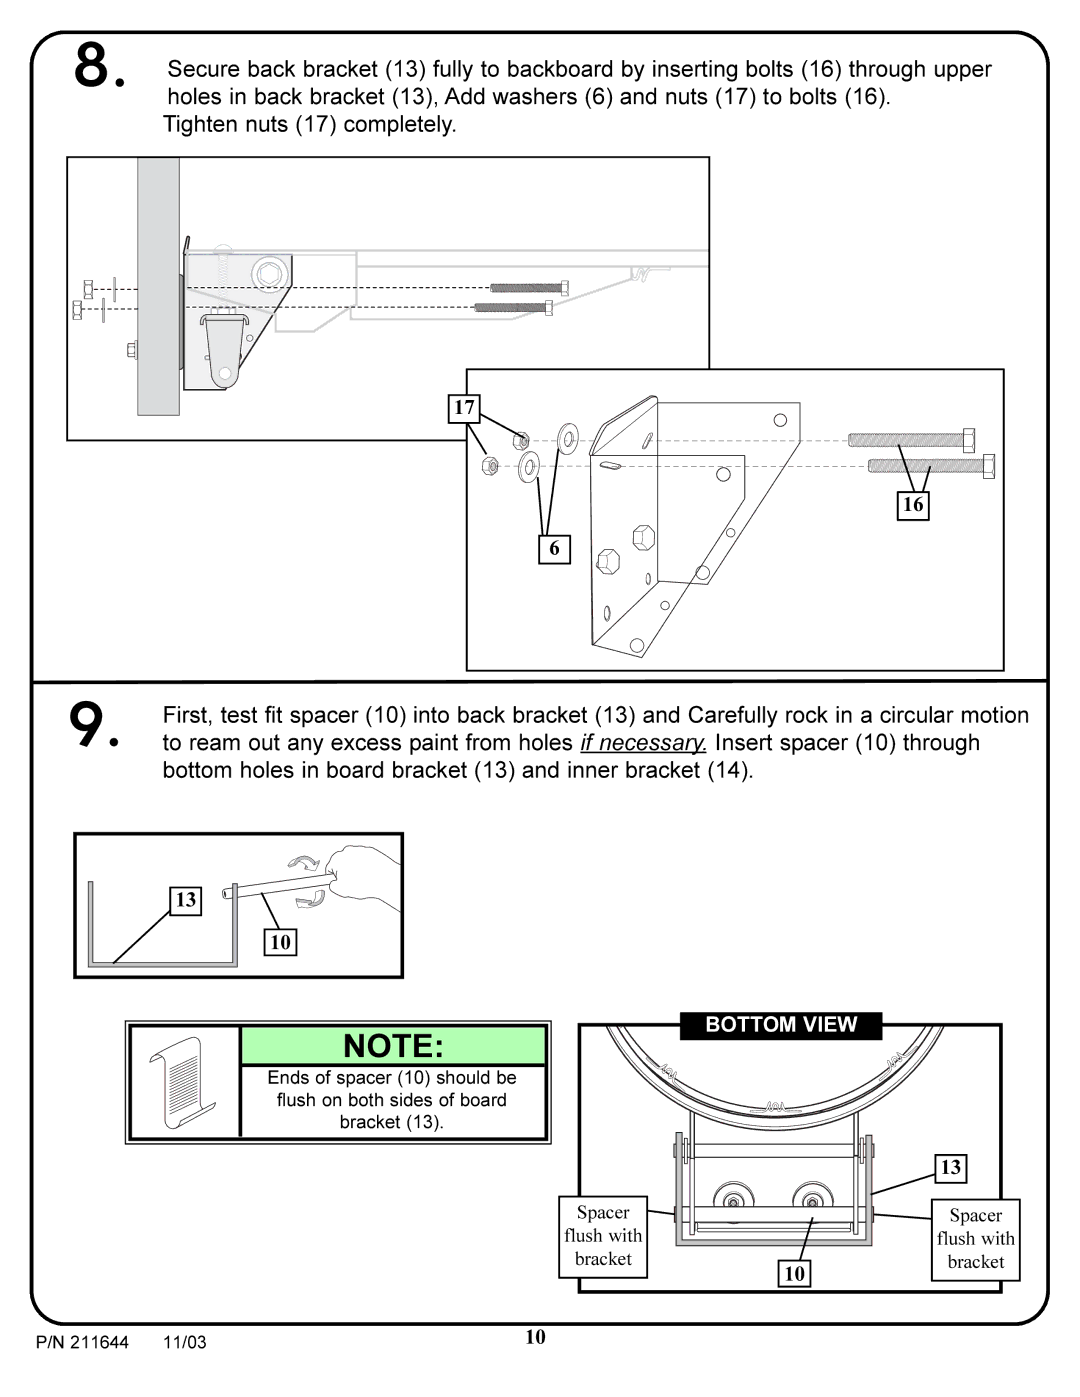
8. | Secure back bracket (13) fully to backboard by inserting bolts (16) through upper |
| holes in back bracket (13), Add washers (6) and nuts (17) to bolts (16). |
| Tighten nuts (17) completely. |
17 |
16 |
6 |
9. | First, test fit spacer (10) into back bracket (13) and Carefully rock in a circular motion |
to ream out any excess paint from holes if necessary. Insert spacer (10) through |
bottom holes in board bracket (13) and inner bracket (14).
13 |
10 |
NOTE: |
Ends of spacer (10) should be |
flush on both sides of board |
bracket (13). |
BOTTOM VIEW
Spacer ![]()
![]() flush with
flush with ![]()
![]()
![]() bracket
bracket
10
13
![]()
![]() Spacer flush with bracket
Spacer flush with bracket
P/N 211644 | 11/03 | 10 |