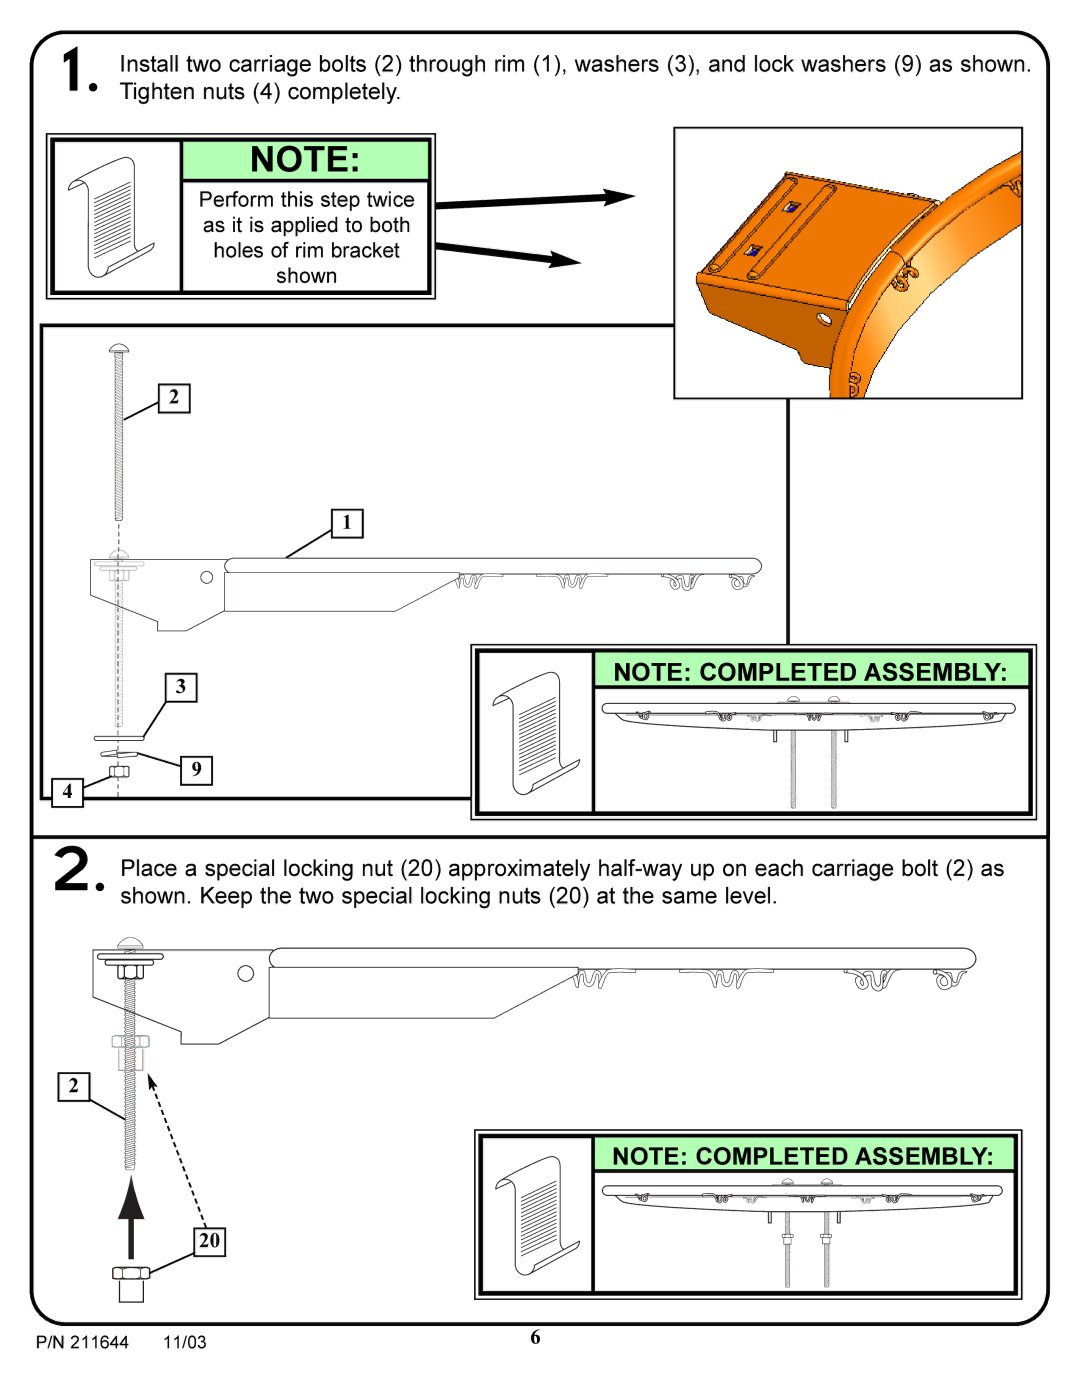
1. Install two carriage bolts (2) through rim (1), washers (3), and lock washers (9) as shown. Tighten nuts (4) completely.
| NOTE: |
| Perform this step twice |
| as it is applied to both |
| holes of rim bracket |
| shown |
2 |
|
| 1 |
3 | NOTE: COMPLETED ASSEMBLY: |
| |
| 9 |
4 |
|
2. Place a special locking nut (20) approximately
2
20
P/N 211644 | 11/03 |
NOTE: COMPLETED ASSEMBLY: |
6 |