CASE ASSEMBLY
ATTACHING THE CONROL HEAD / ASSEMBLING THE TRANSDUCER MOUNT
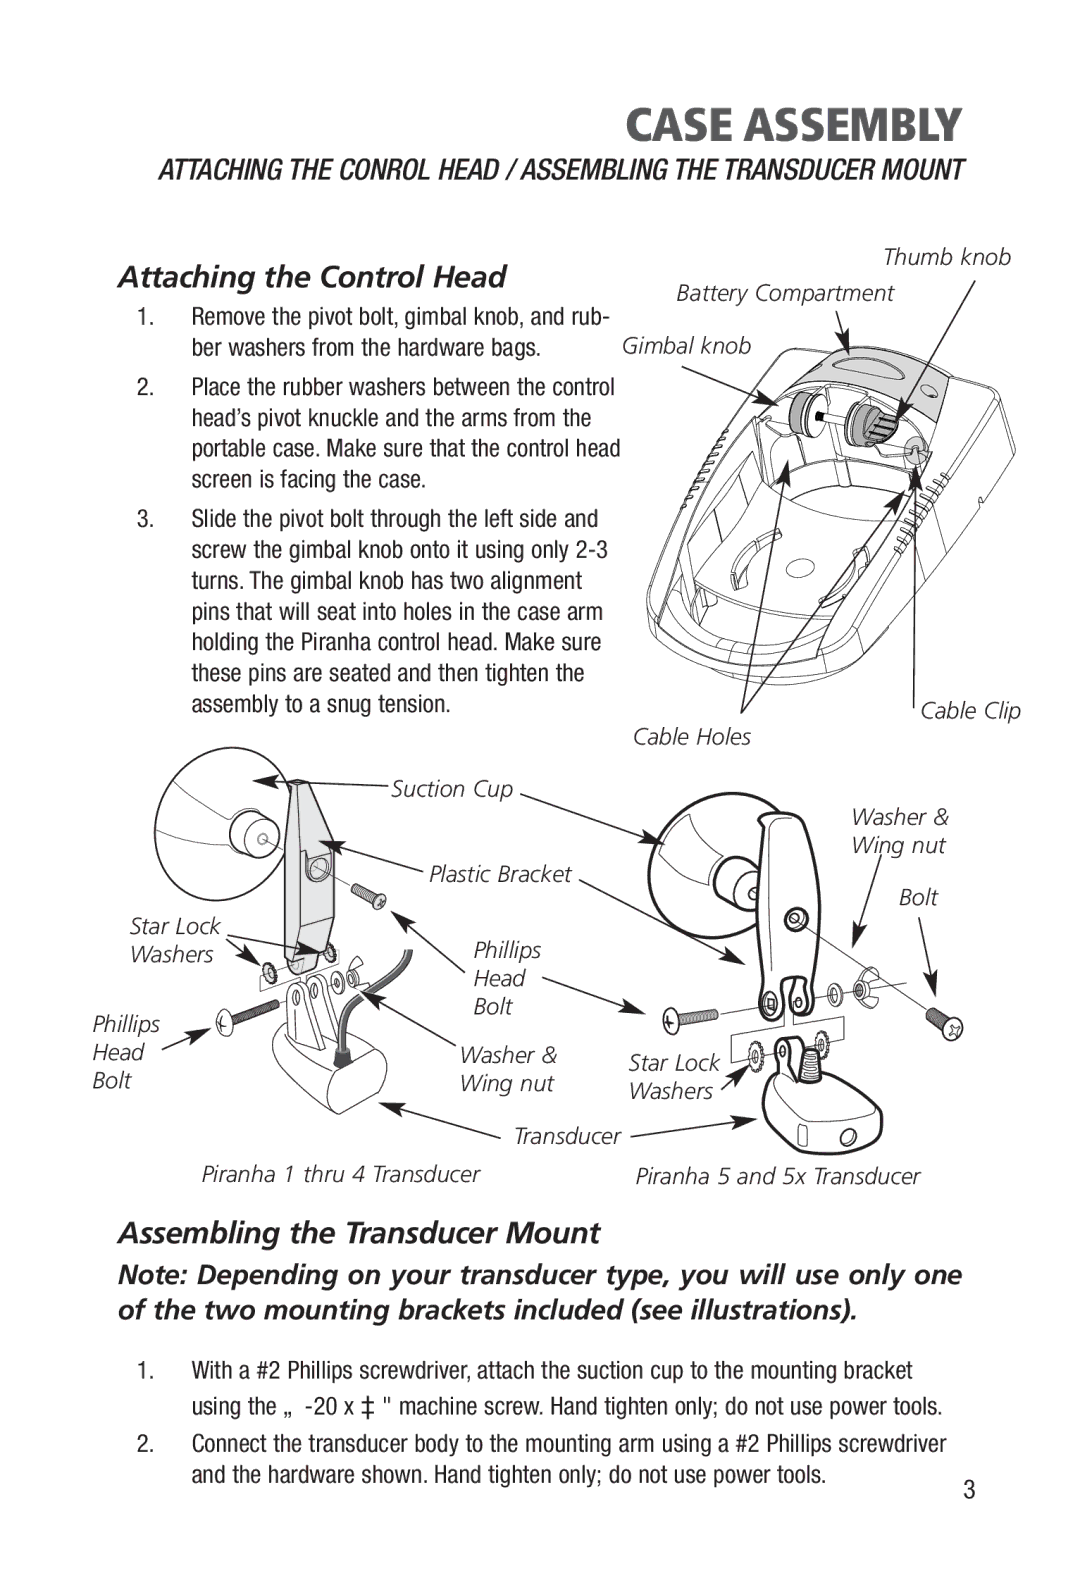
Attaching the Control Head
Thumb knob
Battery Compartment
1. Remove the pivot bolt, gimbal knob, and rub- |
|
ber washers from the hardware bags. | Gimbal knob |
2. Place the rubber washers between the control head’s pivot knuckle and the arms from the portable case. Make sure that the control head screen is facing the case.
3.Slide the pivot bolt through the left side and screw the gimbal knob onto it using only
Cable Holes
![]() Suction Cup
Suction Cup
| Plastic Bracket |
| |
Star Lock | Phillips |
| |
Washers |
| ||
| Head |
| |
Phillips | Bolt |
| |
|
| ||
Head | Washer & | Star Lock | |
Bolt | Wing nut | ||
Washers | |||
|
|
Cable Clip
Washer &
Wing nut
Bolt
Transducer ![]()
Piranha 1 thru 4 Transducer | Piranha 5 and 5x Transducer |
Assembling the Transducer Mount
Note: Depending on your transducer type, you will use only one of the two mounting brackets included (see illustrations).
1. With a #2 Phillips screwdriver, attach the suction cup to the mounting bracket using the
2. Connect the transducer body to the mounting arm using a #2 Phillips screwdriver and the hardware shown. Hand tighten only; do not use power tools.
3