CASE ASSEMBLY
INSTALLING THE BATTERIES / INTRODUCTION TO MOUNTING
Installing the Batteries
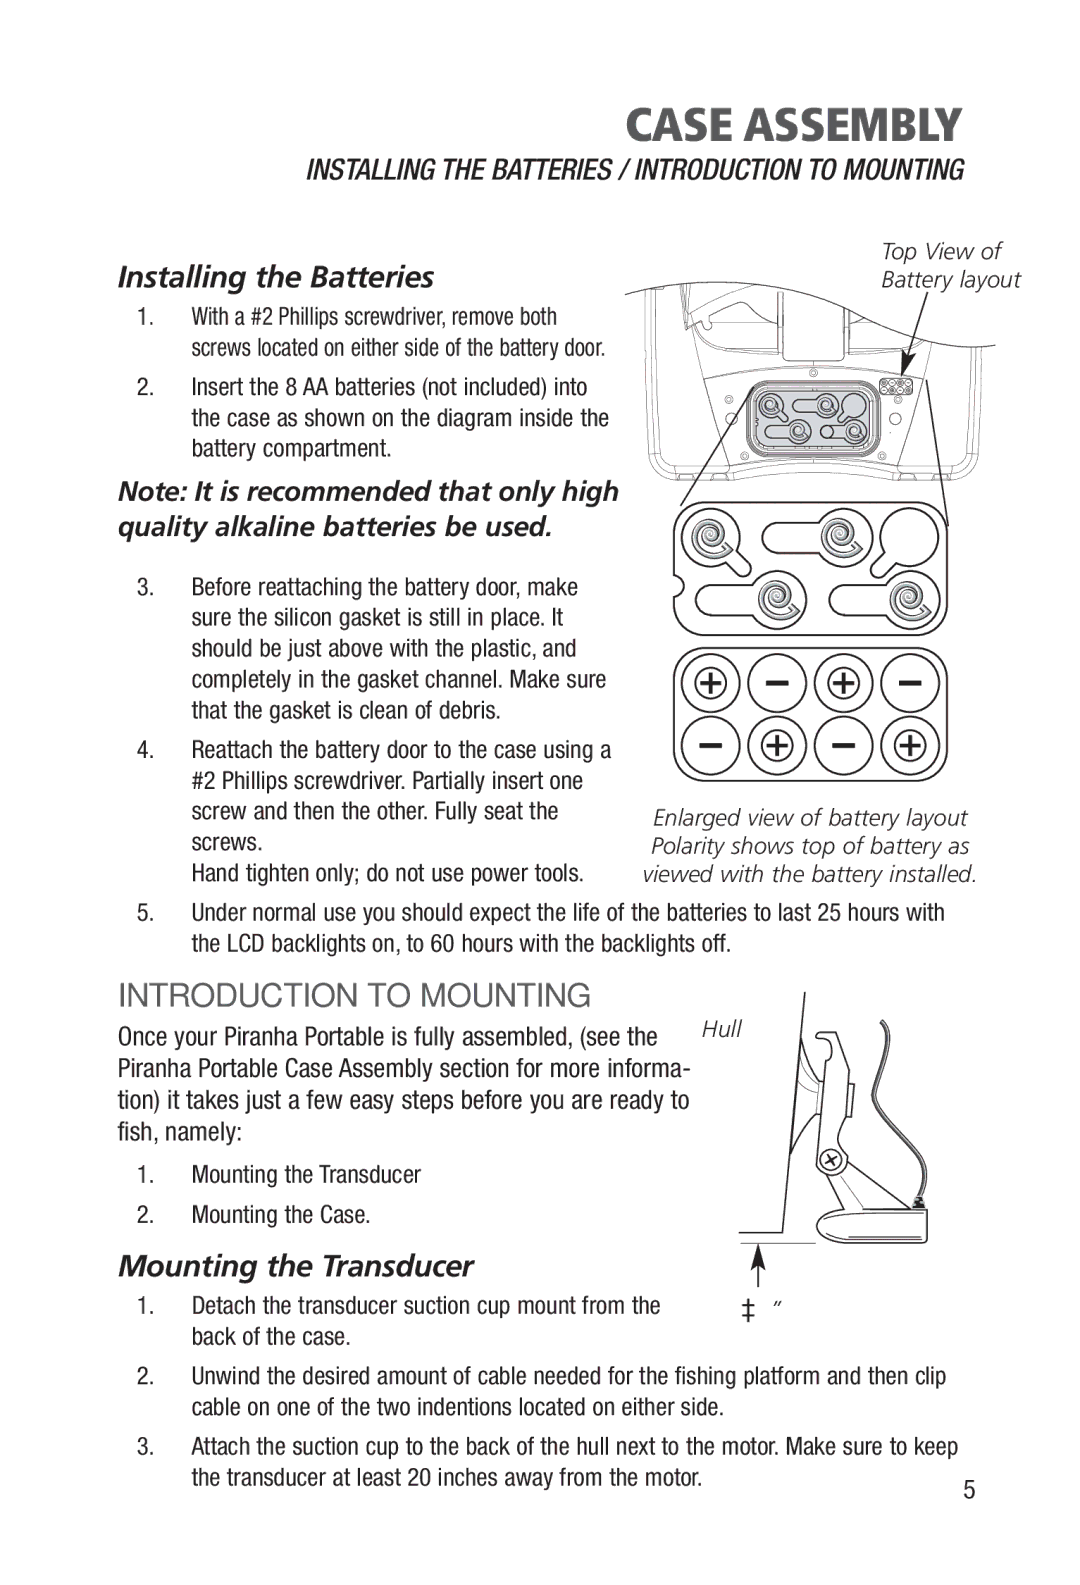
Top View of Battery layout
1.With a #2 Phillips screwdriver, remove both screws located on either side of the battery door.
2.Insert the 8 AA batteries (not included) into the case as shown on the diagram inside the battery compartment.
Note: It is recommended that only high quality alkaline batteries be used.
3.Before reattaching the battery door, make sure the silicon gasket is still in place. It should be just above with the plastic, and completely in the gasket channel. Make sure that the gasket is clean of debris.
4.Reattach the battery door to the case using a #2 Phillips screwdriver. Partially insert one screw and then the other. Fully seat the screws.
Hand tighten only; do not use power tools.
Enlarged view of battery layout Polarity shows top of battery as viewed with the battery installed.
5.Under normal use you should expect the life of the batteries to last 25 hours with the LCD backlights on, to 60 hours with the backlights off.
INTRODUCTION TO MOUNTING
Once your Piranha Portable is fully assembled, (see the | Hull | |
Piranha Portable Case Assembly section for more informa- |
| |
tion) it takes just a few easy steps before you are ready to |
| |
fish, namely: |
| |
1. | Mounting the Transducer |
|
2. | Mounting the Case. |
|
Mounting the Transducer
1. | Detach the transducer suction cup mount from the | ³⁄₁₆” |
| back of the case. |
|
2.Unwind the desired amount of cable needed for the fishing platform and then clip cable on one of the two indentions located on either side.
3.Attach the suction cup to the back of the hull next to the motor. Make sure to keep
the transducer at least 20 inches away from the motor. | 5 |
|
