6 • Installing the Light Fixture
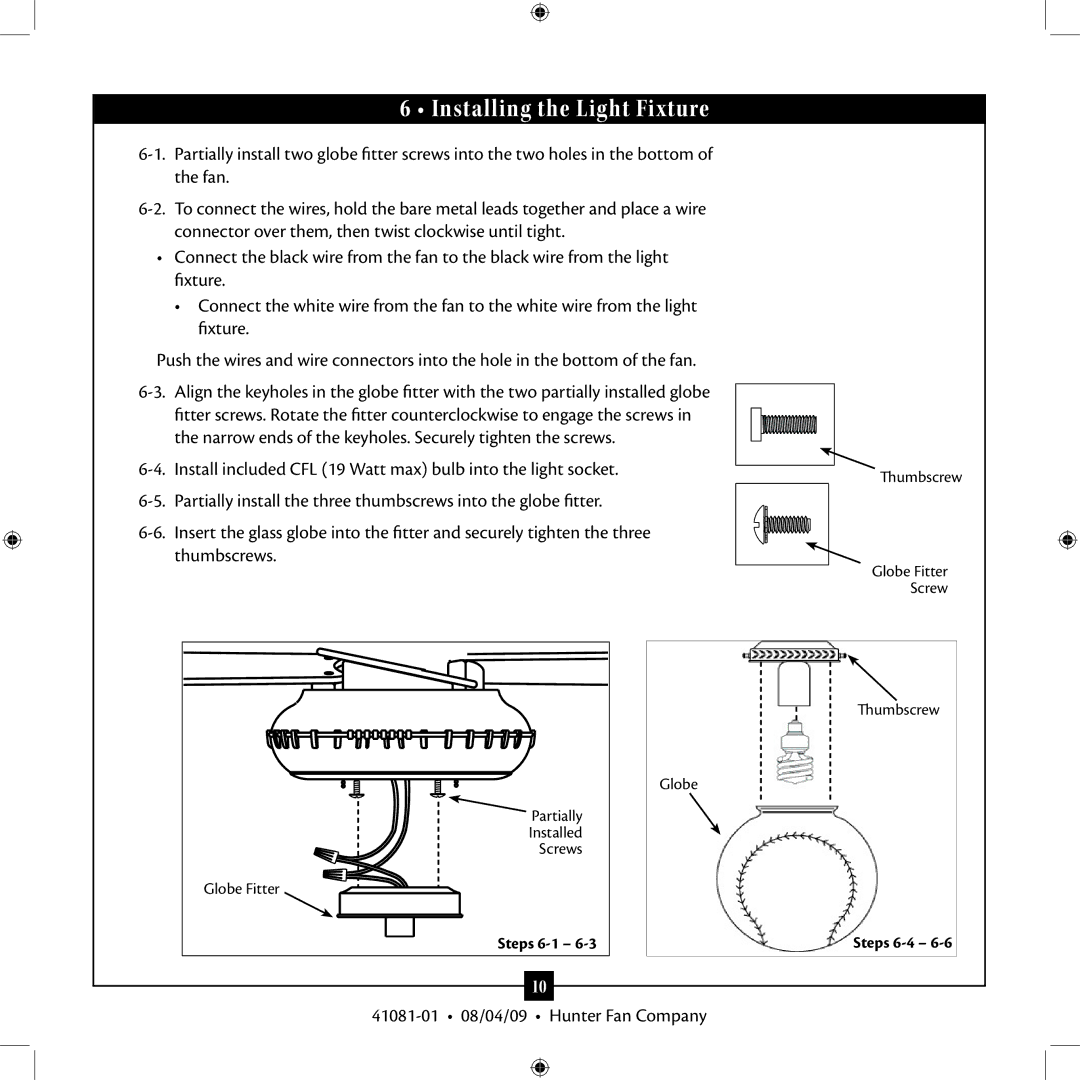
6-1. Partially install two globe fitter screws into the two holes in the bottom of the fan.
6-2. To connect the wires, hold the bare metal leads together and place a wire connector over them, then twist clockwise until tight.
•Connect the black wire from the fan to the black wire from the light fixture.
•Connect the white wire from the fan to the white wire from the light fixture.
Push the wires and wire connectors into the hole in the bottom of the fan.
6-3. Align the keyholes in the globe fitter with the two partially installed globe fitter screws. Rotate the fitter counterclockwise to engage the screws in the narrow ends of the keyholes. Securely tighten the screws.
6-4. Install included CFL (19 Watt max) bulb into the light socket.
6-5. Partially install the three thumbscrews into the globe fitter.
6-6. Insert the glass globe into the fitter and securely tighten the three thumbscrews.
Globe
Partially
Installed
Screws
Globe Fitter
Steps 6-1 – 6-3
10