A7 | E |
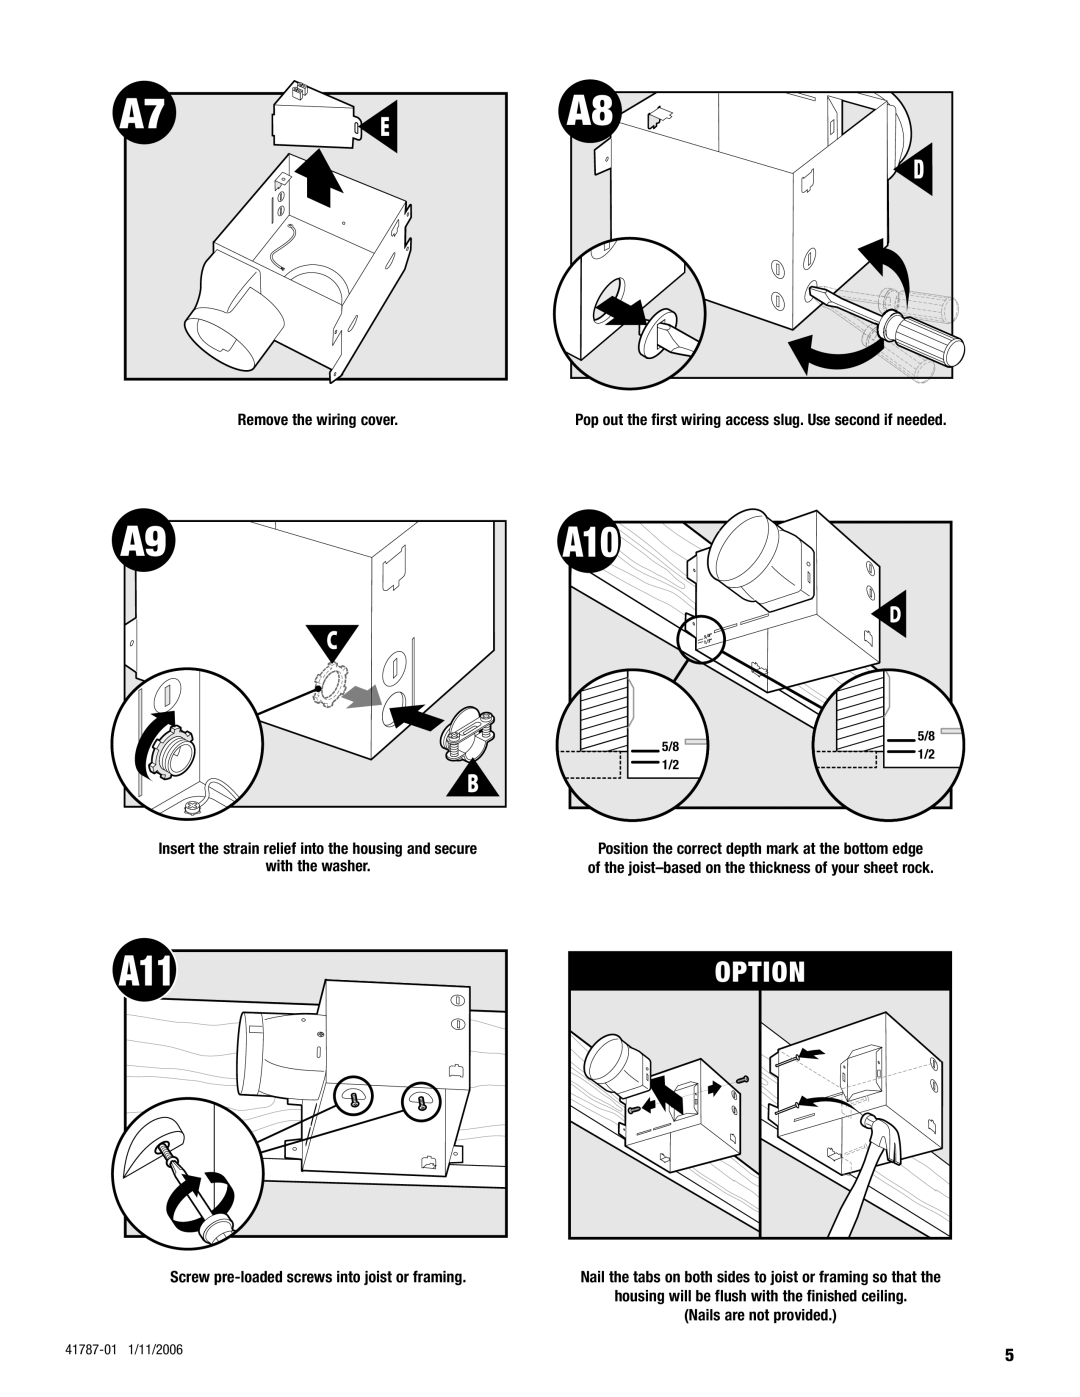
Remove the wiring cover.
A8
D
Pop out the first wiring access slug. Use second if needed.
A9 | A10 |
|
| C | D |
|
| |
| 5/8 | 5/8 |
| 1/2 | |
| 1/2 | |
|
| |
| B |
|
Insert the strain relief into the housing and secure | Position the correct depth mark at the bottom edge |
with the washer. | of the |
A11 |
Screw
OPTION |
Nail the tabs on both sides to joist or framing so that the
housing will be flush with the finished ceiling.
(Nails are not provided.)
5
