
45049-01 specifications
The Hunter Fan 45049-01 stands out in the realm of ceiling fans, combining aesthetics with functionality to create an exceptional cooling solution for any room. This model reflects Hunter's commitment to quality craftsmanship and innovative technology, making it a popular choice among homeowners.One of the main features of the Hunter Fan 45049-01 is its powerful motor. Engineered for optimal performance, the motor ensures excellent air circulation, making the fan capable of cooling large spaces efficiently. This model operates quietly, allowing for a peaceful environment even at high speeds. Homeowners can enjoy a gentle breeze without the disruptive noise often associated with ceiling fans.
The design of the 45049-01 is another highlight. It typically features a sleek, modern look, available in various finishes that complement a wide range of interior decors. From contemporary to traditional, this fan is versatile enough to fit seamlessly into any room. The fan blades are designed not only for aesthetic appeal but also for optimal air movement, providing a perfect balance of style and functionality.
Hunter incorporates advanced technologies in the 45049-01 to enhance user experience. One such technology is the WhisperWind motor, which delivers powerful airflow without excessive noise, fostering a serene atmosphere in living spaces. This fan also comes with a handy pull-chain control, allowing users to easily adjust speed settings and turn the fan on and off as needed.
Energy efficiency is a critical aspect of modern appliances, and the Hunter Fan 45049-01 does not disappoint. With a focus on sustainable design, this ceiling fan is designed to consume less electricity while providing maximum airflow, making it an eco-friendly option for those looking to reduce their carbon footprint.
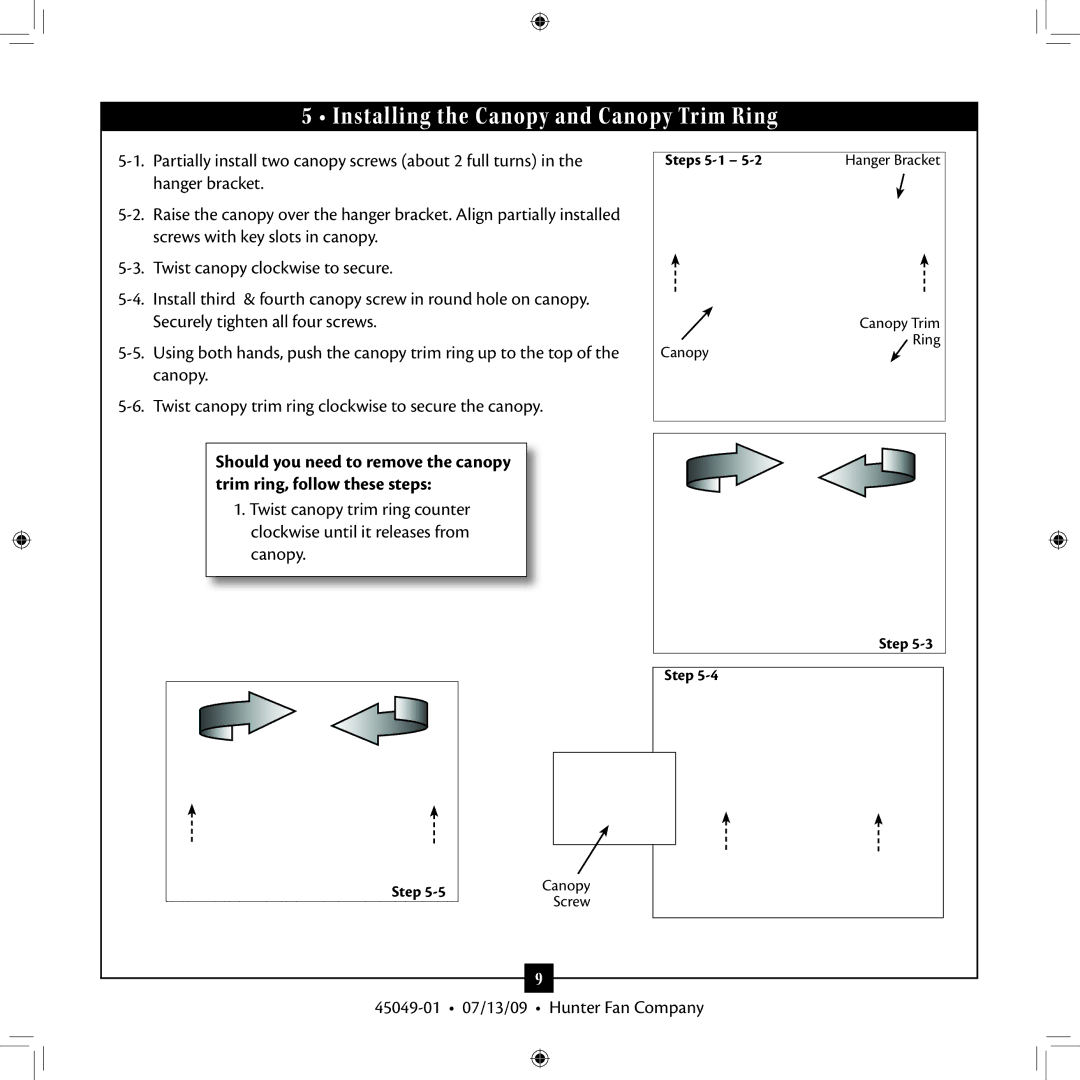
Lastly, the installation of the Hunter Fan 45049-01 is straightforward, featuring a user-friendly design that simplifies the setup process. This ease of installation means that even those with limited DIY experience can successfully mount this ceiling fan in their homes.
In conclusion, the Hunter Fan 45049-01 exemplifies a blend of sophisticated design, robust performance, and user-friendly features, making it a top choice for anyone looking to enhance their living space. With its silent operation, aesthetic versatility, energy efficiency, and easy installation, it ensures comfort and style in any home.