
240RBD specifications
The Husqvarna 240RBD is a robust and efficient brush cutter designed for homeowners and professionals alike, making it an ideal tool for maintaining gardens, yards, and larger green spaces. This lightweight machine is perfect for tackling tough grass, weeds, and dense brush, providing a versatile solution for various landscaping tasks.One of the standout features of the 240RBD is its powerful and reliable engine. Equipped with Husqvarna’s X-Torq technology, the engine not only delivers superior performance but also enhances fuel efficiency, allowing operators to work longer without frequent refueling. This technology minimizes exhaust emissions, making it an eco-friendly option for users who prioritize sustainability.
The ergonomic design of the Husqvarna 240RBD makes it comfortable to operate for extended periods. The adjustable handle allows for optimal maneuverability, while the lightweight construction reduces operator fatigue. Its balance and design facilitate precise control, ensuring that you can navigate around obstacles with ease while achieving a clean cut.
Another significant feature is the brush cutter's dual harness system, which evenly distributes the weight of the tool across the body, providing enhanced comfort during use. This system is particularly beneficial when handling heavy workloads or working on uneven terrains. The soft-grip handles further add to user comfort, reducing vibration and allowing for a more stable grip.
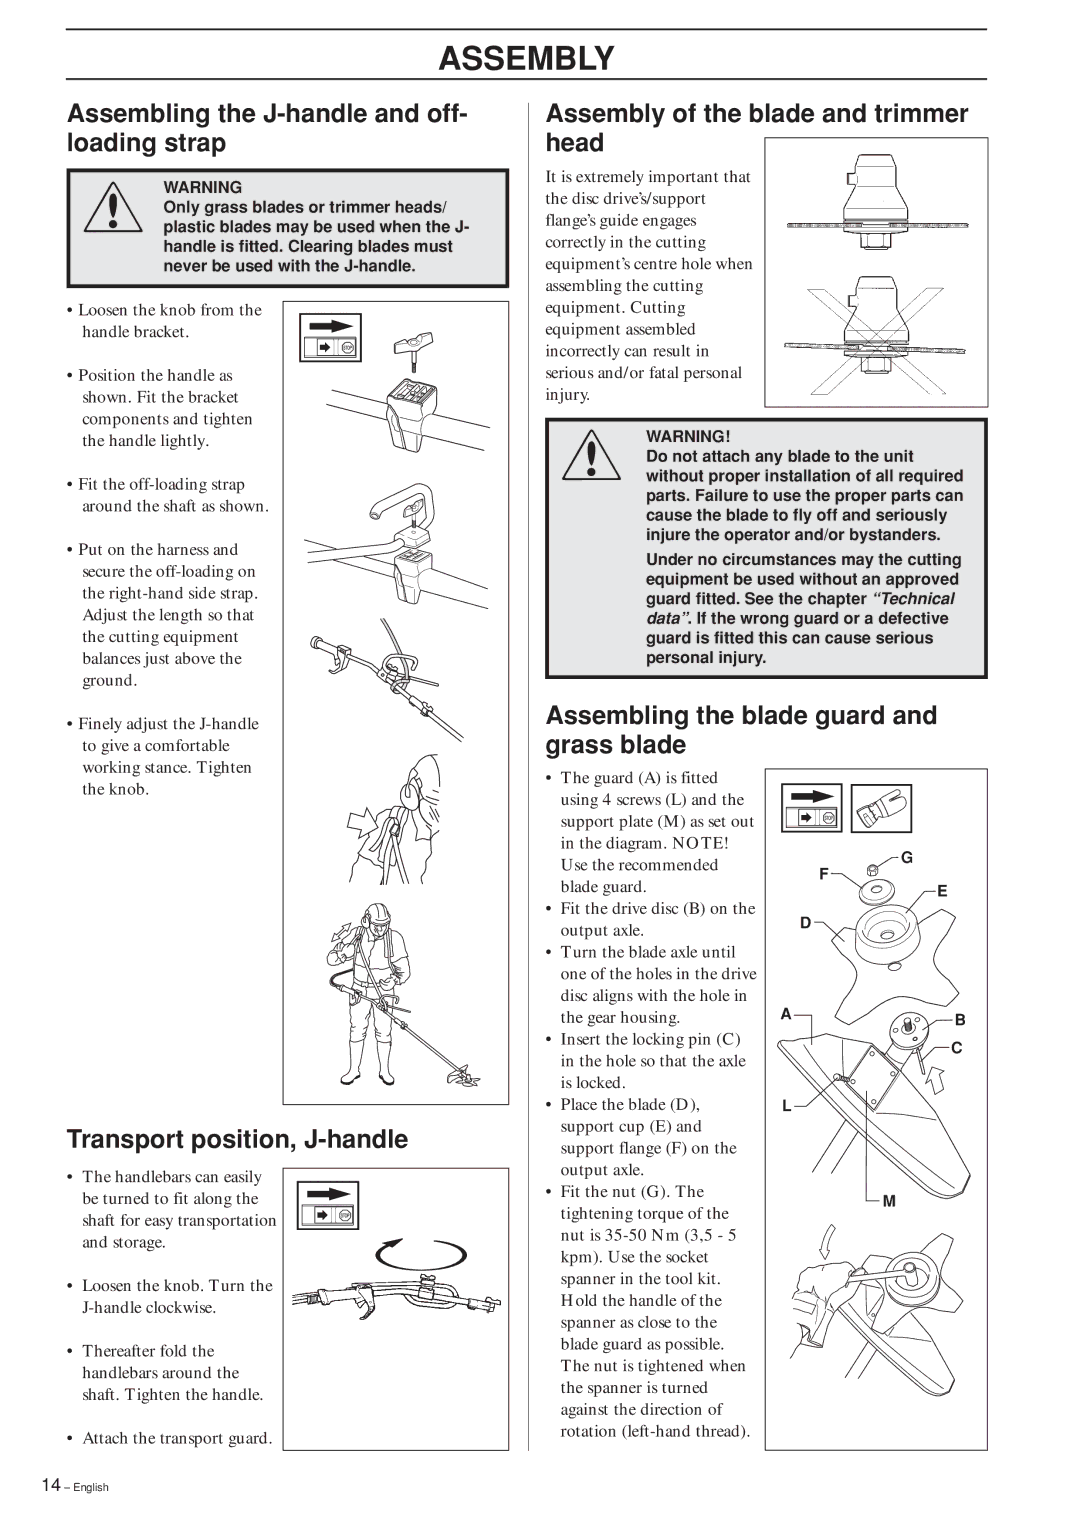
The cutting equipment of the 240RBD is equally impressive, featuring a combination of a metal blade and a trimmer head. This versatility allows users to switch between cutting thick brush and trimming grass with minimal effort. The quick-release mechanism makes it easy to transition between these tools, ensuring that you can tackle various tasks efficiently.
Additionally, the Husqvarna 240RBD comes equipped with features that enhance usability. The easy-start system allows for quick ignition, reducing the hassle often associated with starting traditional gas-powered tools. The automatic gear lubrication helps in prolonging the life of the tool and maintaining optimal performance.
In summary, the Husqvarna 240RBD brush cutter represents a perfect blend of power, efficiency, and user-friendly design, making it a top choice for anyone seeking reliability in outdoor maintenance equipment. Whether you are a homeowner looking to maintain your garden or a professional landscaper, this brush cutter provides the performance and versatility required for various tasks.