Spanner & Spacers
N |
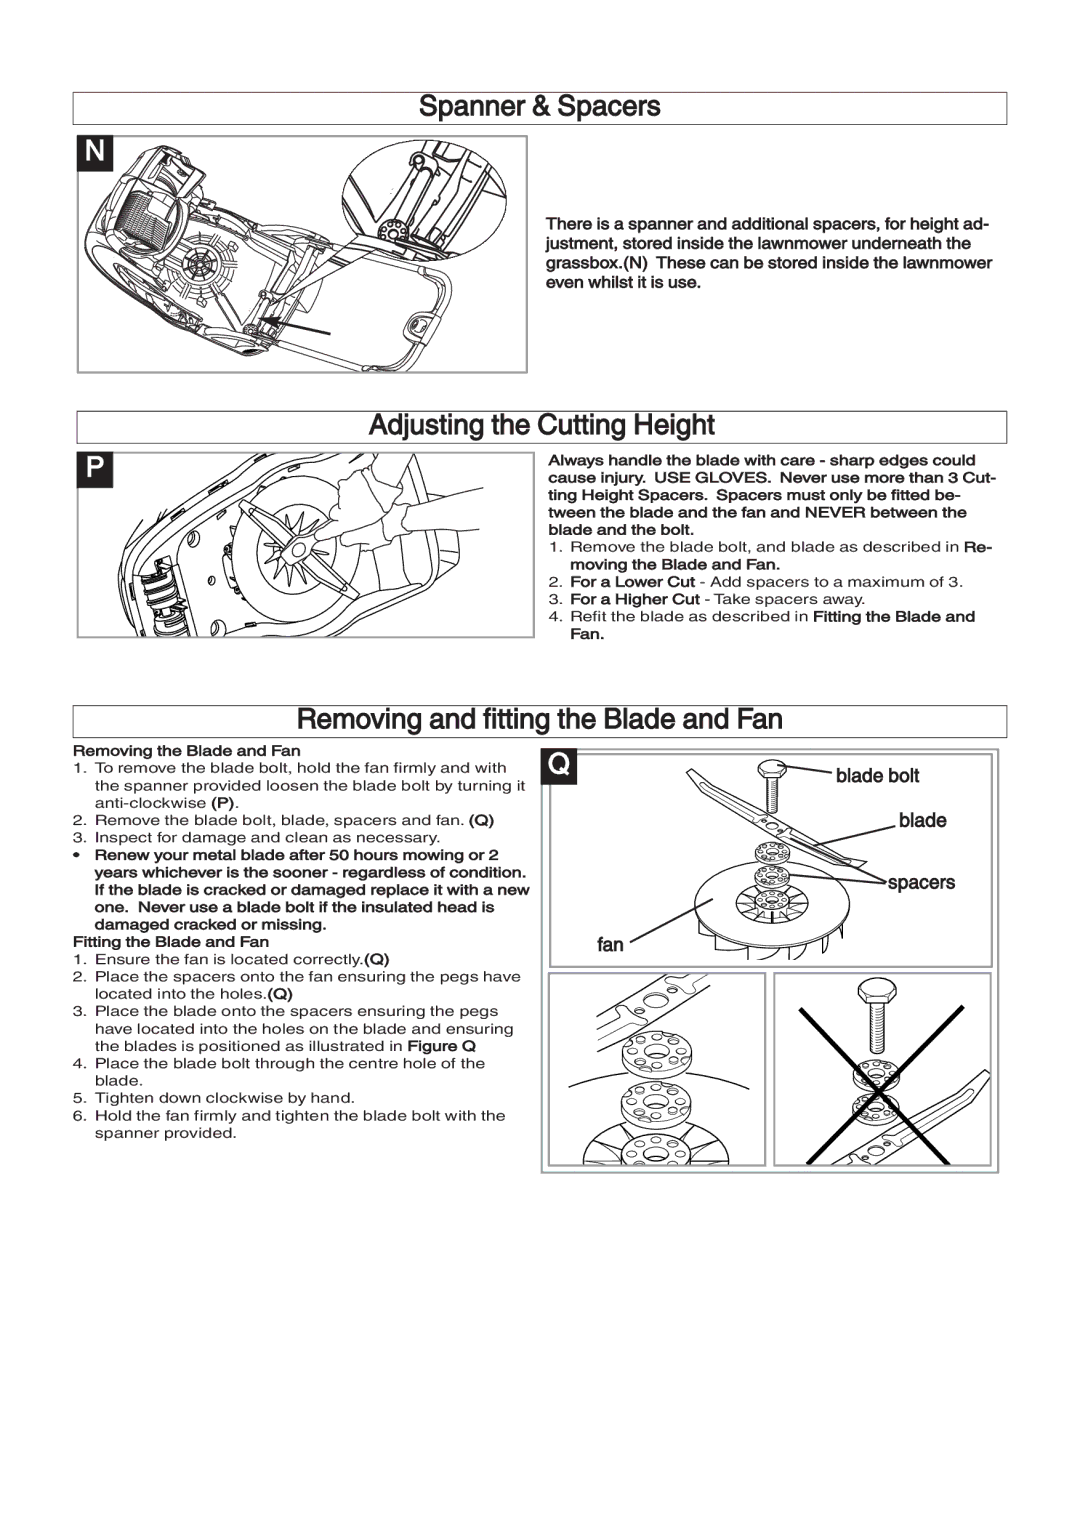
There is a spanner and additional spacers, for height ad- justment, stored inside the lawnmower underneath the grassbox.(N) These can be stored inside the lawnmower even whilst it is use.
Adjusting the Cutting Height
P |
Always handle the blade with care - sharp edges could cause injury. USE GLOVES. Never use more than 3 Cut- ting Height Spacers. Spacers must only be fitted be- tween the blade and the fan and NEVER between the blade and the bolt.
1.Remove the blade bolt, and blade as described in Re- moving the Blade and Fan.
2.For a Lower Cut - Add spacers to a maximum of 3.
3.For a Higher Cut - Take spacers away.
4.Refit the blade as described in Fitting the Blade and
Fan.
Removing and fitting the Blade and Fan
Removing the Blade and Fan
1.To remove the blade bolt, hold the fan firmly and with the spanner provided loosen the blade bolt by turning it
2.Remove the blade bolt, blade, spacers and fan. (Q)
3.Inspect for damage and clean as necessary.
•Renew your metal blade after 50 hours mowing or 2 years whichever is the sooner - regardless of condition. If the blade is cracked or damaged replace it with a new one. Never use a blade bolt if the insulated head is damaged cracked or missing.
Fitting the Blade and Fan
1.Ensure the fan is located correctly.(Q)
2.Place the spacers onto the fan ensuring the pegs have located into the holes.(Q)
3.Place the blade onto the spacers ensuring the pegs have located into the holes on the blade and ensuring the blades is positioned as illustrated in Figure Q
4.Place the blade bolt through the centre hole of the blade.
5.Tighten down clockwise by hand.
6.Hold the fan firmly and tighten the blade bolt with the spanner provided.
Q | blade bolt |
| blade |
| spacers |
| fan |
