OPERATION
ADD GASOLINE (See Fig. 10)
•Fill fuel tank to bottom of tank fi ller neck. Do not over- fi ll. Use fresh, clean, regular unleaded gasoline with a minimum of 87 octane. Do not mix oil with gasoline. Purchase fuel in quantities that can be used within 30 days to assure fuel freshness.
CAUTION: Alcohol blended fuels (called gasohol or using ethanol or methanol) can attract moisture which leads to separation and formation of acids during storage.
Acidic gas can damage the fuel system of an engine while in storage. To avoid engine prob- lems, the fuel system should be emptied before storage of 30 days or longer. Empty the gas tank, start the engine and let it run until the fuel lines and carburetor are empty. Use fresh fuel next season. See Storage Instructions for additional information. Never use engine or carburetor cleaner products in the fuel tank or permanent damage may occur.
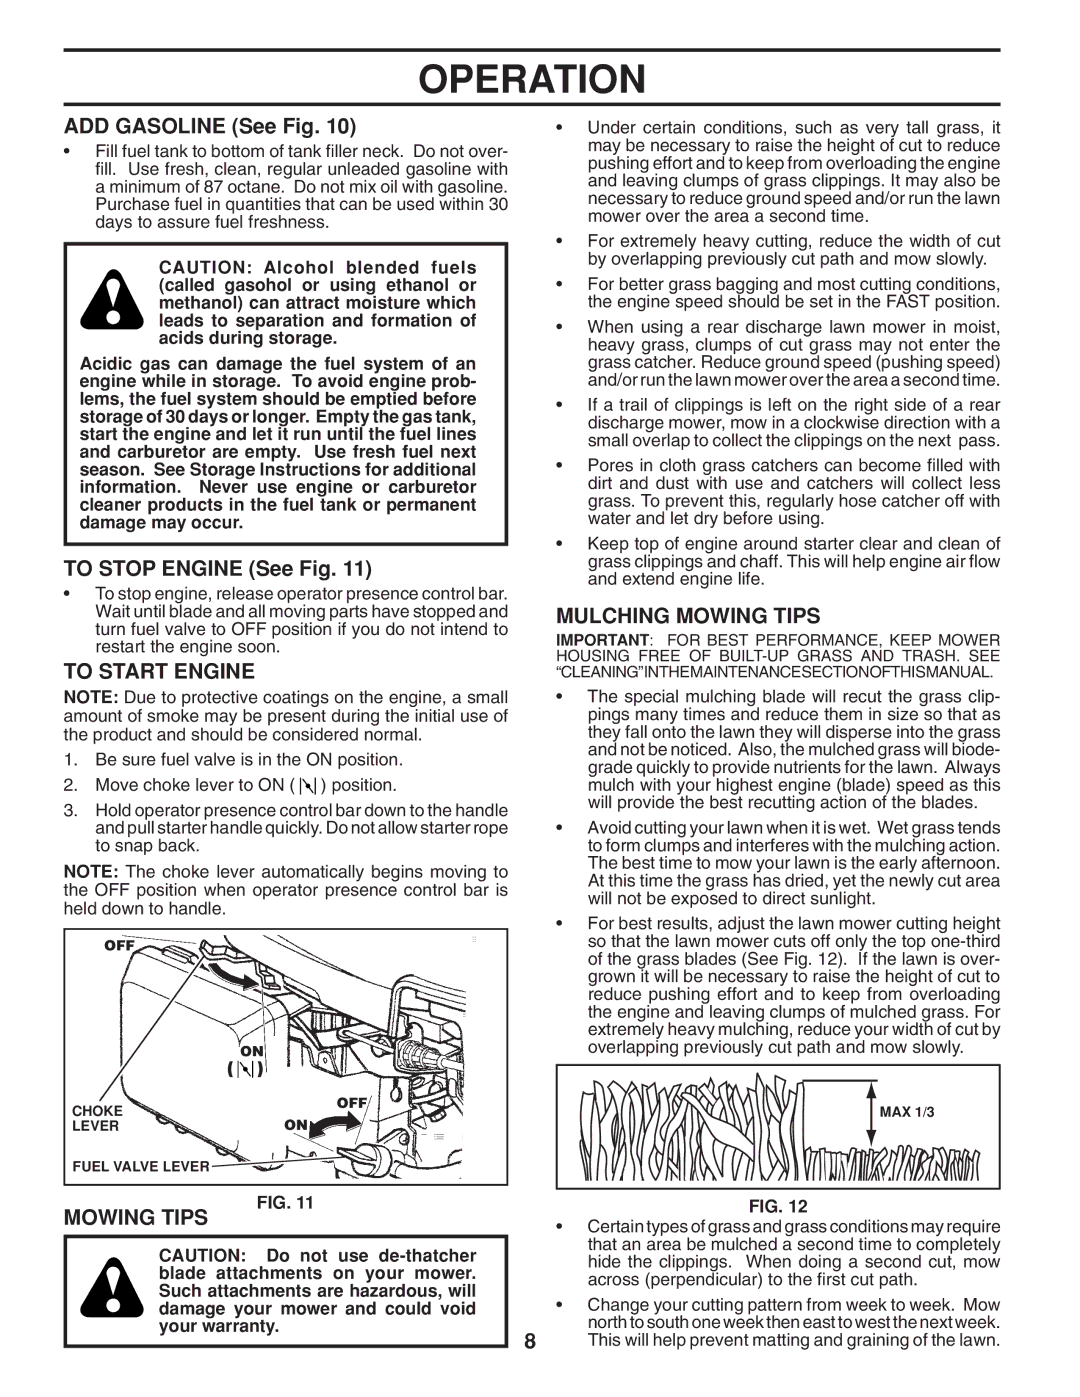
TO STOP ENGINE (See Fig. 11)
•To stop engine, release operator presence control bar. Wait until blade and all moving parts have stopped and turn fuel valve to OFF position if you do not intend to restart the engine soon.
TO START ENGINE
NOTE: Due to protective coatings on the engine, a small amount of smoke may be present during the initial use of the product and should be considered normal.
1.Be sure fuel valve is in the ON position.
2.Move choke lever to ON ( ![]()
![]()
![]() ) position.
) position.
3.Hold operator presence control bar down to the handle and pull starter handle quickly. Do not allow starter rope to snap back.
NOTE: The choke lever automatically begins moving to the OFF position when operator presence control bar is held down to handle.
OFF
|
| ON | ||
( |
|
|
| ) |
|
| |||
CHOKE |
|
|
| OFF |
|
|
| ON | |
LEVER |
|
|
| |
FUEL VALVE LEVER |
|
|
|
|
•Under certain conditions, such as very tall grass, it may be necessary to raise the height of cut to reduce pushing effort and to keep from overloading the engine and leaving clumps of grass clippings. It may also be necessary to reduce ground speed and/or run the lawn mower over the area a second time.
•For extremely heavy cutting, reduce the width of cut by overlapping previously cut path and mow slowly.
•For better grass bagging and most cutting conditions, the engine speed should be set in the FAST position.
•When using a rear discharge lawn mower in moist, heavy grass, clumps of cut grass may not enter the grass catcher. Reduce ground speed (pushing speed) and/or run the lawn mower over the area a second time.
•If a trail of clippings is left on the right side of a rear discharge mower, mow in a clockwise direction with a small overlap to collect the clippings on the next pass.
•Pores in cloth grass catchers can become fi lled with dirt and dust with use and catchers will collect less grass. To prevent this, regularly hose catcher off with water and let dry before using.
•Keep top of engine around starter clear and clean of grass clippings and chaff. This will help engine air fl ow and extend engine life.
MULCHING MOWING TIPS
IMPORTANT: FOR BEST PERFORMANCE, KEEP MOWER HOUSING FREE OF
•The special mulching blade will recut the grass clip- pings many times and reduce them in size so that as they fall onto the lawn they will disperse into the grass and not be noticed. Also, the mulched grass will biode- grade quickly to provide nutrients for the lawn. Always mulch with your highest engine (blade) speed as this will provide the best recutting action of the blades.
•Avoid cutting your lawn when it is wet. Wet grass tends to form clumps and interferes with the mulching action. The best time to mow your lawn is the early afternoon. At this time the grass has dried, yet the newly cut area will not be exposed to direct sunlight.
•For best results, adjust the lawn mower cutting height so that the lawn mower cuts off only the top
MAX 1/3
FIG. 11
MOWING TIPS
CAUTION: Do not use
FIG. 12
•Certain types of grass and grass conditions may require that an area be mulched a second time to completely hide the clippings. When doing a second cut, mow across (perpendicular) to the fi rst cut path.
•Change your cutting pattern from week to week. Mow north to south one week then east to west the next week.
8This will help prevent matting and graining of the lawn.