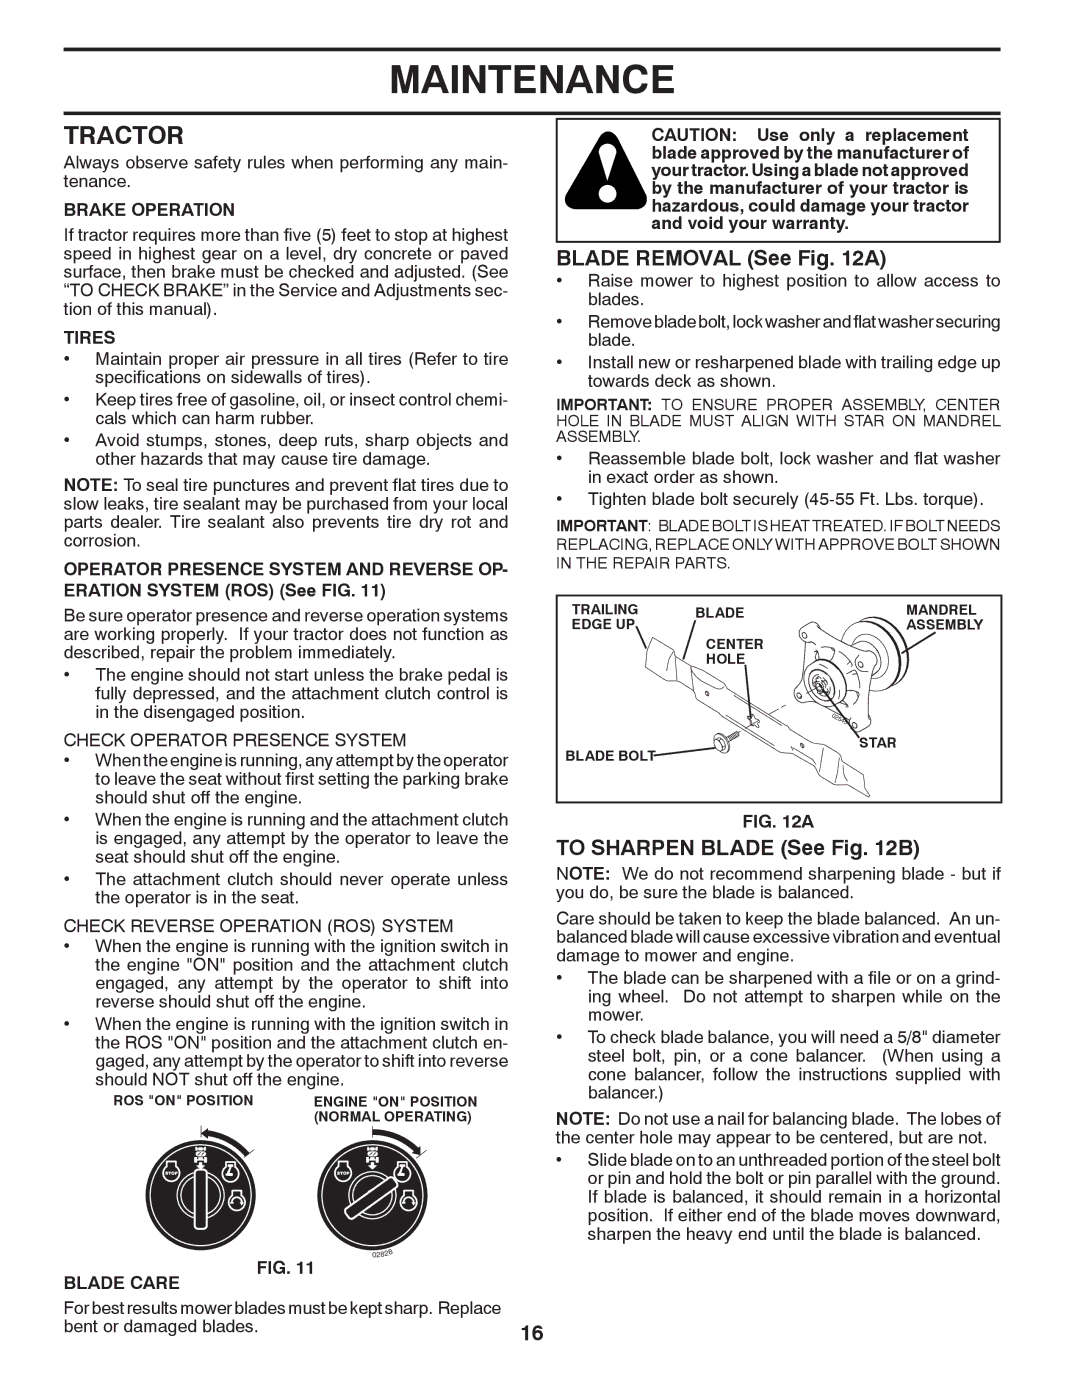
LTH1842 specifications
The Husqvarna LTH1842 is a reliable and efficient riding mower designed for homeowners who need a robust lawn care solution. Engineered with a focus on performance and user comfort, this model is an excellent choice for those maintaining medium to large-sized yards.One of the standout features of the LTH1842 is its powerful 18.5 HP Briggs & Stratton engine. This engine provides ample power for a smooth cutting experience, ensuring that grass is cut evenly and effectively. Users will appreciate the automatic transmission, which allows for effortless speed adjustments and makes mowing a straightforward task, even on hilly terrain.
The cutting deck is another highlight of the Husqvarna LTH1842. With a width of 42 inches, it features a reinforced design that enhances durability. The cutting height can be adjusted to six different positions, ranging from 1 to 4 inches, giving users the flexibility to choose the perfect height for their lawn. Additionally, the fan-assisted bagger option helps collect grass clippings efficiently, promoting a cleaner mowing experience.
Ease of use is integrated throughout the design of the LTH1842. The ergonomic steering wheel and high-back seat are designed for comfort, especially during extended mowing sessions. The clear dashboard makes it simple for operators to monitor their speed and fuel levels without distraction.
Moreover, the Husqvarna LTH1842 incorporates advanced technology to enhance functionality. The ReadyStart system enables quick starts without the need for priming, ensuring that your mower is ready when you are. The mower is also compatible with a wide range of attachments, allowing it to perform additional tasks throughout different seasons, such as mulching and snow clearing.
Safety features, including an automatic shut-off mechanism when the operator leaves the seat, ensures that the user operates the machine securely. The LTH1842 also comes with a strong warranty, reflecting the manufacturer’s confidence in the machine's durability and performance.
In summary, the Husqvarna LTH1842 is a versatile riding mower that combines power, comfort, and innovative features. It is well-suited for homeowners looking for a reliable solution to maintain their lawns efficiently. With its robust engine, adjustable cutting deck, and user-friendly design, the LTH1842 delivers performance and convenience for a superior mowing experience.