If you choose | the | default | SCSI | address | of | 5, |
| proceed | to | Step |
| 4. If | you | need | to change | ||||||||||||||||
the | SCSI | address, | use | the |
| SCSI ID |
| jumper | block to | set your | SCSI | ID. | Remove |
|
| ||||||||||||||||
and | reposition | jumpers | to | set | the | ID. |
| If | necessary, | use | a | pair | of | ||||||||||||||||||
remove | the | jumpers. | The | following | illustration | shows | how | to |
| set | the | jumper | block | for | |||||||||||||||||
each | ID. | Use | the | jumpers | that | come | with | your |
| tape | drive. |
|
|
|
|
|
| ||||||||||||||
|
|
|
|
|
| 0 |
| 1 |
|
|
|
|
|
| 2 |
|
|
|
|
| 3 |
|
|
|
|
|
| ||||
|
|
|
|
|
|
|
|
|
|
|
|
|
|
|
|
|
|
|
|
|
|
|
|
|
|
|
| ||||
|
|
|
|
|
|
|
|
|
|
|
|
|
|
|
|
|
|
|
|
|
|
|
|
|
|
|
|
|
|
|
|
|
|
|
|
|
| 4 |
|
| 5 |
|
|
|
|
| 6 |
|
|
|
|
| 7 |
|
|
|
|
|
| ||||
|
|
|
|
|
|
|
|
|
|
|
|
|
|
|
|
|
|
|
|
|
|
|
|
|
|
|
|
|
|
|
|
|
|
|
|
|
| 8 |
| 9 |
|
|
|
|
|
| 10 |
|
|
|
| 11 |
|
|
|
|
|
| |||||
|
|
|
|
|
|
|
|
|
|
|
|
|
|
|
|
|
|
|
|
|
|
|
|
|
|
|
|
|
|
|
|
|
|
|
|
| 12 |
| 13 |
|
|
|
|
| 14 |
|
|
|
| 15 |
|
|
|
|
|
| |||||||
|
|
|
|
|
|
|
|
|
|
|
|
|
|
|
|
|
|
|
|
|
|
|
|
|
|
|
|
|
|
|
|
Step | 4. | Mounting | the | drive |
|
|
|
|
|
|
|
|
|
|
|
|
|
|
|
|
| |||||
Mount | the |
| tape | drive; | then |
| attach | the | SCSI and |
| power | cables | to | it. | If | there | is |
| ||||||||
insufficient |
| working | space |
| to | attach | the | connectors |
| after | mounting | the | drive, | attach the | ||||||||||||
cables | first (see | “Step | 5. Attaching | cables”). | To | mount | the | drive: |
|
|
|
|
| |||||||||||||
1. | Locate | an | available | bay | or | space | in | your | computer | to | mount | the |
| tape |
| |||||||||||
| drive. | Remove | the | cover |
| plate | from | the | bay |
| selected. | Place | the | drive |
|
|
|
| ||||||||
| horizontally | or | vertically. |
|
|
|
|
|
|
|
|
|
|
|
|
|
|
|
|
|
| |||||
2. | Align |
| the | with | the | threaded | holes | in | the | drive | housing. |
| ||||||||||||||
| When | you | mount | the | tape | drive, | follow | these | guidelines: |
|
|
|
|
|
|
|
|
| ||||||||
| Ÿ | Ensure | that | no | objects | such | as | screw |
| heads, | cables, | or | adjacent | devices | are | |||||||||||
|
| pressing | against | the | frame. |
|
|
|
|
|
|
|
|
|
|
|
|
|
|
|
| |||||
| Ÿ | Ensure | that | nothing |
| blocks | the | ventilation | slots | on | the | bottom | and | rear | of the | |||||||||||
|
| tape | drive. |
|
|
|
|
|
|
|
|
|
|
|
|
|
|
|
|
|
|
|
|
| ||
3. | Insert | a | screw | through |
| each | of the | holes | into | the | threaded | holes | in | the | ||||||||||||
| drive |
| and | tighten | the | screws | with | a | screwdriver. | Use |
| only | the | screws | that | come | ||||||||||
| with |
| the | tape drive. | Other | screws | might | be | too | long |
| and | cause | electrical |
| shorts. | ||||||||||
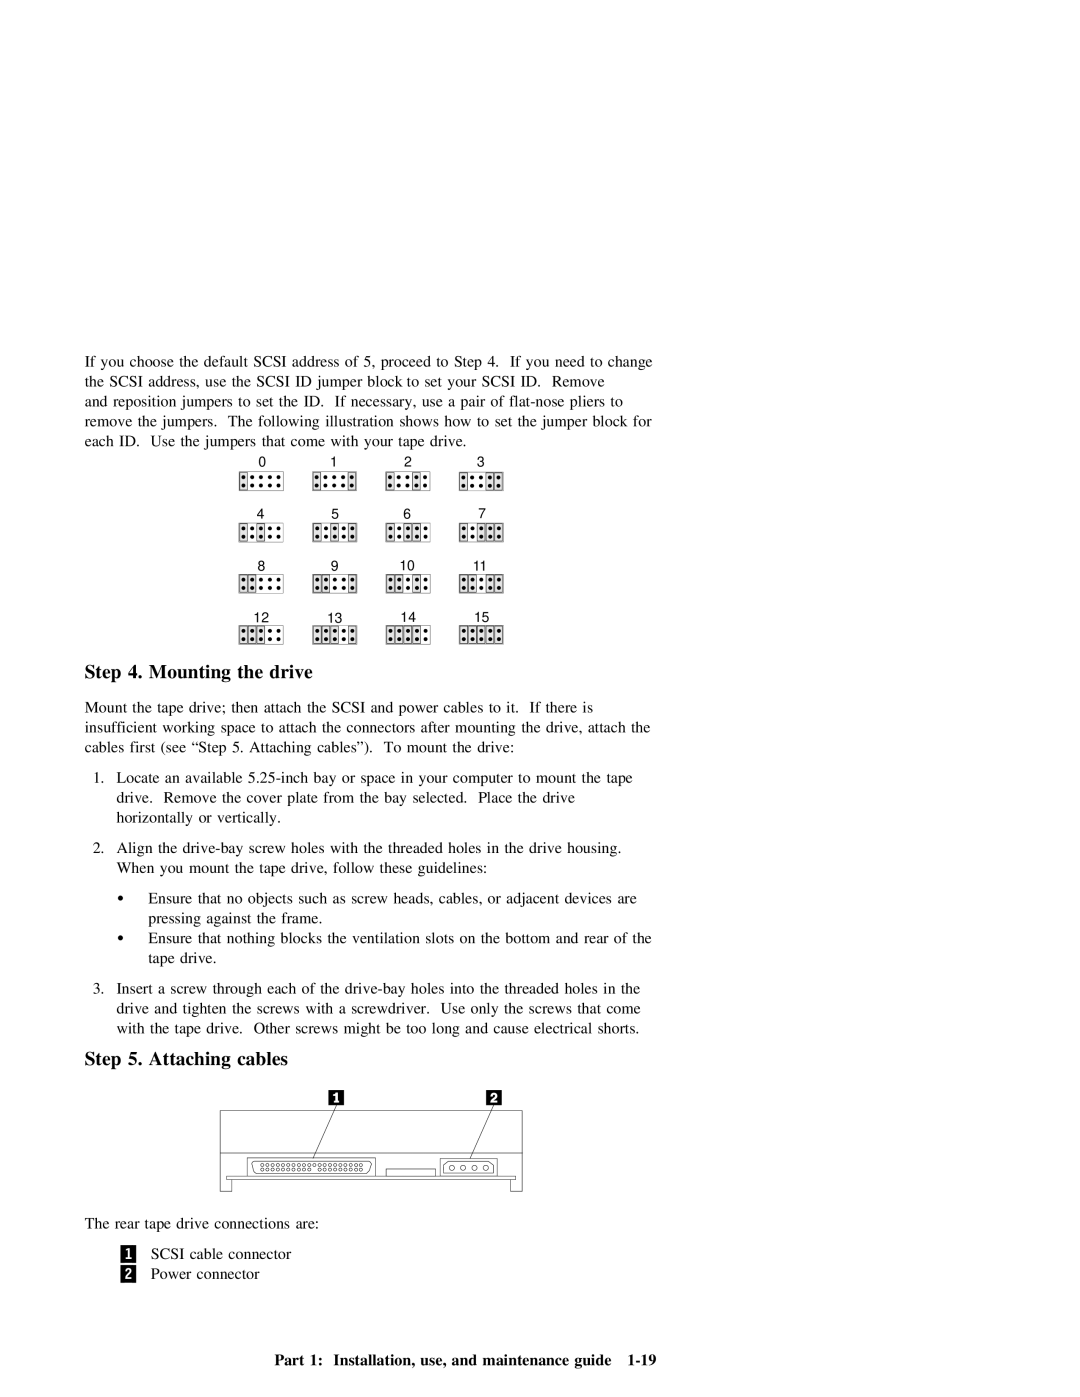
Step 5. Attaching cables
The rear tape drive connections are:
.1/ SCSI cable connector
.2/ Power connector