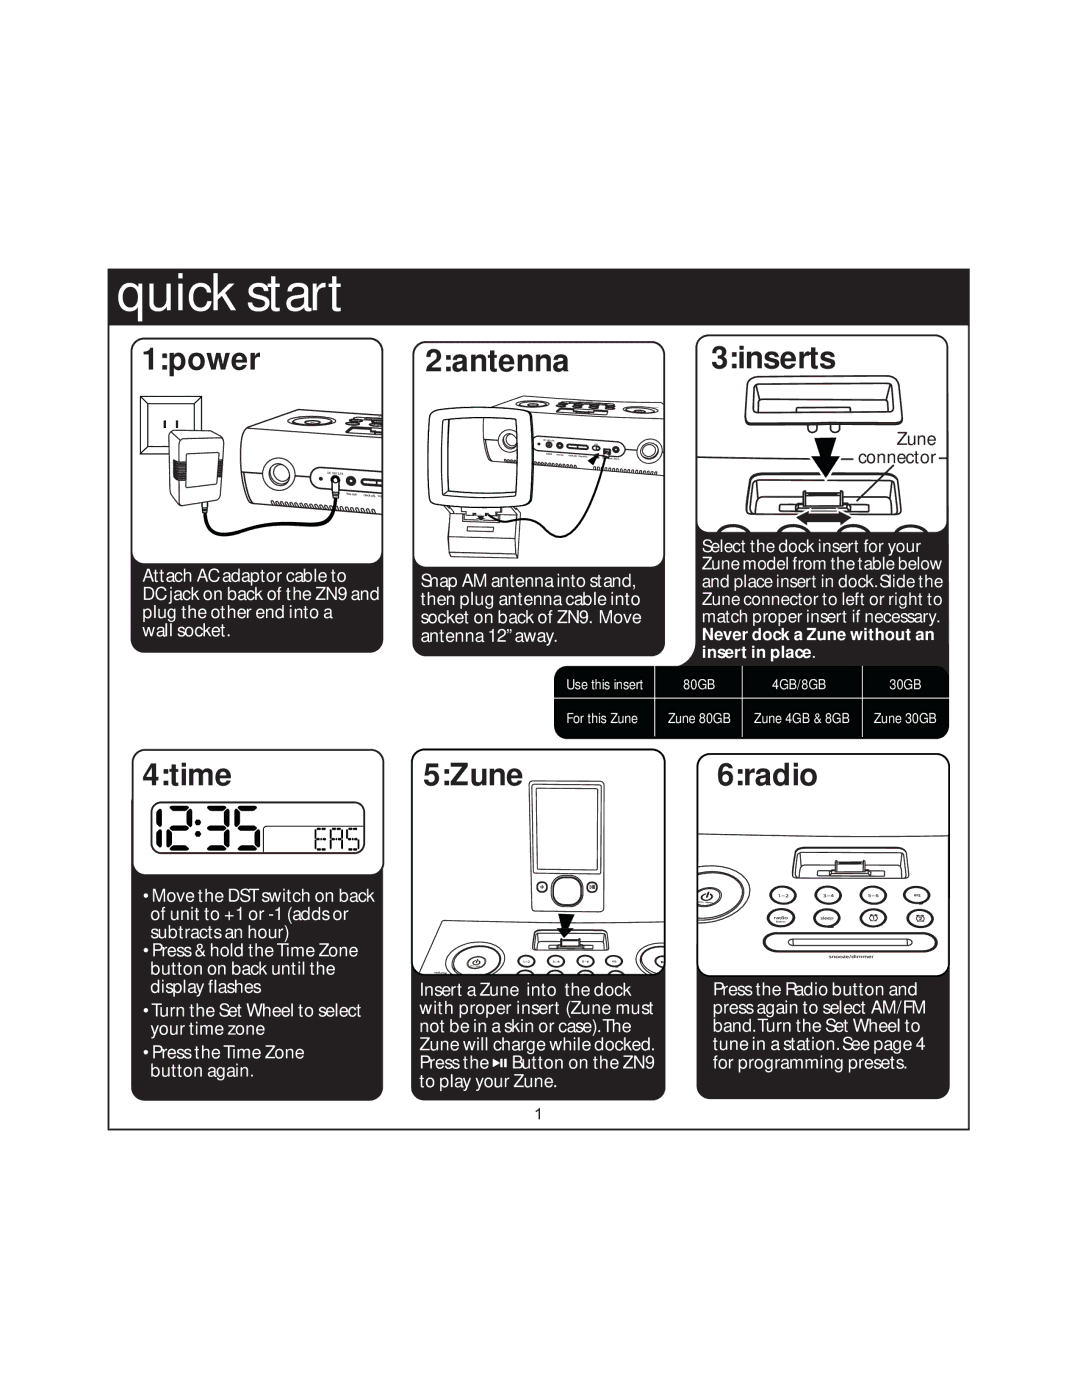
quick start
1:power 2:antenna 3:inserts
Zune connector
Attach AC adaptor cable to
DC jack on back of the ZN9 and plug the other end into a wall socket.
Snap AM antenna into stand, then plug antenna cable into socket on back of ZN9. Move antenna 12” away.
Use this insert
Select the dock insert for your Zune model from the table below and place insert in dock. Slide the Zune connector to left or right to match proper insert if necessary.
Never dock a Zune without an ![]() insert in place.
insert in place.
80GB | 4GB/8GB | 30GB |
4:time
For this Zune | Zune 80GB Zune 4GB & 8GB Zune 30GB |
5:Zune6:radio
•Move the DST switch on back of unit to +1 or
•Press & hold the Time Zone button on back until the display flashes
•Turn the Set Wheel to select your time zone
•Press the Time Zone button again.
Insert a Zune into the dock with proper insert (Zune must not be in a skin or case). The Zune will charge while docked. Press the ![]() Button on the ZN9 to play your Zune.
Button on the ZN9 to play your Zune.
Press the Radio button and press again to select AM/FM band. Turn the Set Wheel to tune in a station. See page 4 for programming presets.
1