Ikelite Digital Housing
in struct | ion | manual |
#6111.7 for Sony D
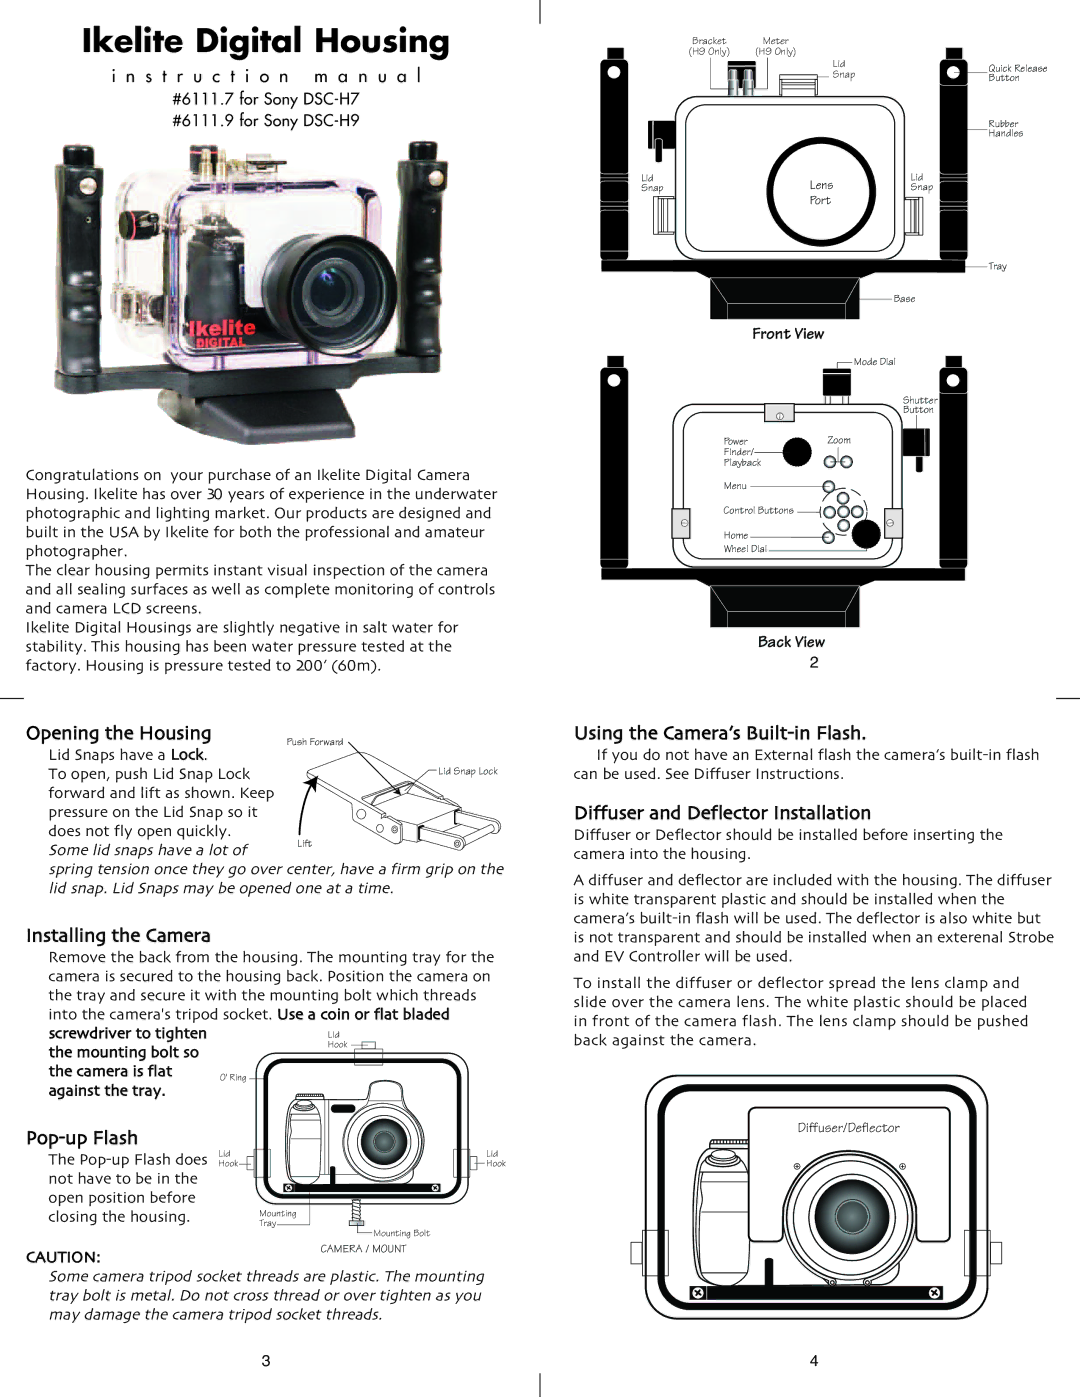
Congratulations on your purchase of an Ikelite Digital Camera Housing. Ikelite has over 30 years of experience in the underwater photographic and lighting market. Our products are designed and built in the USA by Ikelite for both the professional and amateur photographer.
The clear housing permits instant visual inspection of the camera and all sealing surfaces as well as complete monitoring of controls and camera LCD screens.
Ikelite Digital Housings are slightly negative in salt water for stability. This housing has been water pressure tested at the factory. Housing is pressure tested to 200’ (60m).
Opening the Housing | Push Forward |
Lid Snaps have a Lock. |
|
To open, push Lid Snap Lock | Lid Snap Lock |
forward and lift as shown. Keep |
|
pressure on the Lid Snap so it |
|
does not fly open quickly. | Lift |
Some lid snaps have a lot of |
|
spring tension once they go over center, have a firm grip on the lid snap. Lid Snaps may be opened one at a time.
Installing the Camera |
|
|
|
|
|
|
|
|
|
|
|
|
|
|
|
|
|
|
|
|
Remove the back from the housing. The mounting tray for the | ||||||||||||||||||||
camera is secured to the housing back. Position the camera on | ||||||||||||||||||||
the tray and secure it with the mounting bolt which threads | ||||||||||||||||||||
into the camera's tripod socket. | Use a coin or flat bladed | |||||||||||||||||||
screwdriver to tighten |
|
|
|
|
|
|
|
|
|
|
| Lid | ||||||||
|
|
|
|
|
|
|
|
|
|
| Hook | |||||||||
the mounting bolt so |
|
|
|
|
|
|
|
|
|
|
|
|
|
|
|
|
|
|
|
|
|
|
|
|
|
|
|
|
|
|
|
|
|
|
|
|
|
|
|
| |
the camera is flat | O' Ring |
|
|
|
|
|
|
|
|
|
|
|
|
|
|
|
|
|
| |
against the tray. |
|
|
|
|
|
|
|
|
|
|
|
|
|
|
|
|
|
|
|
|
| Lid |
|
|
|
|
|
|
|
|
|
|
|
|
|
| Lid | ||||
|
|
|
|
|
|
|
|
|
|
|
|
|
| |||||||
The | Hook |
|
|
|
|
|
|
|
|
|
|
|
|
|
|
|
| Hook | ||
not have to be in the |
|
|
|
|
|
|
|
|
|
|
|
|
|
|
|
|
|
|
|
|
|
|
|
|
|
|
|
|
|
|
|
|
|
|
|
|
|
|
|
| |
|
|
|
|
|
|
|
|
|
|
|
|
|
|
|
|
|
|
|
| |
open position before |
|
|
|
|
|
|
|
|
|
|
|
|
|
|
|
|
|
| ||
|
|
| Mounting | |||||||||||||||||
closing the housing. |
|
|
| Tray |
|
|
|
|
|
|
|
|
|
|
|
|
|
|
| |
CAUTION: | Mounting Bolt |
CAMERA / MOUNT | |
| |
Some camera tripod socket threads are plastic. The mounting | |
tray bolt is metal. Do not cross thread or over tighten as you | |
may damage the camera tripod socket threads. | |
| 3 |
Bracket | Meter |
|
|
| |||||||||
(H9 Only) | (H9 Only) |
|
|
| |||||||||
|
|
|
|
|
|
|
|
|
| Lid |
|
| Quick Release |
|
|
|
|
|
|
|
|
|
| Snap |
|
| |
|
|
|
|
|
|
|
|
|
|
|
| Button | |
|
|
|
|
|
|
|
|
|
|
|
|
| Rubber |
|
|
|
|
|
|
|
|
|
|
|
|
| Handles |
Lid |
|
|
| Lens | Lid | ||||||||
Snap |
|
|
| Snap | |||||||||
Port
Tray
Base
Front View
Mode Dial
Shutter
Button
Power | Zoom |
Finder/ |
|
Playback |
|
Menu
Control Buttons
Home
Wheel Dial
Back View2
Using the Camera’s Built-in Flash.
If you do not have an External flash the camera’s
Diffuser and Deflector Installation
Diffuser or Deflector should be installed before inserting the camera into the housing.
A diffuser and deflector are included with the housing. The diffuser is white transparent plastic and should be installed when the camera’s
To install the diffuser or deflector spread the lens clamp and slide over the camera lens. The white plastic should be placed in front of the camera flash. The lens clamp should be pushed back against the camera.
Diffuser/Deflector
4
