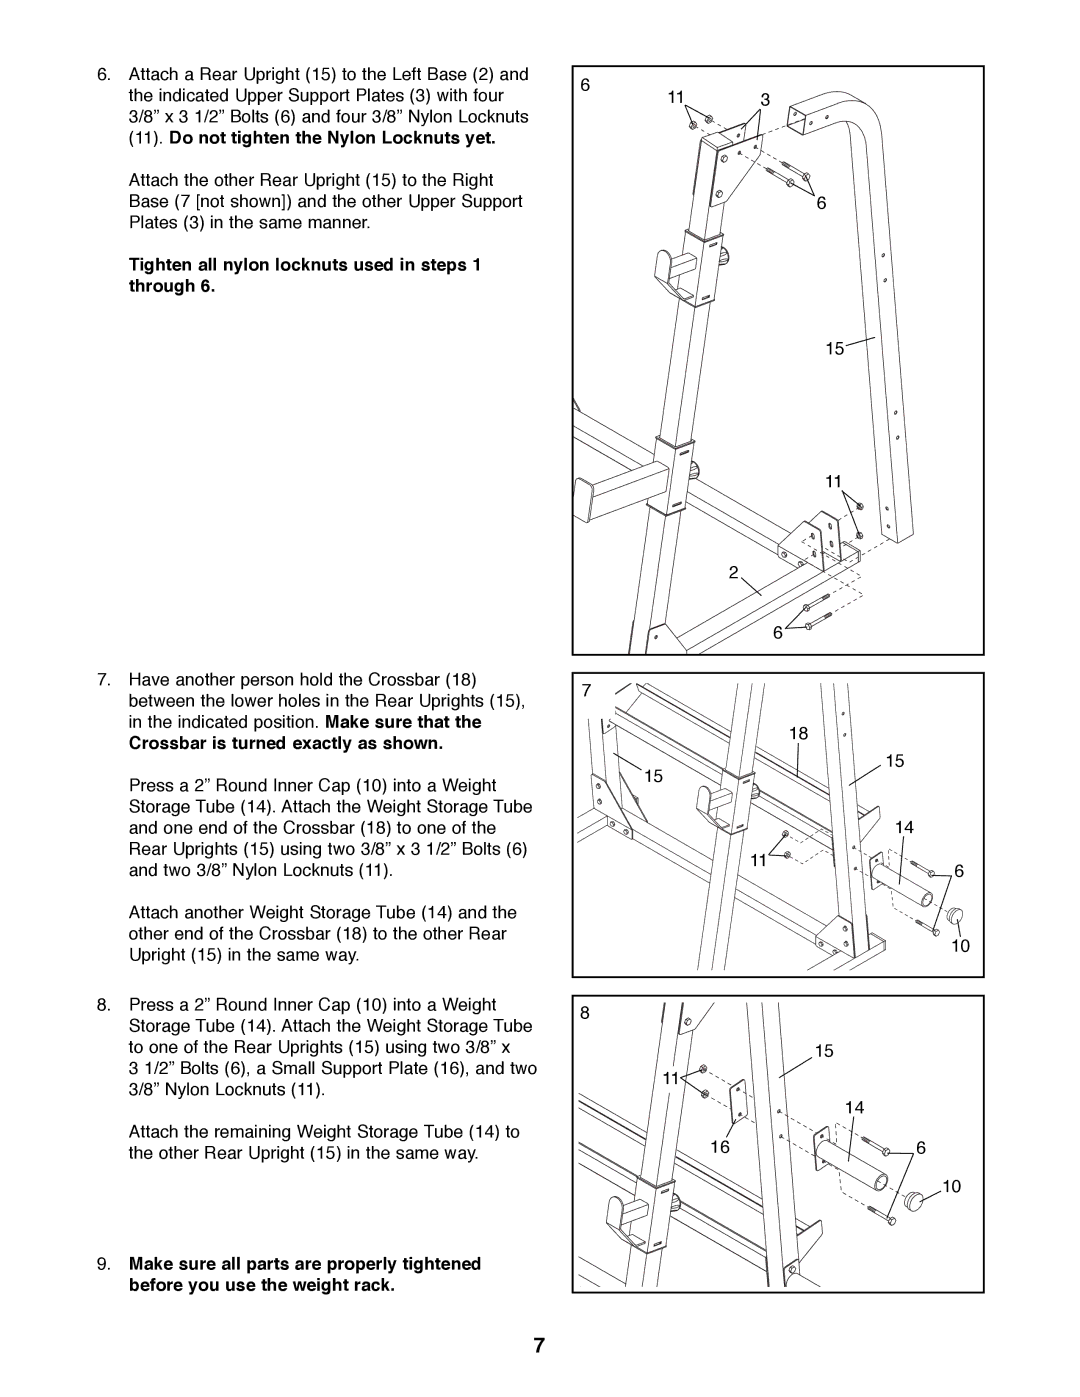
6.Attach a Rear Upright (15) to the Left Base (2) and the indicated Upper Support Plates (3) with four 3/8Ó x 3 1/2Ó Bolts (6) and four 3/8Ó Nylon Locknuts (11). Do not tighten the Nylon Locknuts yet.
Attach the other Rear Upright (15) to the Right Base (7 [not shown]) and the other Upper Support Plates (3) in the same manner.
Tighten all nylon locknuts used in steps 1 through 6.
7.Have another person hold the Crossbar (18) between the lower holes in the Rear Uprights (15), in the indicated position. Make sure that the
Crossbar is turned exactly as shown.
Press a 2Ó Round Inner Cap (10) into a Weight Storage Tube (14). Attach the Weight Storage Tube and one end of the Crossbar (18) to one of the Rear Uprights (15) using two 3/8Ó x 3 1/2Ó Bolts (6) and two 3/8Ó Nylon Locknuts (11).
Attach another Weight Storage Tube (14) and the other end of the Crossbar (18) to the other Rear Upright (15) in the same way.
8.Press a 2Ó Round Inner Cap (10) into a Weight Storage Tube (14). Attach the Weight Storage Tube to one of the Rear Uprights (15) using two 3/8Ó x
3 1/2Ó Bolts (6), a Small Support Plate (16), and two 3/8Ó Nylon Locknuts (11).
Attach the remaining Weight Storage Tube (14) to the other Rear Upright (15) in the same way.
9.Make sure all parts are properly tightened before you use the weight rack.
7
6 | 3 |
|
11 |
| |
|
| 6 |
|
| 15 |
|
| 11 |
2 |
|
|
|
| 6 |
7 |
|
|
|
| 18 |
15 |
| 15 |
|
| |
|
| 14 |
| 11 | 6 |
|
| |
|
| 10 |
8 |
|
|
|
| 15 |
11 |
|
|
|
| 14 |
16 |
| 6 |
|
| 10 |
