NOTE: It is strongly recommended that two or more people assemble this machine to avoid possible injury.
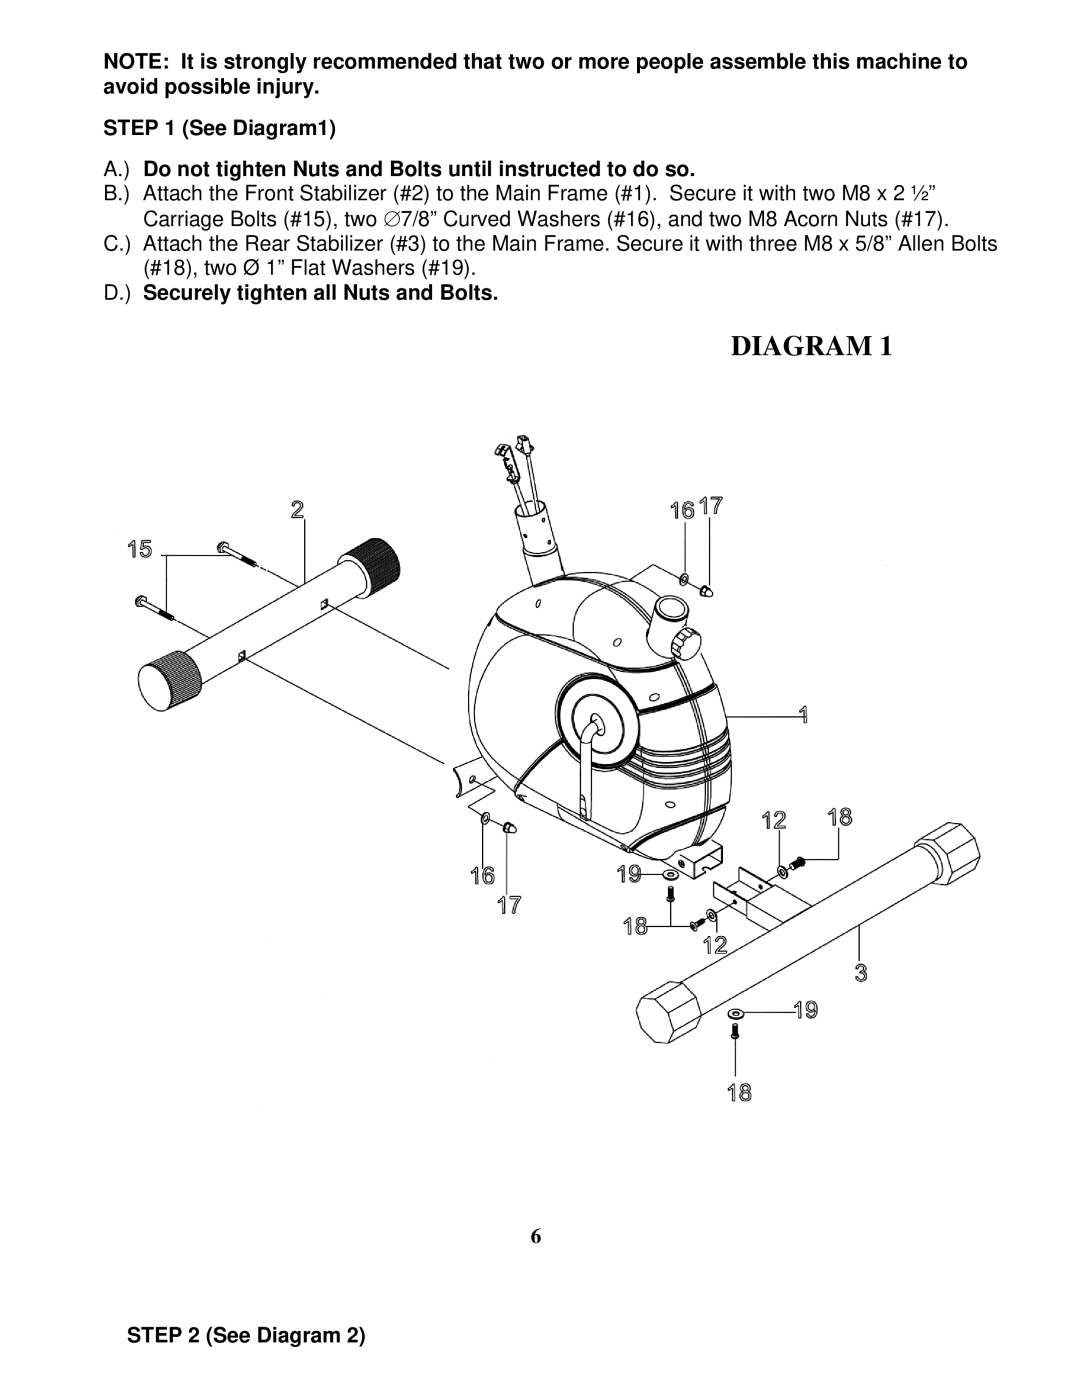
STEP 1 (See Diagram1)
A.) Do not tighten Nuts and Bolts until instructed to do so.
B.) Attach the Front Stabilizer (#2) to the Main Frame (#1). Secure it with two M8 x 2 ½”
Carriage Bolts (#15), two 7/8” Curved Washers (#16), and two M8 Acorn Nuts (#17).
C.) Attach the Rear Stabilizer (#3) to the Main Frame. Secure it with three M8 x 5/8” Allen Bolts (#18), two Ø 1” Flat Washers (#19).
D.) Securely tighten all Nuts and Bolts.
DIAGRAM 1
6
