Impulse Maintenance
The following section will review standard maintenance instructions for the Impulse.
Changing the Battery
To change the battery in the Impulse, remove the two grip cover screws on either side of the grip frame. Remove the old battery and replace with a new
Lubricating the Bolt
To remove the bolt from the Impulse, remove the bolt pin located at the top of the body and slide the bolt out the back of the body. Wipe clean with a paper towel. Apply a generous amount of Dow 33 Shocker lubricant to the bolt. While the bolt is removed, the inner surface of the upper bore should be cleaned by pushing a paper towel through the body.
Lubricating the Hammer Piston
To remove the Hammer Assembly from the Impulse, remove the bolt pin from the top of the body. Then use an adjustable wrench to loosen the hammer assembly from the back of the body. After removing the hammer assembly, apply a generous amount of Dow 33 Shocker lubricant to the stainless piston and holes at the rear of the assembly. Do not apply lubricant to hammer head.
Cleaning the Valve
Remove the end cap and valve spring. Remove the Hammer Assembly from the back of the Impulse. Push the valve out through the front of the Impulse. Do not use a tool or object with sharp edges, as this may damage the inner surface of the body. Wipe the valve with a clean paper towel, apply Dow 33 lubricant to the
Cleaning the Solenoid Spool Valve
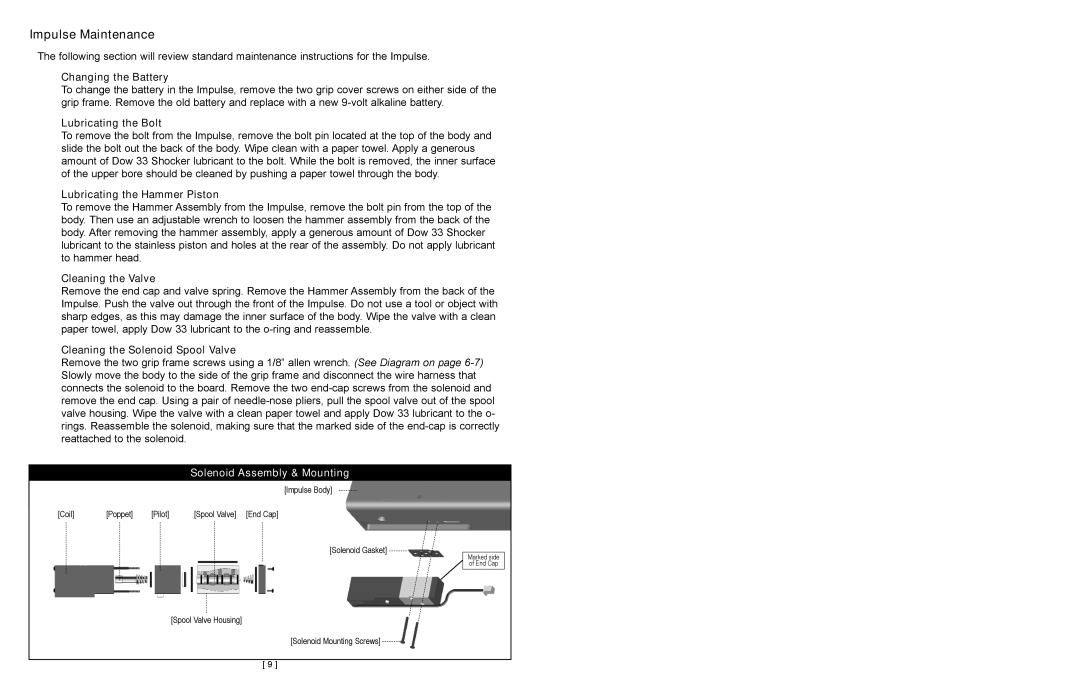
Remove the two grip frame screws using a 1/8” allen wrench. (See Diagram on page
Solenoid Assembly & Mounting
[Impulse Body]
|
|
|
|
|
|
|
|
|
[Coil] | [Poppet] | [Pilot] | [Spool Valve] | [End Cap] | ||||
|
|
|
|
|
|
|
|
|
[Solenoid Gasket]
[Spool Valve Housing]
[Solenoid Mounting Screws]
[ 9 ]
Marked side of End Cap
