5.Take “shoulder straps” down over your shoulders
(like a backpack). Pull straps to make sure they are tight and take them back behind you going over baby’s thighs, then cross over baby’s bum and bring to the front (beneath baby’s legs) to tie at the waist. Tie in a double knot. Once carrier is securely tied, your partner can remove their support of baby.
*IMPORTANT! Before releasing your hold on the baby, ensure that all straps are securely tied.
4 Carrier use for an Older Baby: Hip Carry Position
*Baby must be able to sit up on their own before being worn in the hip carry position.
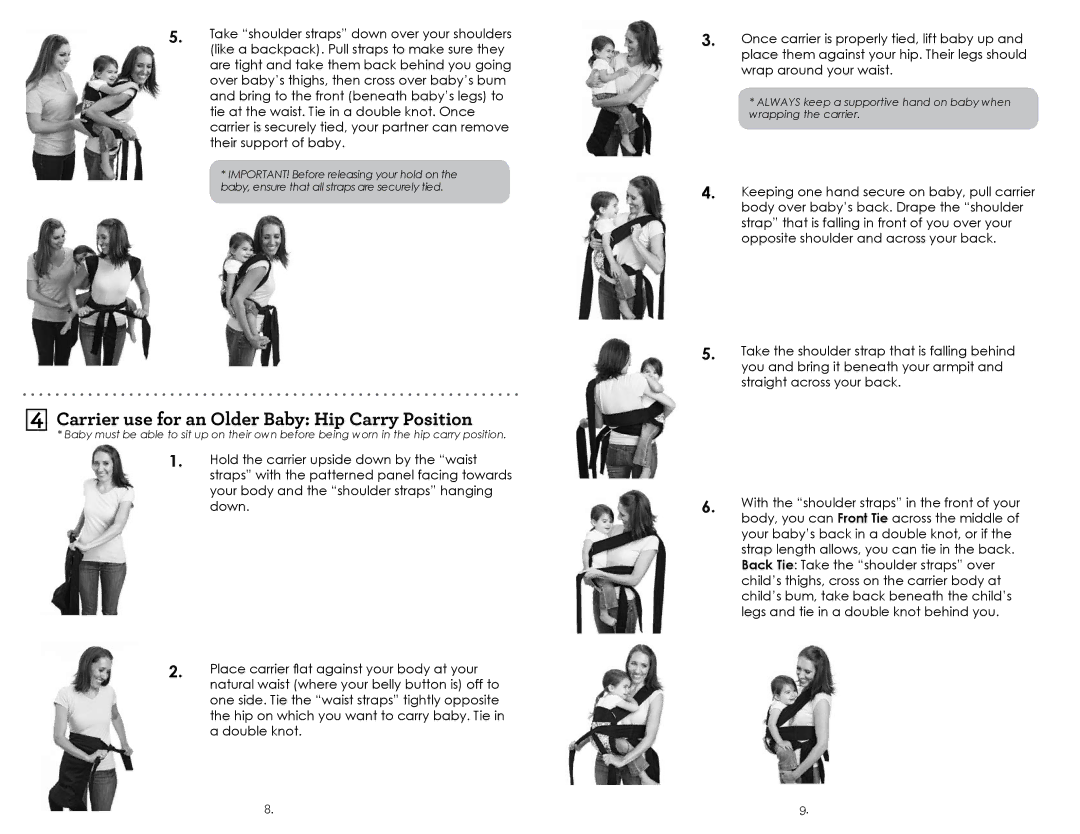
1.Hold the carrier upside down by the “waist straps” with the patterned panel facing towards your body and the “shoulder straps” hanging down.
2.Place carrier flat against your body at your natural waist (where your belly button is) off to one side. Tie the “waist straps” tightly opposite the hip on which you want to carry baby. Tie in a double knot.
3.Once carrier is properly tied, lift baby up and place them against your hip. Their legs should wrap around your waist.
*ALWAYS keep a supportive hand on baby when wrapping the carrier.
4.Keeping one hand secure on baby, pull carrier
5 body over baby’s back. Drape the “shoulder
strap” that is falling in front of you over your opposite shoulder and across your back.
5.Take the shoulder strap that is falling behind you and bring it beneath your armpit and straight across your back.
6.With the “shoulder straps” in the front of your body, you can Front Tie across the middle of your baby’s back in a double knot, or if the strap length allows, you can tie in the back. Back Tie: Take the “shoulder straps” over child’s thighs, cross on the carrier body at child’s bum, take back beneath the child’s legs and tie in a double knot behind you.
8. | 9. |