
CD-7 THRU CD-15 specifications
Infinity's CD-7 through CD-15 models represent an impressive lineup of compact disc players, blending advanced technology with exceptional audio performance. Designed for audiophiles and casual listeners alike, these models showcase Infinity's commitment to delivering high-quality sound and a user-friendly experience.The CD-7, the entry-level model in the range, stands out with its sleek design and affordability, offering remarkable sound quality thanks to Infinity’s proprietary digital signal processing technology. Equipped with a high-performance DAC (Digital-to-Analog Converter), the CD-7 ensures accurate audio reproduction, faithfully conveying the nuances of your favorite tracks.
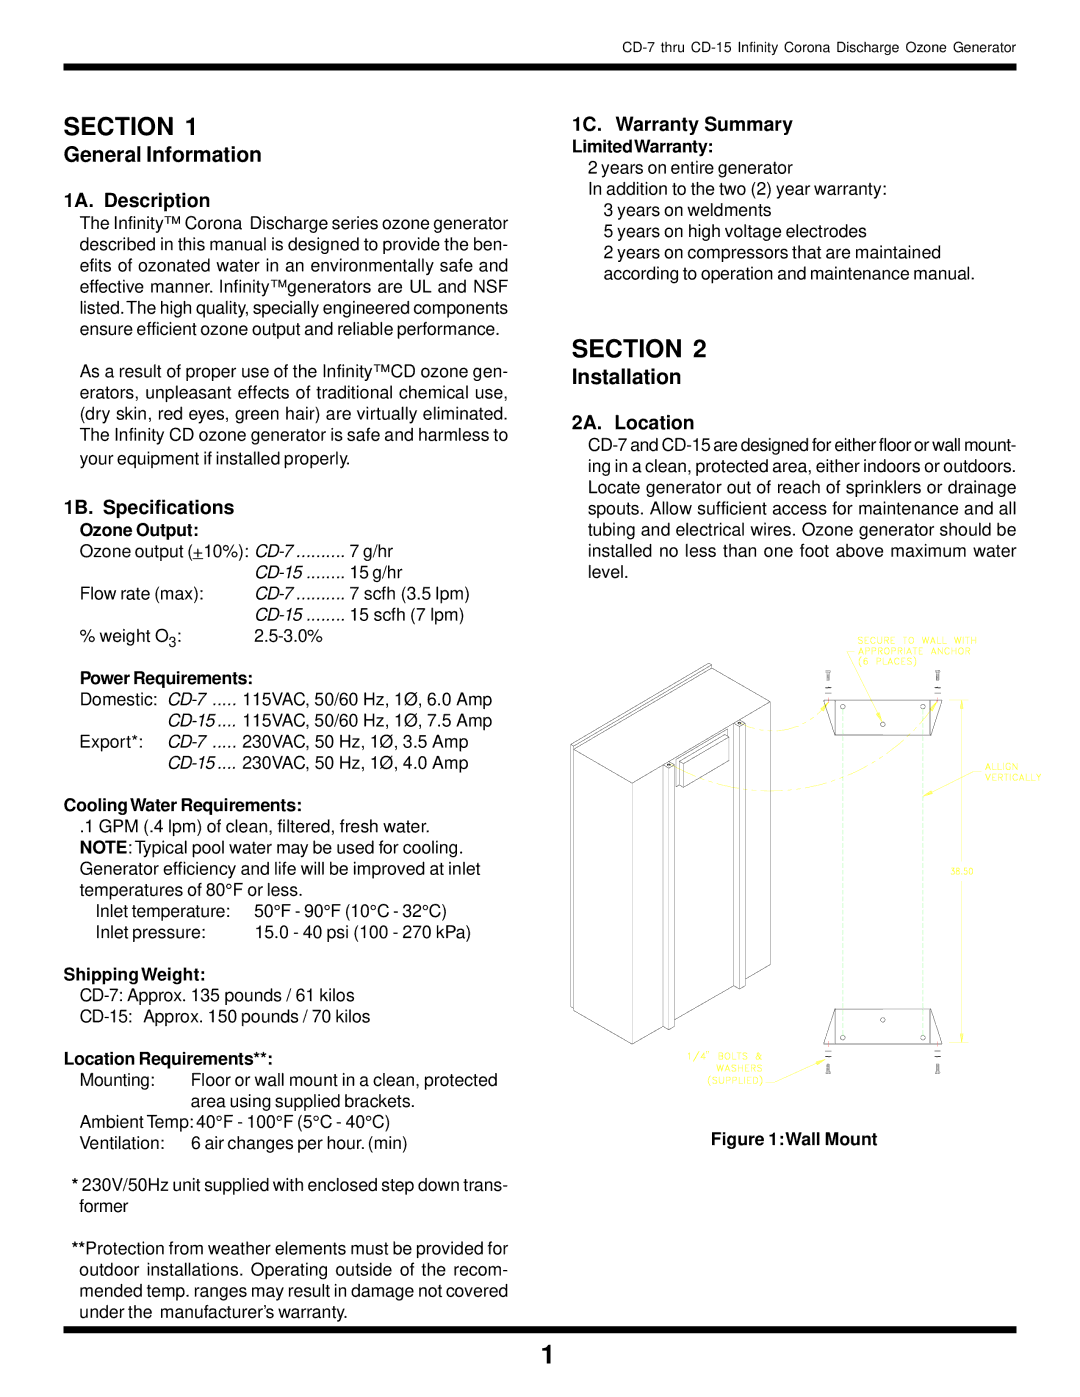
Moving up the line, the CD-10 introduces enhanced features like signal isolation and a refined power supply system that minimizes noise interference. This model also includes an intuitive front panel with a bright LED display, allowing for effortless navigation through your music library. Users often praise the improved dynamics and clearer highs delivered by the CD-10, making it an excellent choice for discerning listeners.
At the higher end, the CD-15 incorporates even more sophisticated technology to further elevate the listening experience. This model features a dual DAC configuration, providing improved stereo separation and a wider soundstage. The CD-15 also supports a variety of audio formats, including CD-R and CD-RW, making it versatile for different media needs. Additionally, it includes USB connectivity, allowing for easy playback of digital music files directly from USB drives.
All models in the CD-7 to CD-15 range boast robust build quality, ensuring durability and longevity. Infinity has also integrated advanced error correction systems to minimize playback issues, resulting in smooth and uninterrupted listening experiences.
Each player is engineered with both aesthetics and functionality in mind, featuring elegant designs that blend seamlessly into any home audio setup. With remote control capabilities, users can easily manage their listening experience from a distance, adding convenience to their enjoyment of music.
In summary, Infinity's CD-7 to CD-15 series offers a compelling assortment of features, technologies, and characteristics that cater to various audiences. Whether you are just beginning your journey into high-fidelity audio or are a seasoned audiophile, these CD players deliver impressive sound quality, reliability, and user satisfaction.