5 Adjust the picture
1 Height
1
![]() 2
2
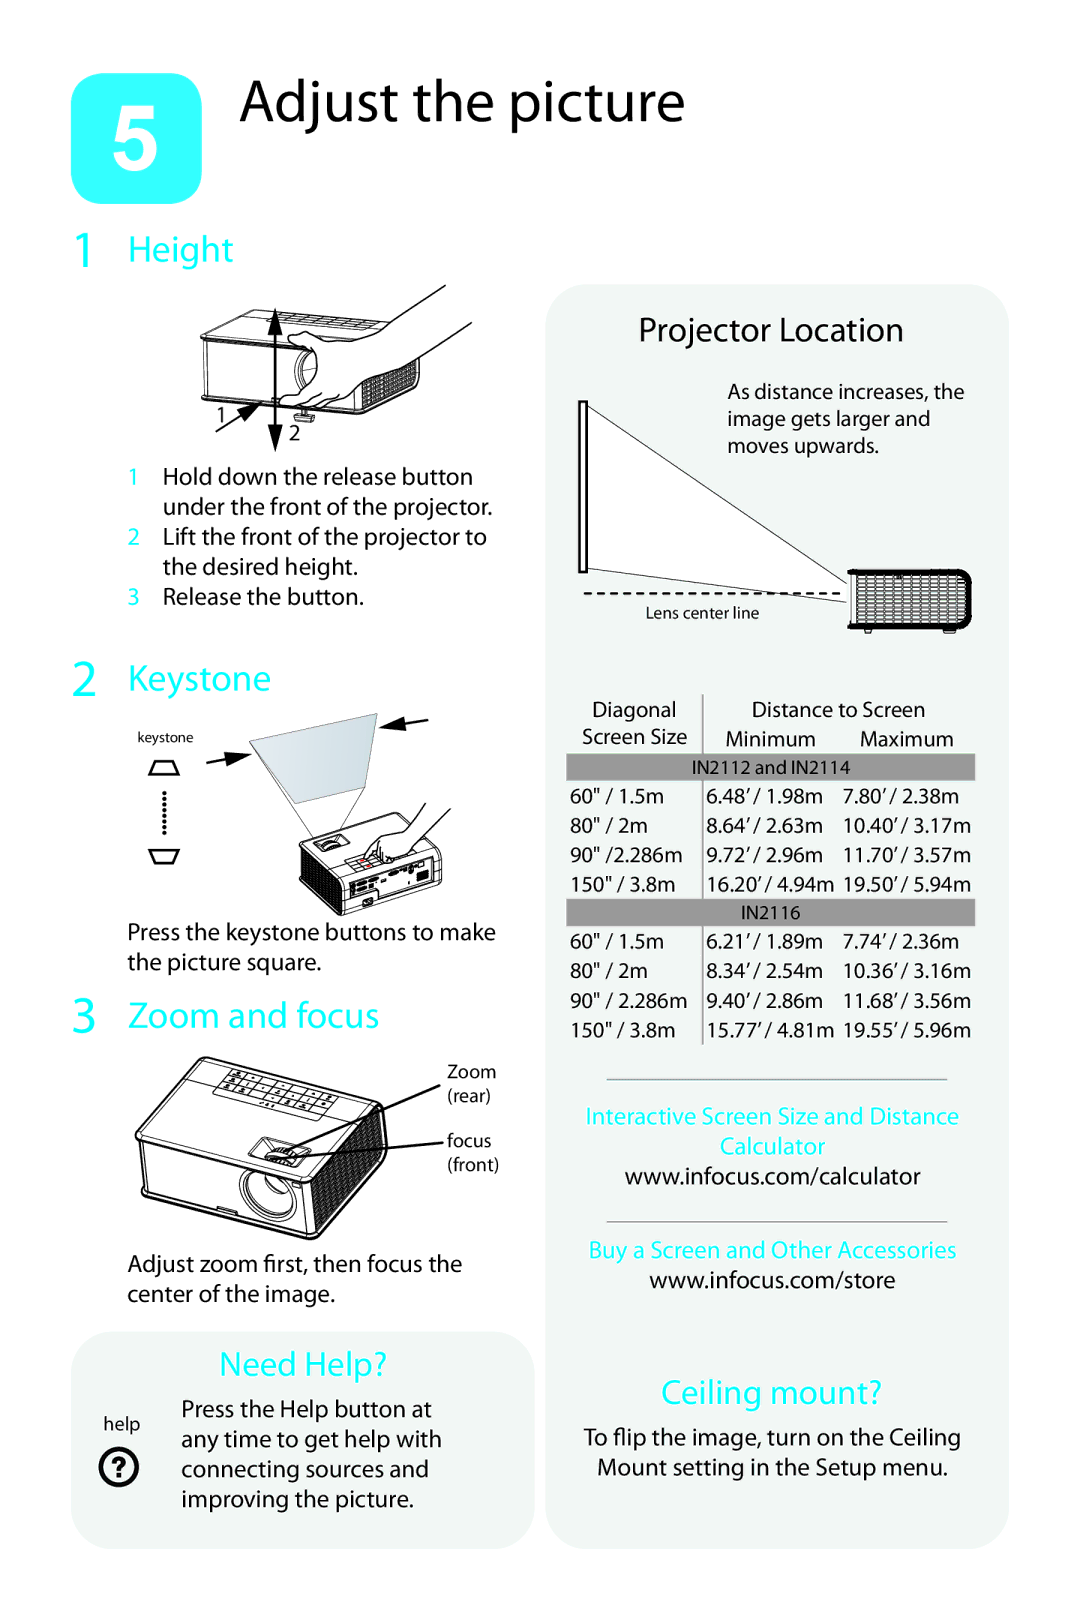
1Hold down the release button under the front of the projector.
2Lift the front of the projector to the desired height.
3Release the button.
Projector Location
As distance increases, the image gets larger and moves upwards.
Lens center line
2 Keystone
keystone
Press the keystone buttons to make the picture square.
3 Zoom and focus
Zoom (rear)
focus (front)
Adjust zoom first, then focus the center of the image.
Diagonal |
| Distance to Screen | |
Screen Size |
| Minimum | Maximum |
| IN2112 and IN2114 | ||
60" / 1.5m |
| 6.48’ / 1.98m | 7.80’ / 2.38m |
80" / 2m |
| 8.64’ / 2.63m | 10.40’ / 3.17m |
90" /2.286m |
| 9.72’ / 2.96m | 11.70’ / 3.57m |
150" / 3.8m |
| 16.20’ / 4.94m | 19.50’ / 5.94m |
|
| IN2116 |
|
60" / 1.5m |
| 6.21’ / 1.89m | 7.74’ / 2.36m |
80" / 2m |
| 8.34’ / 2.54m | 10.36’ / 3.16m |
90" / 2.286m |
| 9.40’ / 2.86m | 11.68’ / 3.56m |
150" / 3.8m |
| 15.77’ / 4.81m | 19.55’ / 5.96m |
Interactive Screen Size and Distance
Calculator
www.infocus.com/calculator
Buy a Screen and Other Accessories
www.infocus.com/store
Need Help?
help | Press the Help button at | |
any time to get help with | ||
| ||
| connecting sources and | |
| improving the picture. |
Ceiling mount?
To flip the image, turn on theCeiling Mount setting in the Setup menu.
