IN70 SERIES
Users Guide
Here’s what’s included
Power Cord
Unpack the box
The remote uses 2 AA batteries
Connect to DVD, Cable Box, VCR, or Game
You can connect more
than one source if needed
Connect to HDTV Receiver or DVD
2 Turn on the projector
1 Connect the power cord to the projector and to an electrical outlet
4 Turn on projector and source
3 Wait for the lamp to warm up
1 Height
5 Adjust the picture
Buy a Screen and Other Custom Accessories
2 Keystone
Register with InFocus
Press the power button
6 Turn off the projector
Read the Reference Guide
More troubleshooting options are in the Reference Guide
Troubleshooting
Check power
If the light is green and not blinking, press the power button
Declaration of Conformity
Questions? InFocus is here to help
Visit us at
Trademarks
Reference Guide
IN72/IN74/IN76/IN78
Trademarks
Canada
Declaration of Conformity
FCC Warning
Table of Contents
Introduction
Product specifications
Accessories
Online Registration
Connector Panel
12 volt DC output
60/1.5
Positioning the projector
Range of distance to the screen for a given screen size for the IN72
7.8/2.4
Choosing the aspect ratio
letterbox aspect ratio
Video connectors
S-video connection
Connecting a video device
Composite RCA video connection
Component RCA connection
HDMI connection
Digital connections
DVI connection
Computer connections
Adjusting the image
Displaying an image
Adjust the zoom and focus
Sleep Timer
Troubleshooting your setup
Power Save
Shutting down the projector
Problem
move projector, adjust zoom, adjust height
Problem
Solution
tilt the projector up or down or adjust Keystone in Picture menu
Page
COLOR
COLOR
message disappears, LED stops blinking red
lamp must be replaced see page replace lamp, reset lamp timer
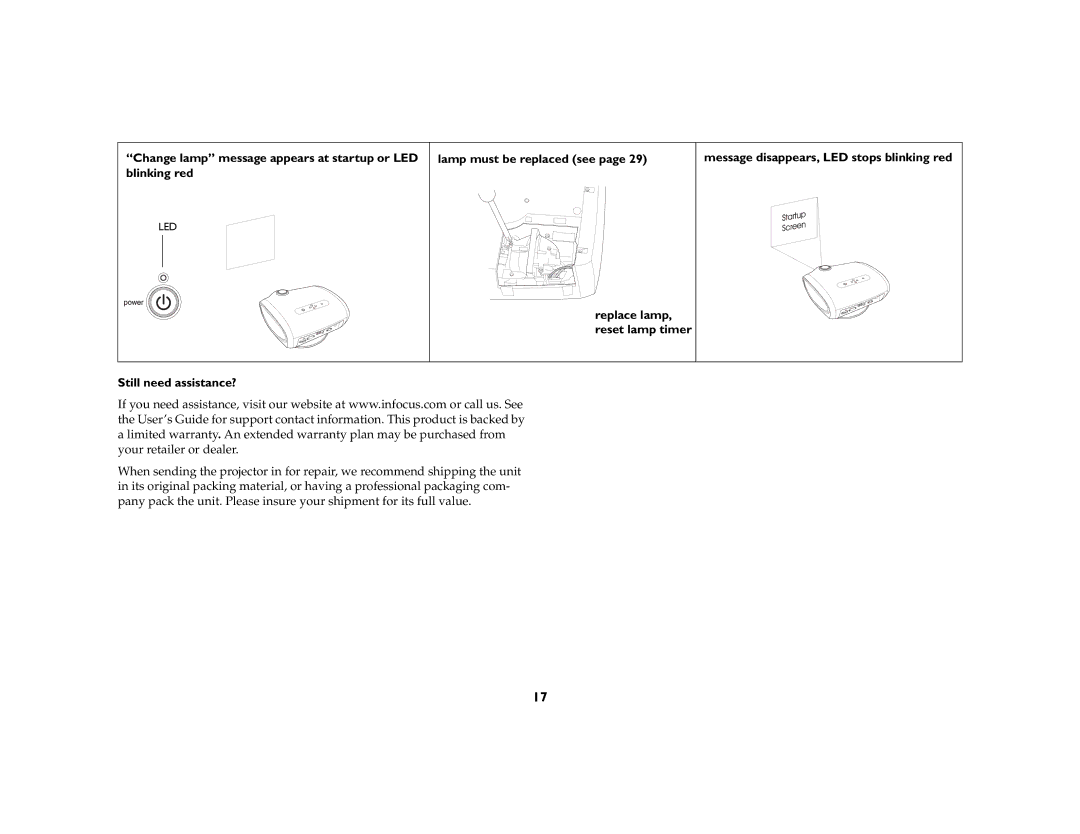
“Change lamp” message appears at startup or LED blinking red
Still need assistance?
Using the remote control
Troubleshooting the remote
Select-confirms choices made in the menus page
Using the keypad buttons
Menu-opens the on-screen menus page
Source-changes the active source
Optimizing video images
Customizing the projector
Using the menus
Picture menu
Save
Presets
Settings
User
Advanced menu
Color Temperature Color Control Video Standard Overscan
Noise Reduction
Sources
Settings menu
Settings menu
System menu
Language allows you to select a language for the onscreen display
Service To use these features, highlight them and press Select
Replacing the projection lamp
Maintenance
Cleaning the lens
8 Install the new lamp housing and tighten the screws
Replace the lamp door
Plug in the power cord and press the Power button on the remote or
Service menu
Replace the base or ceiling mount plate, if necessary
Table 4 LED Behavior
Red LED behavior and projector errors
Appendix
Red LED Behavior
Function
Remote control discrete codes
Table 5 Remote control discrete codes
Description
40.5 163 227.5 245.5
Projector dimensions for ceiling mount installations
167 24.5
344.25
Signal Type
Supported video formats
Connector
Supported formats
Command format
RS-232 terminal specifications for IN74/IN76/IN76
Communication configuration
Defa
Supported commands
Command
Function
Menu Navigation
Vertical Position
INDEX