Connecting a video device
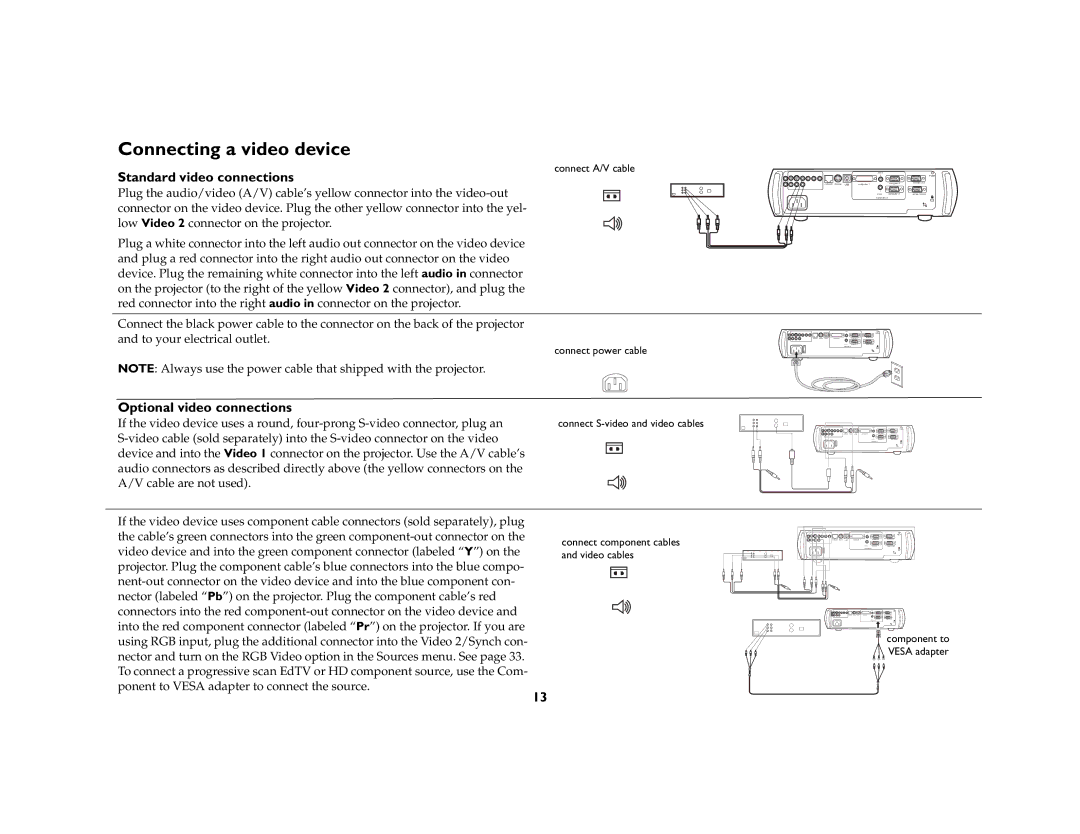
Standard video connections | connect A/V cable | |||||
|
|
|
|
|
| |
Plug the audio/video (A/V) cable’s yellow connector into the |
|
|
|
|
|
|
connector on the video device. Plug the other yellow connector into the yel- |
|
|
|
|
|
|
low Video 2 connector on the projector. |
|
|
|
|
|
|
Plug a white connector into the left audio out connector on the video device |
|
|
|
|
|
|
and plug a red connector into the right audio out connector on the video |
|
|
|
|
|
|
device. Plug the remaining white connector into the left audio in connector |
|
|
|
|
|
|
on the projector (to the right of the yellow Video 2 connector), and plug the |
|
|
|
|
|
|
red connector into the right audio in connector on the projector. |
|
|
|
|
|
|
Connect the black power cable to the connector on the back of the projector |
|
|
|
|
|
|
and to your electrical outlet. | connect power cable | |||||
| ||||||
NOTE: Always use the power cable that shipped with the projector. |
|
|
|
|
|
|
Optional video connections |
|
|
|
|
|
|
If the video device uses a round, | connect | |||||
|
|
|
|
|
| |
device and into the Video 1 connector on the projector. Use the A/V cable’s |
|
|
|
|
|
|
|
|
|
|
|
| |
audio connectors as described directly above (the yellow connectors on the |
|
|
|
|
|
|
A/V cable are not used). |
|
|
|
|
|
|
| audio in |
|
|
| R |
| trigger |
network mouse USB | computer 1 | computer 2 | monitor out |
| |||
| L |
|
|
| audio in | computer 3 | serial control |
| computer in |
|
|
I
O
If the video device uses component cable connectors (sold separately), plug the cable’s green connectors into the green
connect component cables and video cables
|
|
|
|
| trigger |
network | mouse | USB | computer 1 | computer 2 | monitor out |
|
|
|
| computer 3 | serial control |
|
|
|
| computer in |
|
![]()
![]()
![]() component to
component to ![]() VESA adapter
VESA adapter
13
