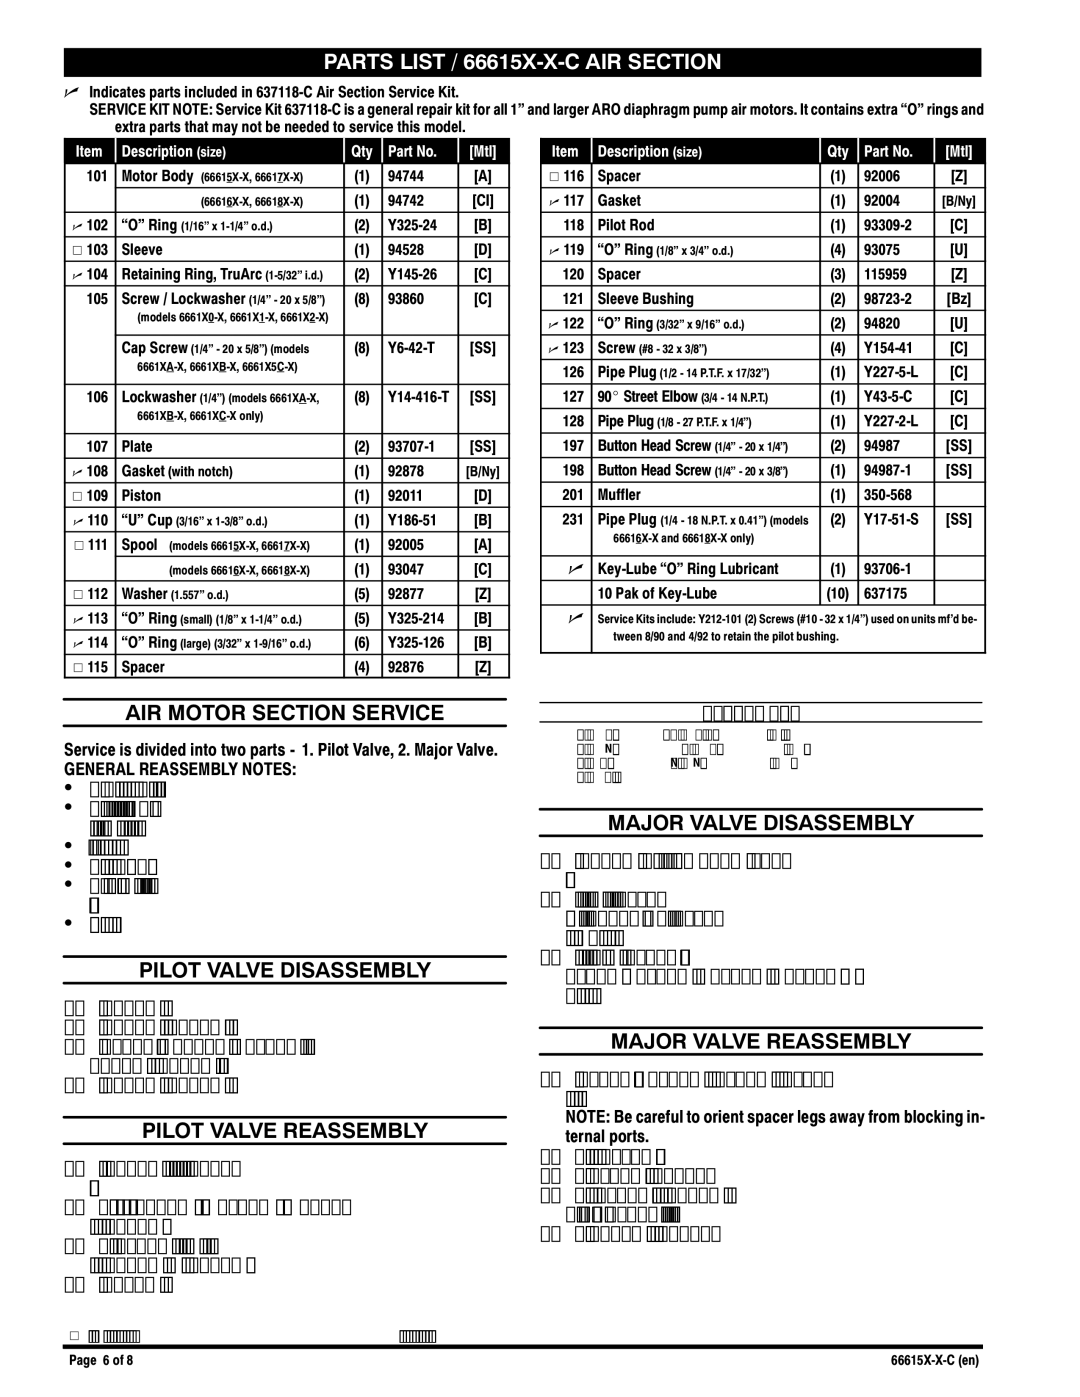
66615X-X-C specifications
The Ingersoll-Rand 66615X-X-C is a robust and versatile impact wrench that is designed to meet the demands of various industrial applications. Renowned for its durability and exceptional performance, this air tool is widely used in automotive repair, construction, and assembly lines.One of the standout features of the Ingersoll-Rand 66615X-X-C is its powerful motor, which provides a maximum torque output that allows users to tackle even the most challenging fasteners with ease. This high torque capacity is complemented by a lightweight design, making it easy to maneuver in tight spaces without sacrificing power. The ergonomic handle enhances grip and reduces operator fatigue, making it ideal for extended use.
The advanced twin hammer mechanism is another significant characteristic of this impact wrench. This technology distributes force evenly across the fastener, providing greater efficiency and reducing wear on both the tool and the fasteners themselves. Additionally, the Ingersoll-Rand 66615X-X-C features a variable speed limiter that enables users to control the speed of the rotation with precision. This feature is crucial when working on delicate applications or when bolts require a finely-tuned torque setting.
Durability is a key aspect of the Ingersoll-Rand brand, and the 66615X-X-C exemplifies this commitment. It is constructed with high-quality materials resistant to corrosion and wear, ensuring longevity even in harsh working conditions. The maintenance-free design also reduces downtime needed for upkeep, allowing operators to focus on their tasks without interruption.
In terms of adaptability, this impact wrench supports various socket sizes, making it versatile for different jobs. Whether you need to switch from lug nuts to smaller bolts, the Ingersoll-Rand 66615X-X-C performs reliably across a range of applications.
Overall, the Ingersoll-Rand 66615X-X-C combines power, efficiency, and durability, making it a preferred choice for professionals in various industries. With its advanced features and robust construction, it stands as a testament to Ingersoll-Rand's dedication to innovation and quality in the field of pneumatic tools. Whether you are a seasoned professional or a DIY enthusiast, this impact wrench is engineered to deliver outstanding performance and reliability for all your fastening needs.