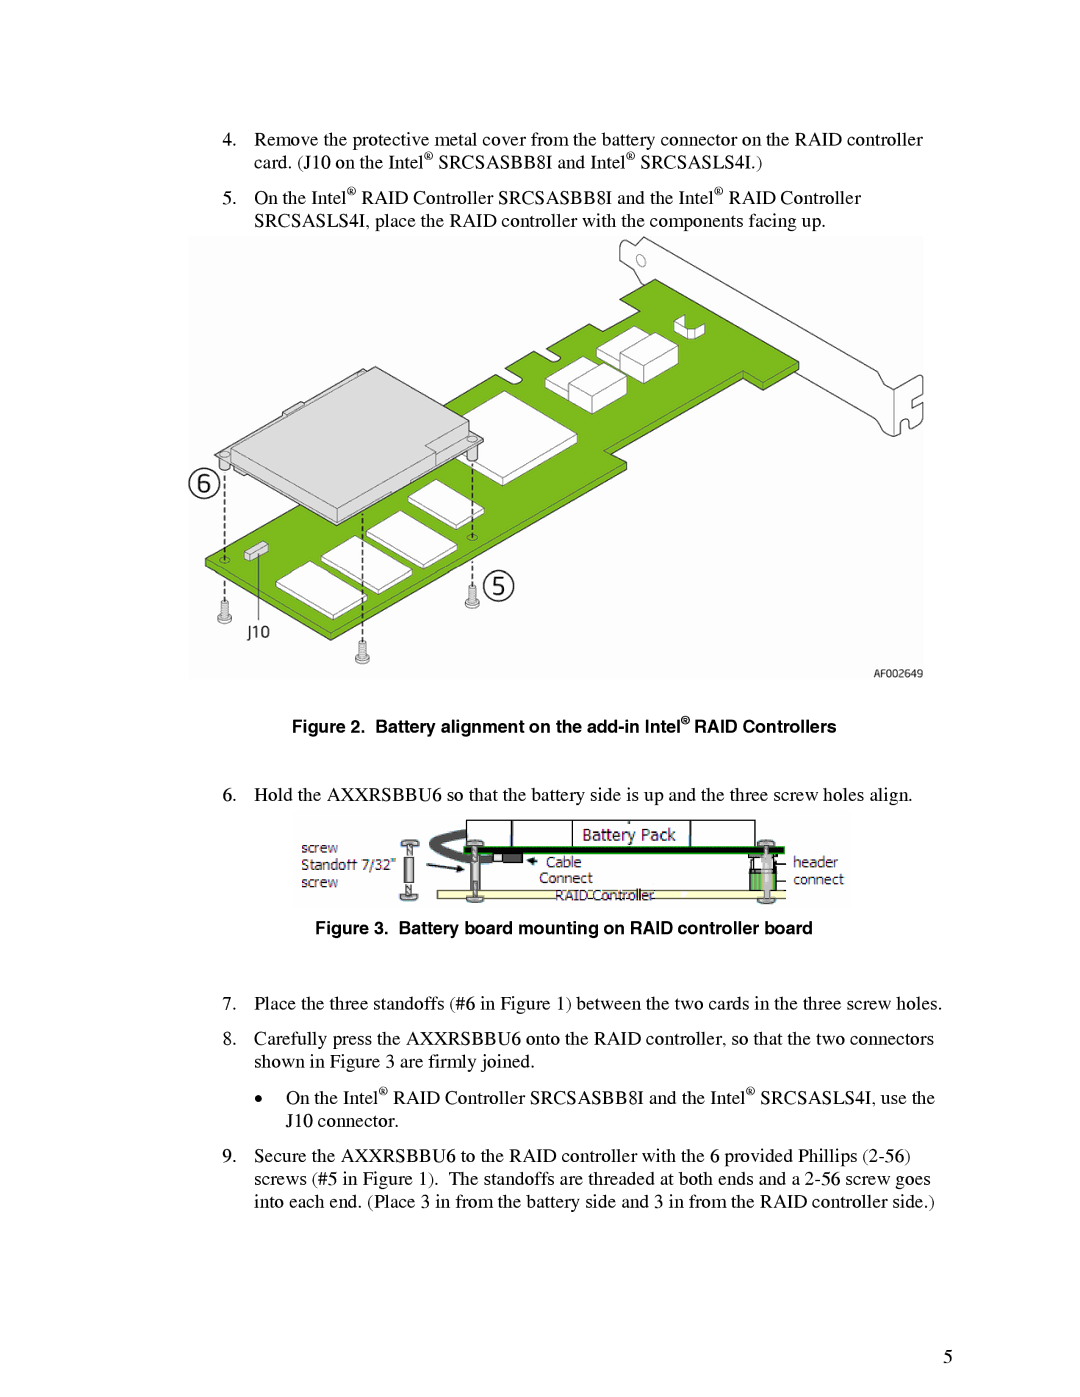
4.Remove the protective metal cover from the battery connector on the RAID controller card. (J10 on the Intel® SRCSASBB8I and Intel® SRCSASLS4I.)
5.On the Intel® RAID Controller SRCSASBB8I and the Intel® RAID Controller SRCSASLS4I, place the RAID controller with the components facing up.
Figure 2. Battery alignment on the add-in Intel® RAID Controllers
6. Hold the AXXRSBBU6 so that the battery side is up and the three screw holes align.
Figure 3. Battery board mounting on RAID controller board
7.Place the three standoffs (#6 in Figure 1) between the two cards in the three screw holes.
8.Carefully press the AXXRSBBU6 onto the RAID controller, so that the two connectors shown in Figure 3 are firmly joined.
•On the Intel® RAID Controller SRCSASBB8I and the Intel® SRCSASLS4I, use the J10 connector.
9.Secure the AXXRSBBU6 to the RAID controller with the 6 provided Phillips
5
