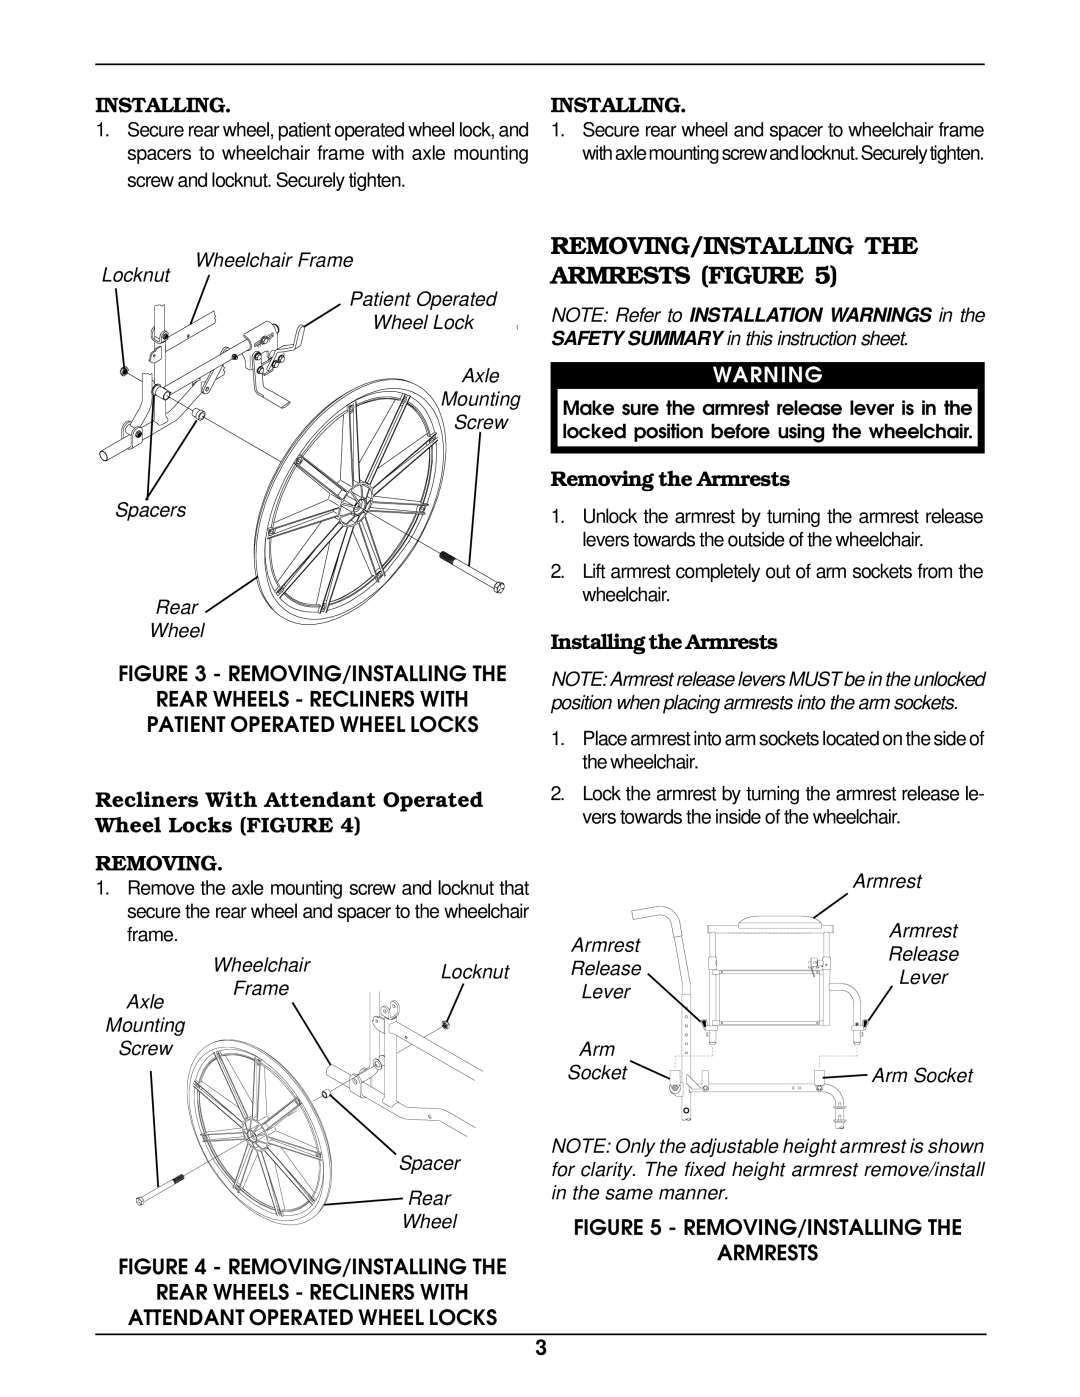
INSTALLING.
1.Secure rear wheel, patient operated wheel lock, and spacers to wheelchair frame with axle mounting screw and locknut. Securely tighten.
Wheelchair Frame
Locknut
Patient Operated
Wheel Lock
Axle
Mounting
Screw
Spacers
Rear
Wheel
FIGURE 3 - REMOVING/INSTALLING THE
REAR WHEELS - RECLINERS WITH PATIENT OPERATED WHEEL LOCKS
Recliners With Attendant Operated Wheel Locks (FIGURE 4)
REMOVING.
1.Remove the axle mounting screw and locknut that secure the rear wheel and spacer to the wheelchair frame.
Wheelchair | Locknut | |
Frame | ||
|
Axle
Mounting
Screw
Spacer
Rear
Wheel
FIGURE 4 - REMOVING/INSTALLING THE
REAR WHEELS - RECLINERS WITH
ATTENDANT OPERATED WHEEL LOCKS
INSTALLING.
1.Secure rear wheel and spacer to wheelchair frame withaxlemountingscrewandlocknut.Securelytighten.
REMOVING/INSTALLING THE ARMRESTS (FIGURE 5)
NOTE: Refer to INSTALLATION WARNINGS in the SAFETY SUMMARY in this instruction sheet.
WARNING
Make sure the armrest release lever is in the locked position before using the wheelchair.
Removing the Armrests
1.Unlock the armrest by turning the armrest release levers towards the outside of the wheelchair.
2.Lift armrest completely out of arm sockets from the wheelchair.
Installing the Armrests
NOTE: Armrest release levers MUST be in the unlocked position when placing armrests into the arm sockets.
1.Place armrest into arm sockets located on the side of the wheelchair.
2.Lock the armrest by turning the armrest release le- vers towards the inside of the wheelchair.
| Armrest | |
Armrest | Armrest | |
Release | ||
Release | ||
Lever | ||
Lever | ||
|
Arm
Socket ![]()
![]()
![]() Arm Socket
Arm Socket
NOTE: Only the adjustable height armrest is shown for clarity. The fixed height armrest remove/install in the same manner.
FIGURE 5 - REMOVING/INSTALLING THE
ARMRESTS
3
