ATTACHING THE BACKREST ASSEMBLY
NOTE: Before performing this procedure, carefully read and understand the Safety Summary of this instruction sheet.
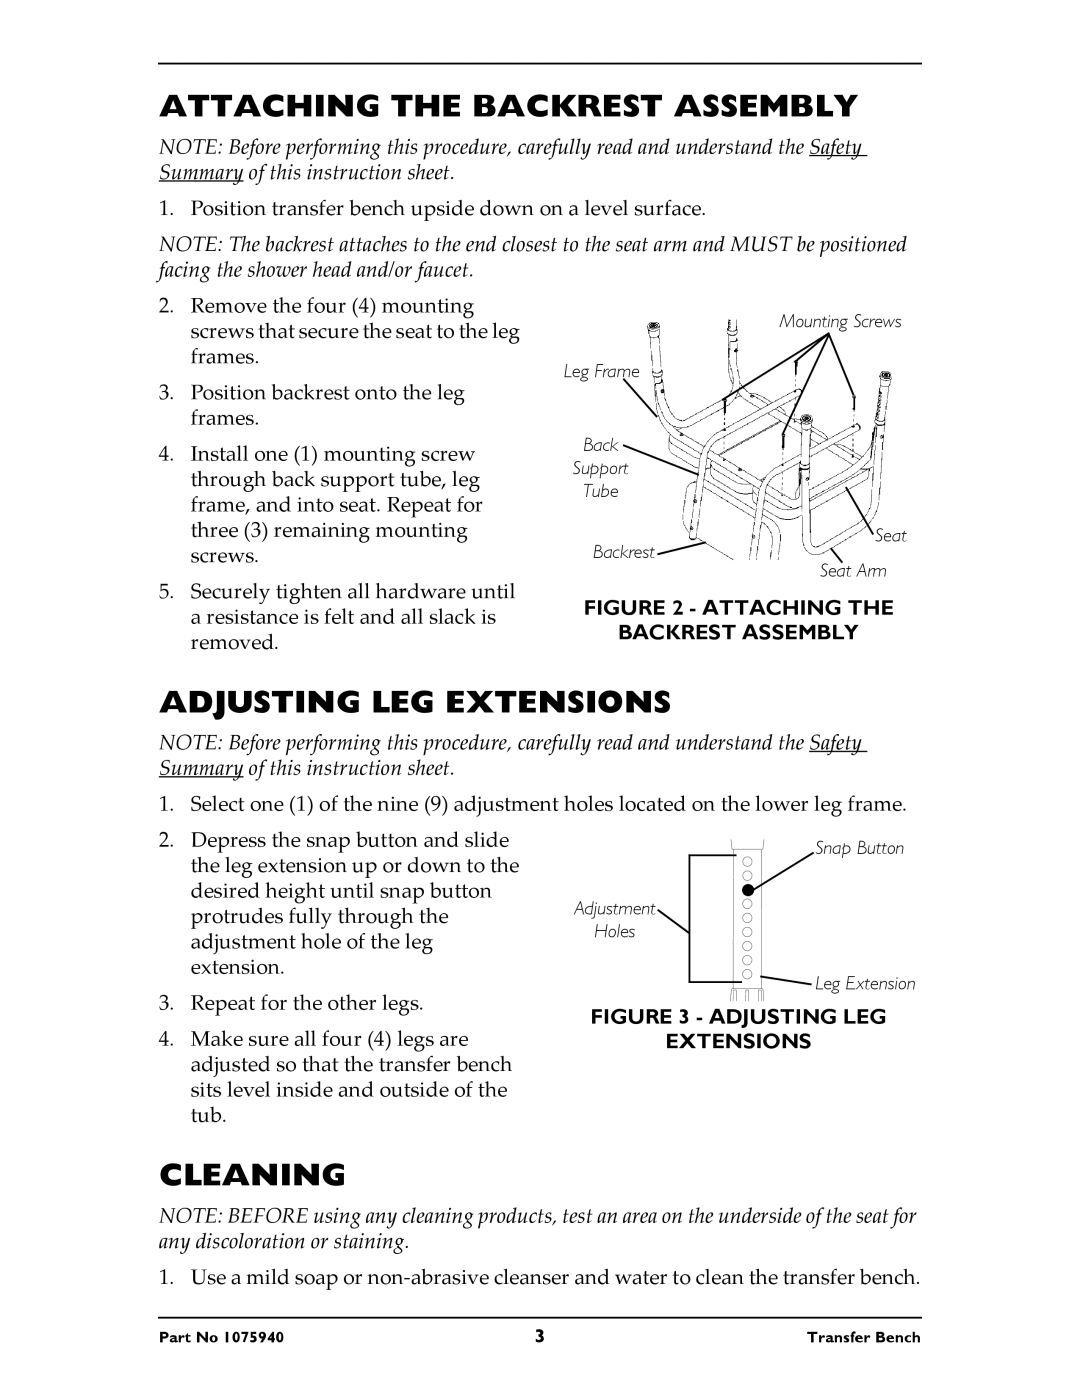
1. Position transfer bench upside down on a level surface.
NOTE: The backrest attaches to the end closest to the seat arm and MUST be positioned facing the shower head and/or faucet.
2. | Remove the four (4) mounting |
| screws that secure the seat to the leg |
| frames. |
3. | Position backrest onto the leg |
| frames. |
4. | Install one (1) mounting screw |
| through back support tube, leg |
Mounting Screws
Leg Frame
Back
Support
frame, and into seat. Repeat for |
three (3) remaining mounting |
Tube
![]() Seat
Seat
screws. |
Backrest ![]()
![]()
Seat Arm
5. Securely tighten all hardware until | FIGURE 2 - ATTACHING THE | |
a resistance is felt and all slack is | ||
BACKREST ASSEMBLY | ||
removed. | ||
|
ADJUSTING LEG EXTENSIONS
NOTE: Before performing this procedure, carefully read and understand the Safety Summary of this instruction sheet.
1. Select one (1) of the nine (9) adjustment holes located on the lower leg frame.
2.Depress the snap button and slide the leg extension up or down to the desired height until snap button protrudes fully through the adjustment hole of the leg extension.
3.Repeat for the other legs.
4.Make sure all four (4) legs are adjusted so that the transfer bench sits level inside and outside of the tub.
CLEANING
NOTE: BEFORE using any cleaning products, test an area on the underside of the seat for any discoloration or staining.
1. Use a mild soap or
Part No 1075940 | 3 | Transfer Bench |