
Quick Install
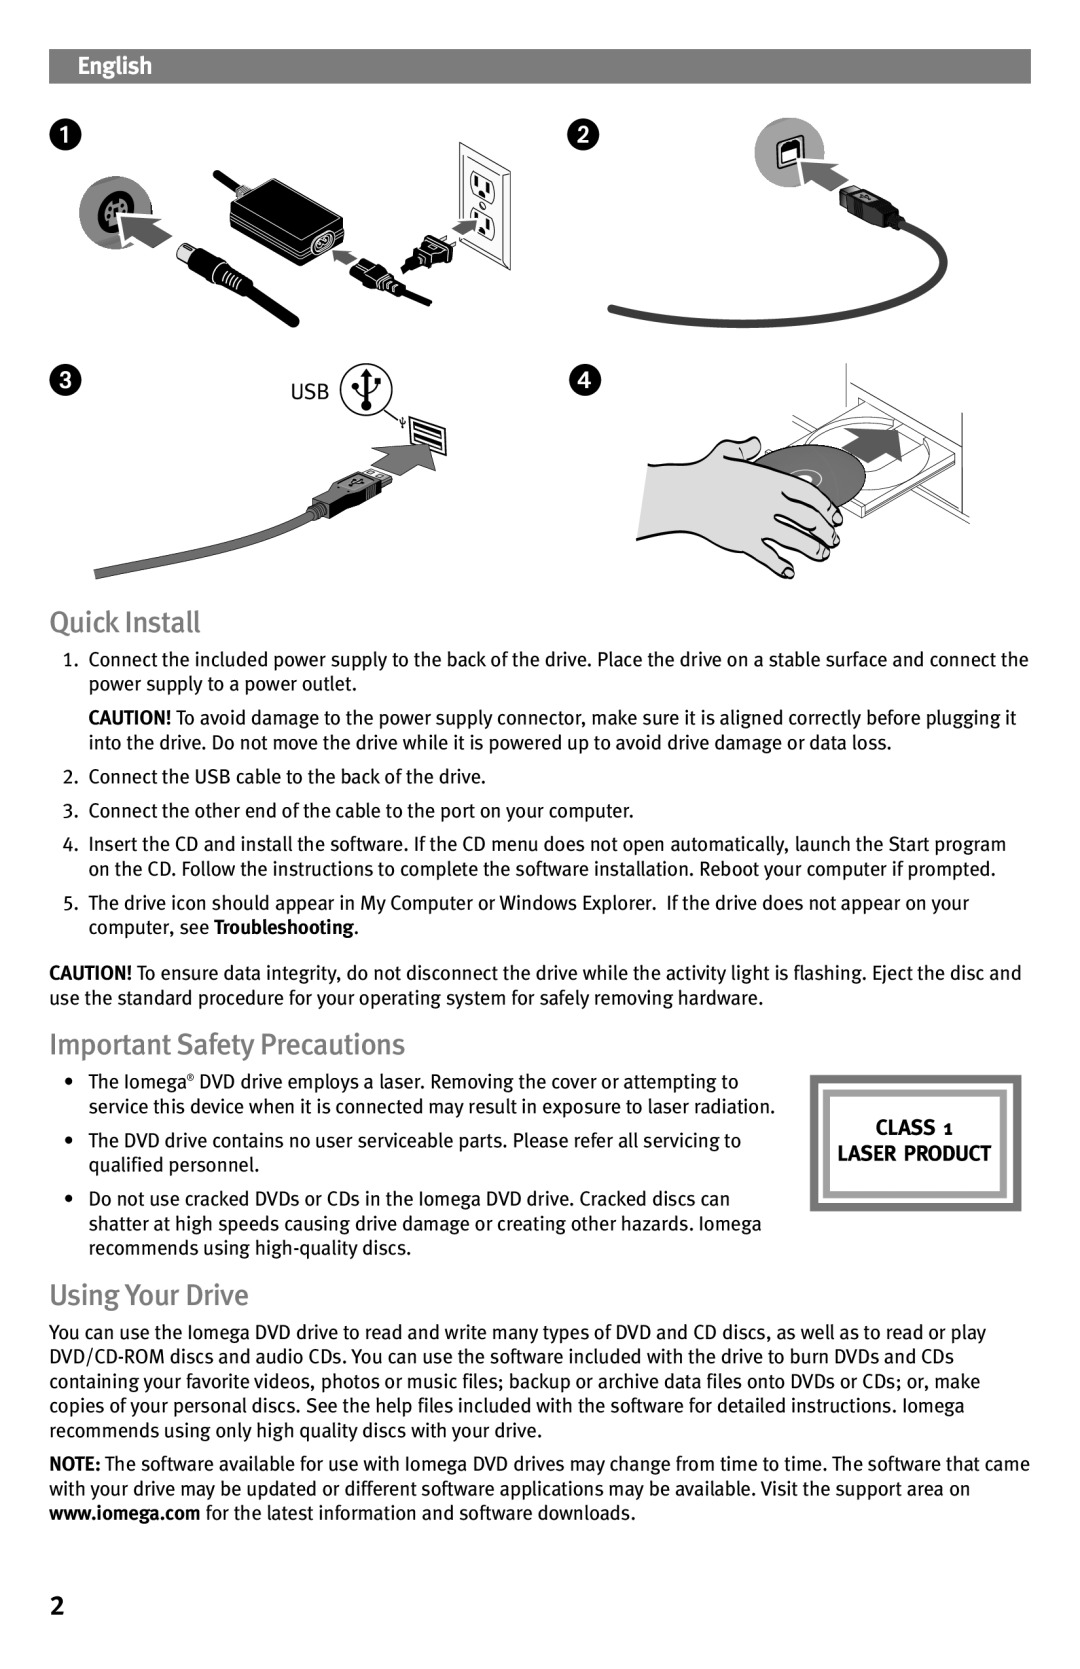
1.Connect the included power supply to the back of the drive. Place the drive on a stable surface and connect the power supply to a power outlet.
CAUTION! To avoid damage to the power supply connector, make sure it is aligned correctly before plugging it into the drive. Do not move the drive while it is powered up to avoid drive damage or data loss.
2.Connect the USB cable to the back of the drive.
3.Connect the other end of the cable to the port on your computer.
4.Insert the CD and install the software. If the CD menu does not open automatically, launch the Start program on the CD. Follow the instructions to complete the software installation. Reboot your computer if prompted.
5.The drive icon should appear in My Computer or Windows Explorer. If the drive does not appear on your computer, see Troubleshooting.
CAUTION! To ensure data integrity, do not disconnect the drive while the activity light is flashing. Eject the disc and use the standard procedure for your operating system for safely removing hardware.
Important Safety Precautions
•The Iomega® DVD drive employs a laser. Removing the cover or attempting to service this device when it is connected may result in exposure to laser radiation.
• The DVD drive contains no user serviceable parts. Please refer all servicing to qualified personnel.
•Do not use cracked DVDs or CDs in the Iomega DVD drive. Cracked discs can shatter at high speeds causing drive damage or creating other hazards. Iomega recommends using
Using Your Drive
You can use the Iomega DVD drive to read and write many types of DVD and CD discs, as well as to read or play
NOTE: The software available for use with Iomega DVD drives may change from time to time. The software that came with your drive may be updated or different software applications may be available. Visit the support area on www.iomega.com for the latest information and software downloads.
2
