www.jacksonmsc.com
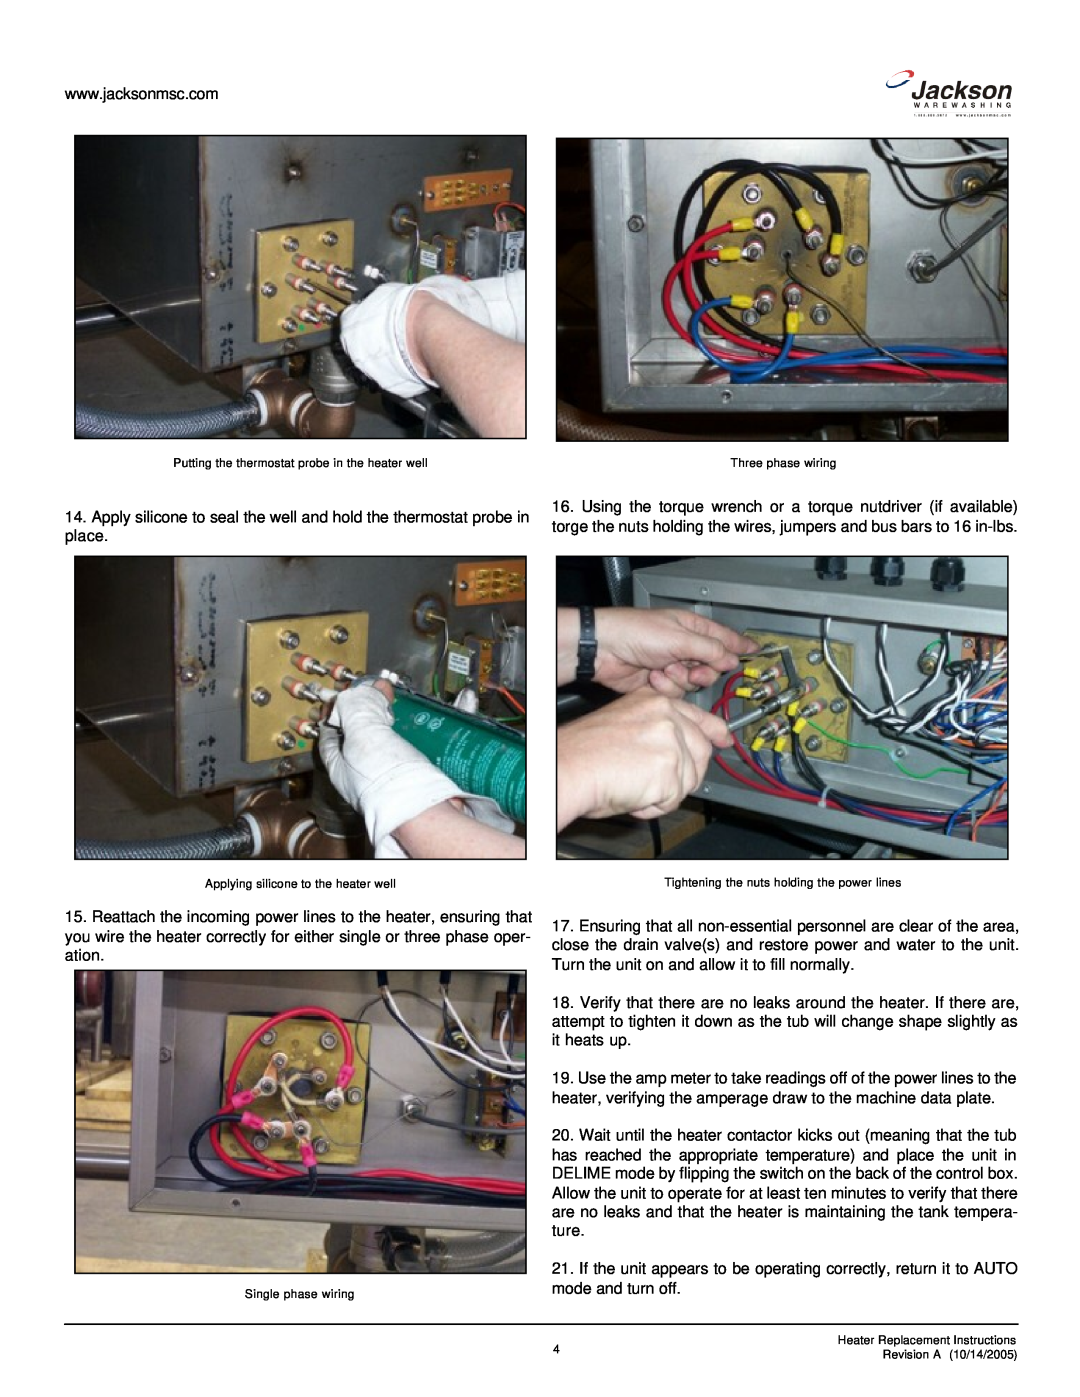
Putting the thermostat probe in the heater well | Three phase wiring |
14.Apply silicone to seal the well and hold the thermostat probe in place.
16.Using the torque wrench or a torque nutdriver (if available) torge the nuts holding the wires, jumpers and bus bars to 16
Applying silicone to the heater well | Tightening the nuts holding the power lines |
15.Reattach the incoming power lines to the heater, ensuring that you wire the heater correctly for either single or three phase oper- ation.
Single phase wiring
17.Ensuring that all
18.Verify that there are no leaks around the heater. If there are, attempt to tighten it down as the tub will change shape slightly as it heats up.
19.Use the amp meter to take readings off of the power lines to the heater, verifying the amperage draw to the machine data plate.
20.Wait until the heater contactor kicks out (meaning that the tub has reached the appropriate temperature) and place the unit in DELIME mode by flipping the switch on the back of the control box. Allow the unit to operate for at least ten minutes to verify that there are no leaks and that the heater is maintaining the tank tempera- ture.
21.If the unit appears to be operating correctly, return it to AUTO mode and turn off.
4 | Heater Replacement Instructions | |
Revision A (10/14/2005) | ||
|