www.jacksonmsc.com
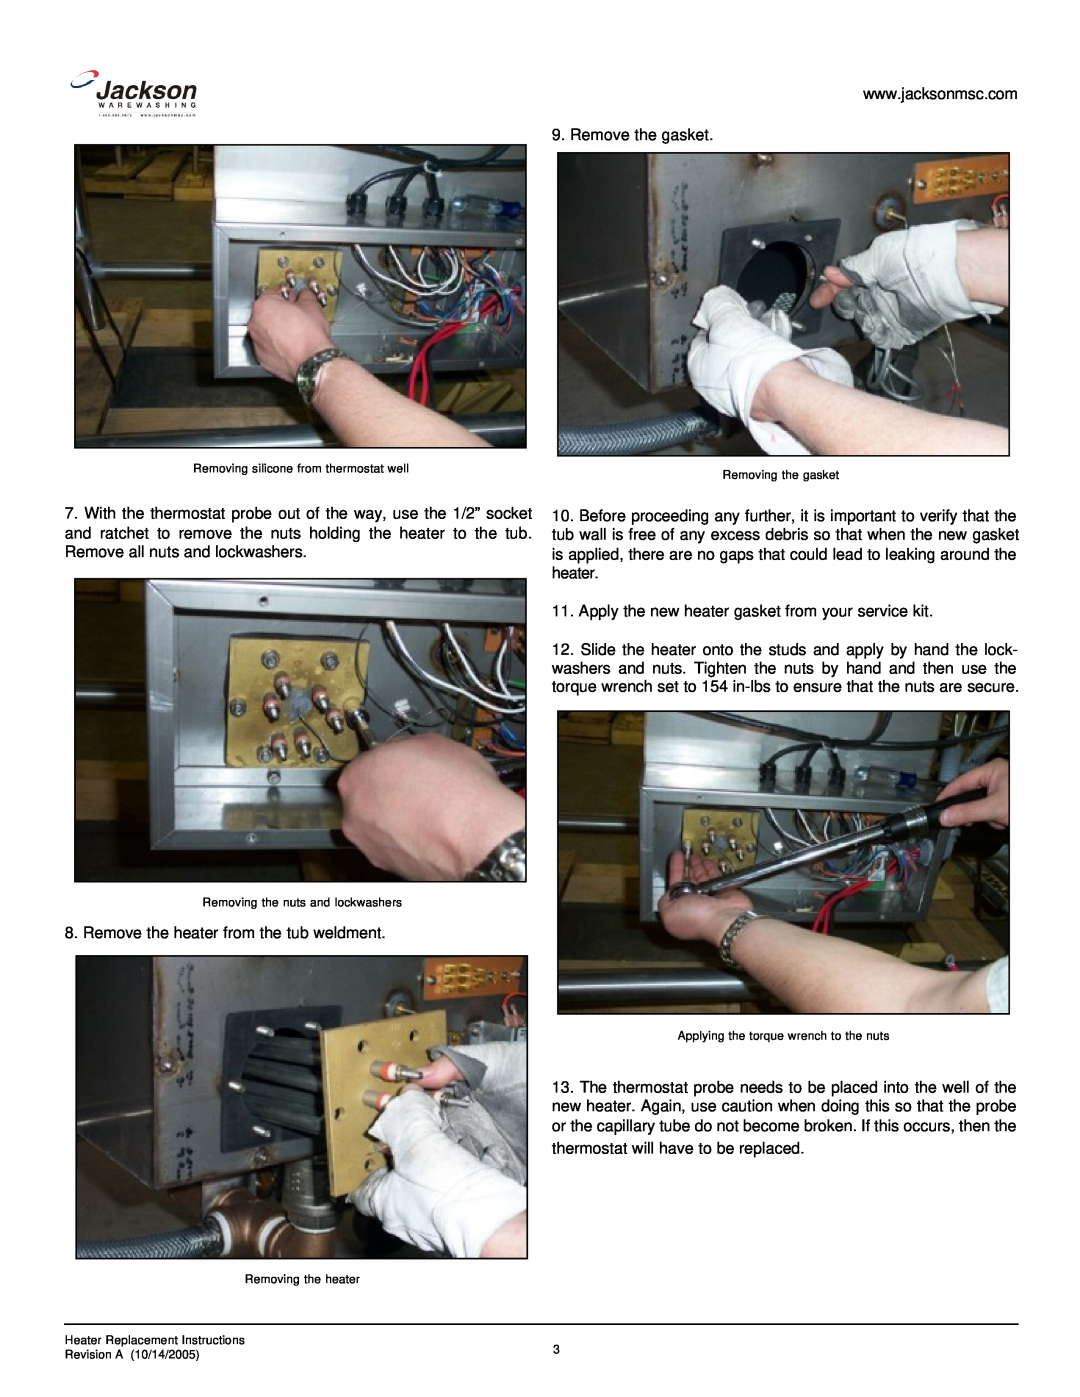
9. Remove the gasket.
Removing silicone from thermostat well | Removing the gasket |
|
7.With the thermostat probe out of the way, use the 1/2” socket and ratchet to remove the nuts holding the heater to the tub. Remove all nuts and lockwashers.
10.Before proceeding any further, it is important to verify that the tub wall is free of any excess debris so that when the new gasket is applied, there are no gaps that could lead to leaking around the heater.
11.Apply the new heater gasket from your service kit.
12.Slide the heater onto the studs and apply by hand the lock- washers and nuts. Tighten the nuts by hand and then use the torque wrench set to 154
Removing the nuts and lockwashers
8. Remove the heater from the tub weldment.
Applying the torque wrench to the nuts
13. The thermostat probe needs to be placed into the well of the new heater. Again, use caution when doing this so that the probe or the capillary tube do not become broken. If this occurs, then the thermostat will have to be replaced.
Removing the heater
Heater Replacement Instructions | 3 | |
Revision A (10/14/2005) | ||
|