Installing Inner Channel and Routing Cables
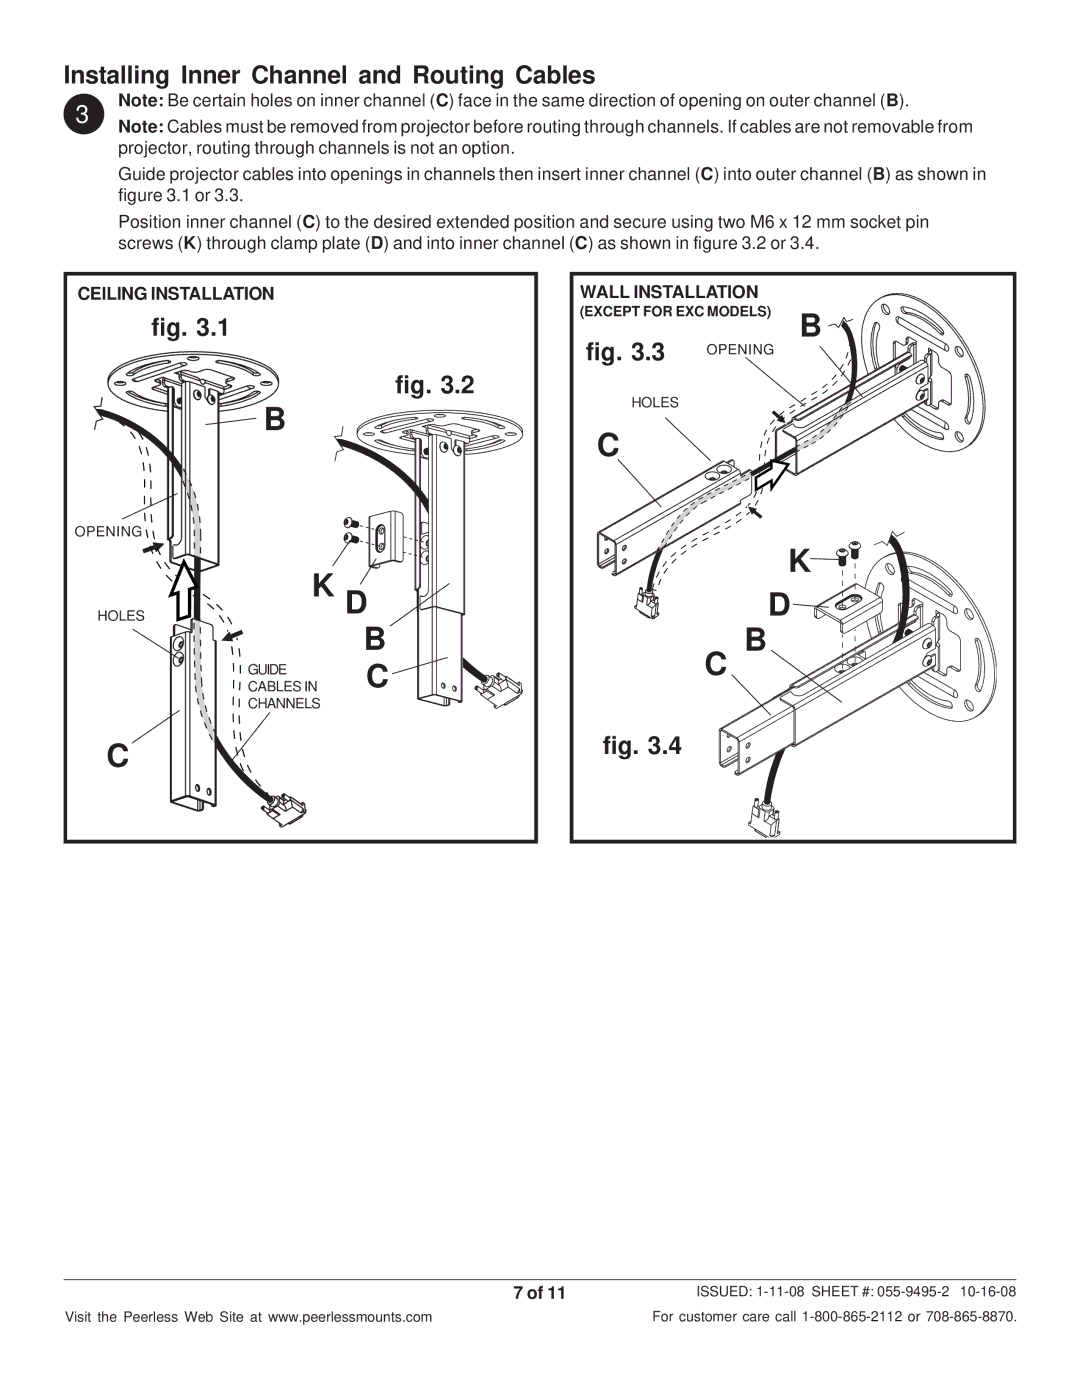
3 | Note: Be certain holes on inner channel (C) face in the same direction of opening on outer channel (B). |
| Note: Cables must be removed from projector before routing through channels. If cables are not removable from |
projector, routing through channels is not an option.
Guide projector cables into openings in channels then insert inner channel (C) into outer channel (B) as shown in figure 3.1 or 3.3.
Position inner channel (C) to the desired extended position and secure using two M6 x 12 mm socket pin screws (K) through clamp plate (D) and into inner channel (C) as shown in figure 3.2 or 3.4.
CEILING INSTALLATION |
| |
| fig. 3.1 |
|
| B | fig. 3.2 |
|
| |
OPENING |
|
|
HOLES | K D | |
|
| B |
| GUIDE | C |
| CABLES IN | |
| CHANNELS |
|
C |
|
|
WALL INSTALLATION |
| |
(EXCEPT FOR EXC MODELS) | B | |
fig. 3.3 | OPENING |
|
|
| |
HOLES |
|
|
C |
|
|
|
| K |
| D | |
| C B |
|
fig. 3.4 |
|
|
7 of 11 | ISSUED: |
Visit the Peerless Web Site at www.peerlessmounts.com | For customer care call |