SECTION 5: PARTS SECTION
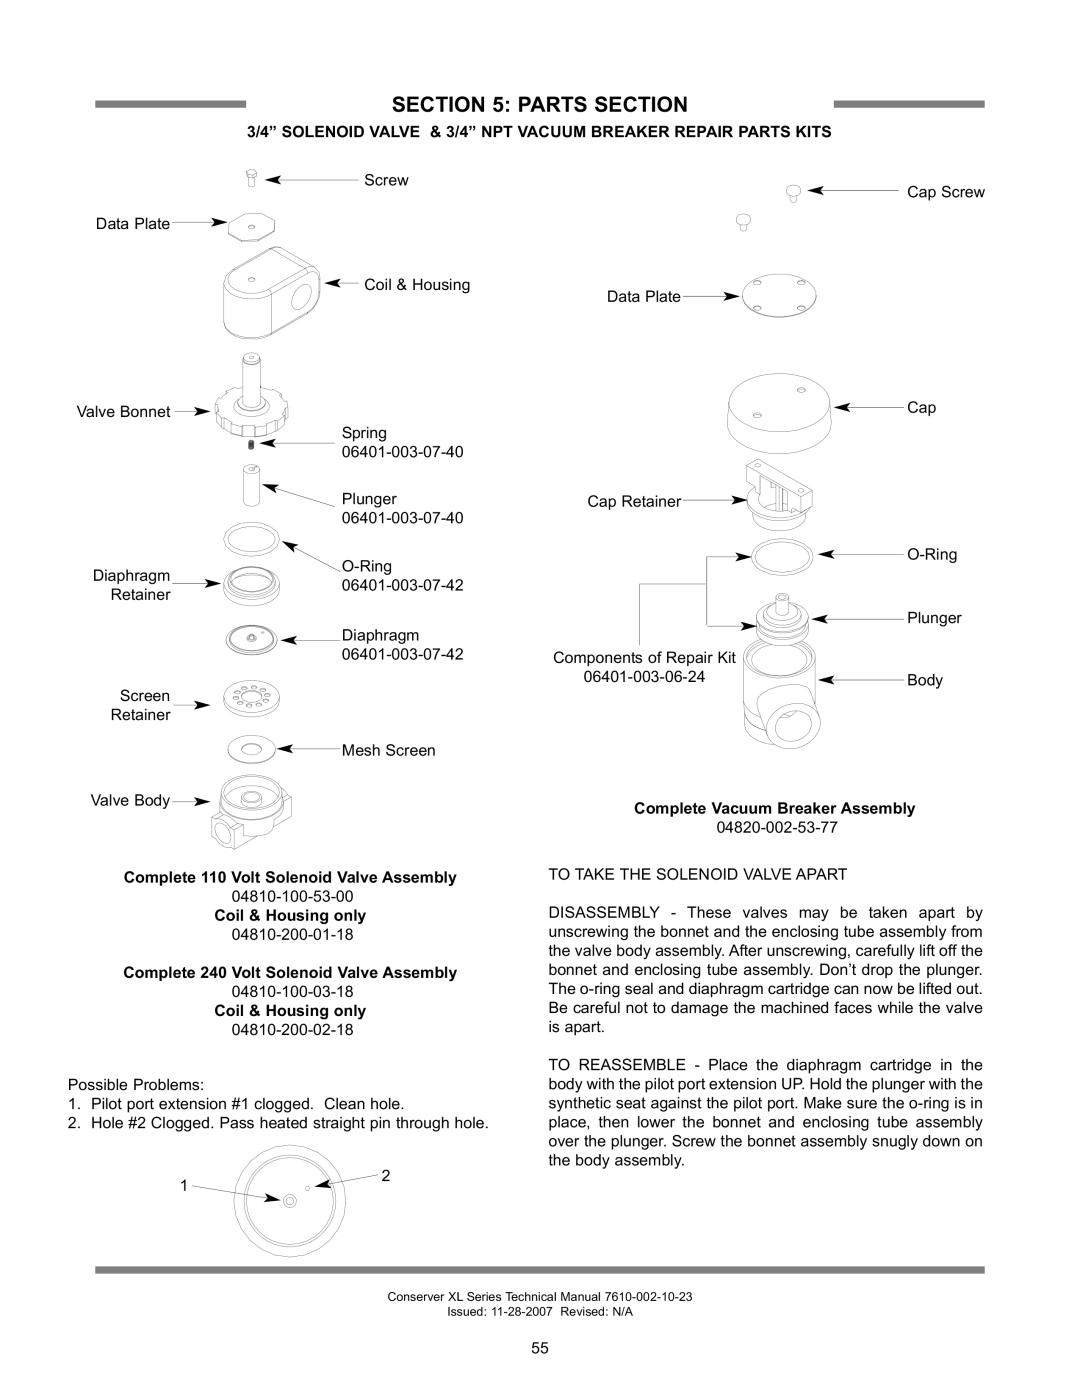
3/4” SOLENOID VALVE & 3/4” NPT VACUUM BREAKER REPAIR PARTS KITS
Data Plate![]()
Valve Bonnet ![]()
Screw
![]()
![]() Coil & Housing
Coil & Housing
Spring
Cap Screw
Data Plate![]()
Cap
Diaphragm Retainer
Screen Retainer
Plunger | Cap Retainer |
| |
|
![]() O-Ring
O-Ring
![]()
![]() Diaphragm
Diaphragm
![]()
![]() Mesh Screen
Mesh Screen
Plunger
Body
Valve Body![]()
Complete 110 Volt Solenoid Valve Assembly
Coil & Housing only
Complete 240 Volt Solenoid Valve Assembly
Coil & Housing only
Possible Problems:
1.Pilot port extension #1 clogged. Clean hole.
2.Hole #2 Clogged. Pass heated straight pin through hole.
Complete Vacuum Breaker Assembly
TO TAKE THE SOLENOID VALVE APART
DISASSEMBLY - These valves may be taken apart by unscrewing the bonnet and the enclosing tube assembly from the valve body assembly. After unscrewing, carefully lift off the bonnet and enclosing tube assembly. Don’t drop the plunger. The
TO REASSEMBLE - Place the diaphragm cartridge in the body with the pilot port extension UP. Hold the plunger with the synthetic seat against the pilot port. Make sure the
1
2
Conserver XL Series Technical Manual
Issued:
55