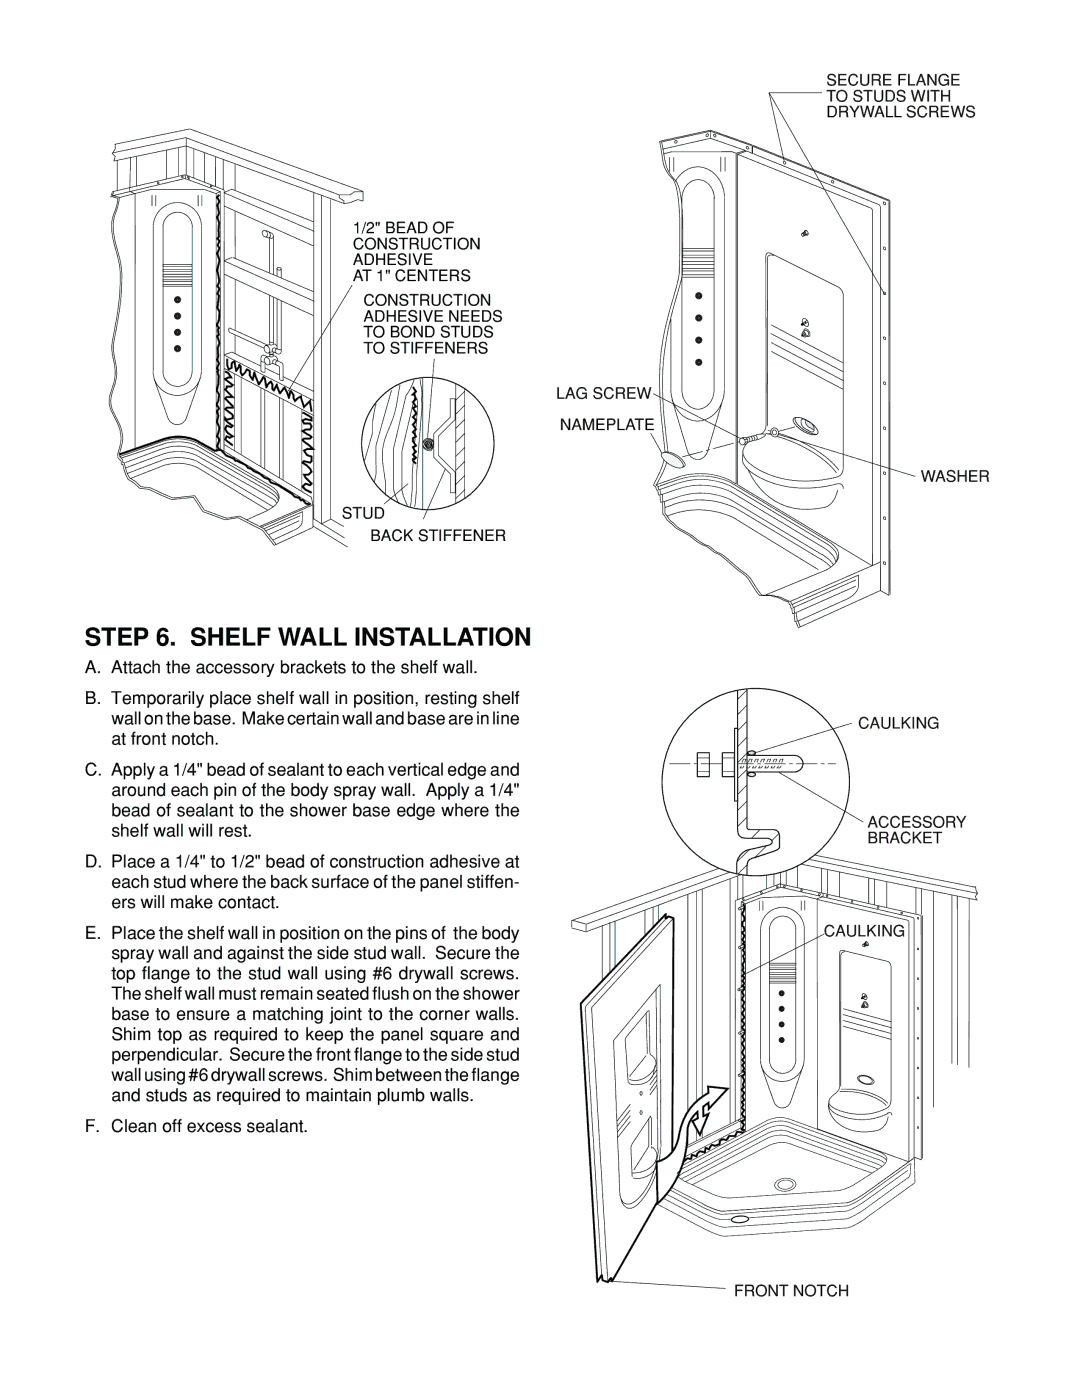
1/2" BEAD OF CONSTRUCTION ADHESIVE
AT 1" CENTERS
CONSTRUCTION
ADHESIVE NEEDS
TO BOND STUDS
TO STIFFENERS
LAG SCREW
NAMEPLATE
STUD
BACK STIFFENER
STEP 6. SHELF WALL INSTALLATION
A.Attach the accessory brackets to the shelf wall.
B.Temporarily place shelf wall in position, resting shelf wall on the base. Make certain wall and base are in line at front notch.
C.Apply a 1/4" bead of sealant to each vertical edge and around each pin of the body spray wall. Apply a 1/4" bead of sealant to the shower base edge where the shelf wall will rest.
D.Place a 1/4" to 1/2" bead of construction adhesive at each stud where the back surface of the panel stiffen- ers will make contact.
E.Place the shelf wall in position on the pins of the body spray wall and against the side stud wall. Secure the top flange to the stud wall using #6 drywall screws. The shelf wall must remain seated flush on the shower base to ensure a matching joint to the corner walls. Shim top as required to keep the panel square and
perpendicular. Secure the front flange to the side stud wall using #6 drywall screws. Shim between the flange and studs as required to maintain plumb walls.
F. Clean off excess sealant.
SECURE FLANGE TO STUDS WITH DRYWALL SCREWS
WASHER
CAULKING
ACCESSORY
BRACKET
CAULKING
FRONT NOTCH