I N S T A L L A T I O N
Foot Kit
The Foot Kit must be utilized if EVOi.324 is to be used “Free Standing”. It provides a much more stable base and also a mechanism that compensates for the shape and angle of the bottom of the enclosure.
Parts Included:
2 x Small Rubber Feet
1 x Large Rubber Foot, threaded with nut
1 x Washer
Installing Feet:
i.Remove suspension insert screws from the bottom of the enclosure.
Placeholder
Bolt 
Figure 27 - Remove Lower Placeholder Bolts
ii.Using two of the removed suspension placeholder screws attach the small rubber feet to the front suspension positions. Please note that there is an orientation to the small rubber feet which compensates for the angle of the enclosure surface.
iii.Place the large washer over the rear suspension position. Make sure the nut is threaded onto the large rubber foot. Then insert the threaded portion through the washer and into the rear suspension position.
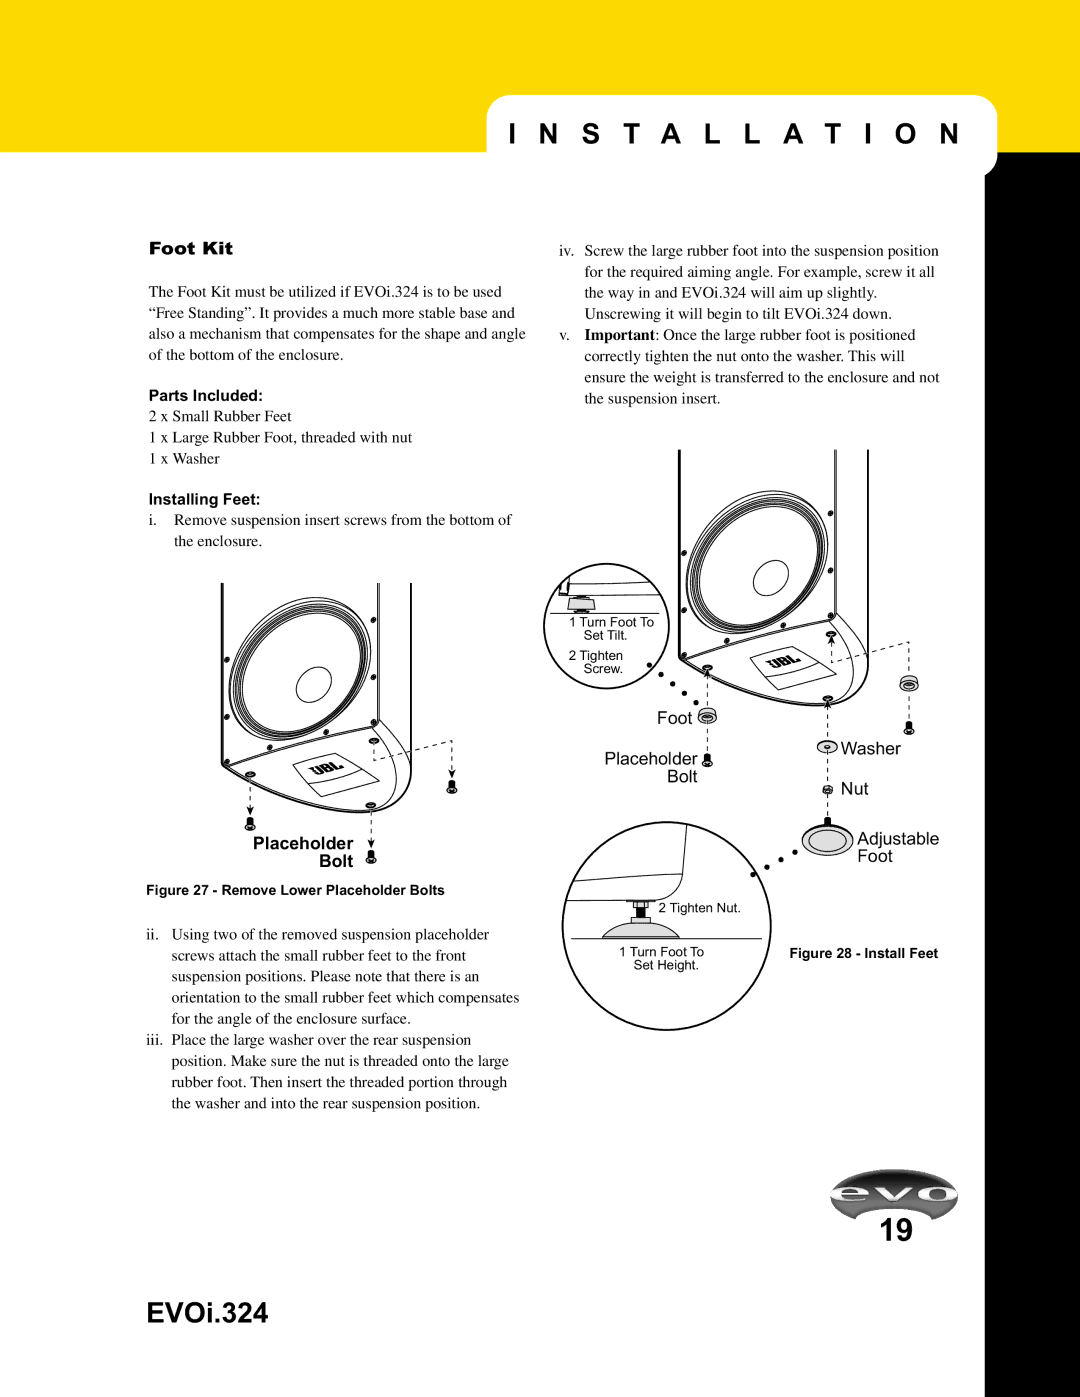
iv.Screw the large rubber foot into the suspension position for the required aiming angle. For example, screw it all the way in and EVOi.324 will aim up slightly.
Unscrewing it will begin to tilt EVOi.324 down.
v.Important: Once the large rubber foot is positioned correctly tighten the nut onto the washer. This will ensure the weight is transferred to the enclosure and not the suspension insert.
1 Turn Foot To
Set Tilt.
2 Tighten
Screw.
Foot ![]()
![]() Washer
Washer
Placeholder
Bolt
![]() Nut
Nut
![]()
![]()
![]()
![]()
![]() Adjustable
Adjustable
Foot
2 Tighten Nut.
1 Turn Foot To | Figure 28 - Install Feet |
Set Height. |
|
19
EVOi.324