
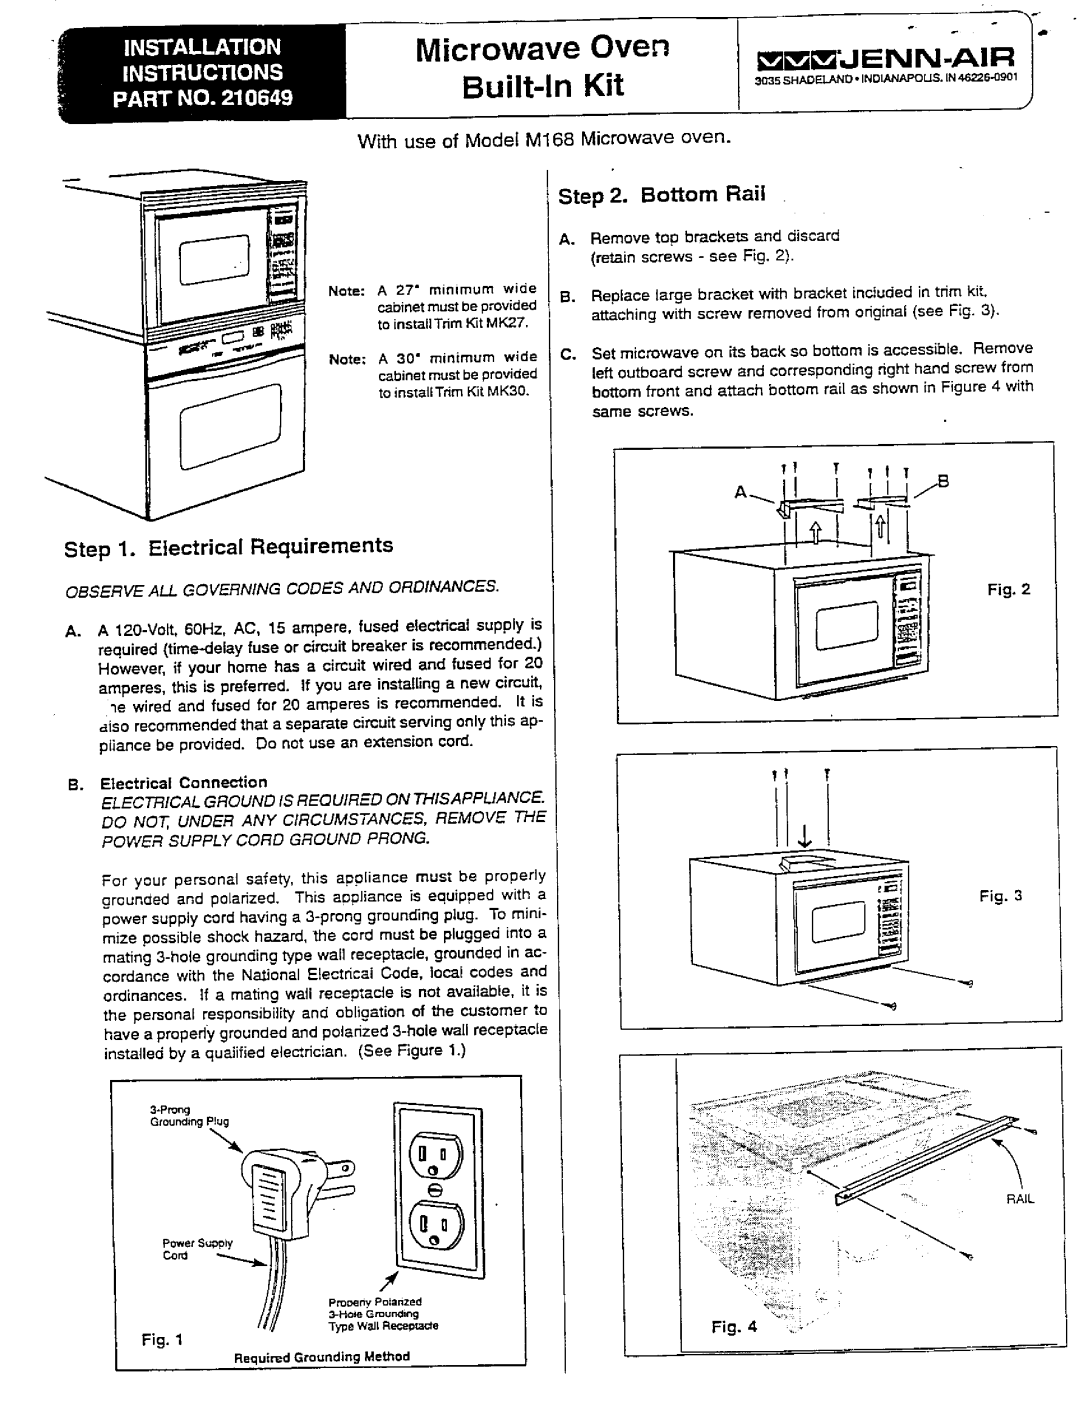
MK24, MK30, MK27, A627 specifications
Jenn-Air is a name synonymous with luxury kitchen appliances, known for its innovative technologies and high-quality products. Among its impressive lineup, the Jenn-Air MK27, MK24, and MK30 built-in grills, along with the A627 model, stand out for their exceptional design and performance.The Jenn-Air MK27 offers a robust 27-inch cooking surface, perfect for those entertaining large gatherings. It features a powerful 25,000 BTU burner system that allows for precise temperature control, essential for a variety of cooking methods. The integrated infrared rotisserie system enhances the grilling experience, ensuring even cooking for meats and vegetables. The smooth, stainless steel finish is not only aesthetically pleasing but also durable, resisting rust and corrosion.
Similarly, the Jenn-Air MK24, with a more compact 24-inch design, is ideal for smaller outdoor spaces without sacrificing performance. This model also boasts a high-output burner and advanced searing capabilities, making it easy to achieve restaurant-quality results at home. The MK24 includes a built-in wind guard, which provides stability and efficiency while cooking, even in breezy conditions.
Meanwhile, the Jenn-Air MK30 elevates the grilling experience with its spacious 30-inch surface. This grill is equipped with a Smart Temperature Indicator that allows users to monitor grilling temperatures accurately. The MK30 also features additional cooking zones, providing versatility for various dishes simultaneously. Its patented "Sear Zone" provides an intense temperature for sealing in flavors, making it a favorite for grilling steaks and chops.
The A627 model serves as a versatile outdoor appliance, combining grill and smoker functionalities. With adjustable temperature settings, it allows users to both pressure-cook and smoke meats, delivering a diverse range of flavors. The A627’s digital control panel offers precision cooking while its large capacity accommodates different sizes of meat cuts for big family gatherings.
Across all models, Jenn-Air incorporates advanced technology, such as Wi-Fi connectivity in some units, enabling remote monitoring and control via smartphone apps. This level of innovation enhances the grilling experience, making it effortless and enjoyable. Overall, the Jenn-Air MK27, MK24, MK30, and A627 unite elegance, functionality, and cutting-edge features, appealing to both amateur and professional chefs alike. These grills not only add a sophisticated touch to any outdoor kitchen but also ensure maximum performance for various culinary adventures.