If you are installingyour new refrigerator yourself, please follow these helpfulsugges- tions.
1. Remove base skids. | IlllJll I |
2. Remove all exterior and interior tape carefully | and |
retain old tape. Make a small pad of this tape to pick | |
offany remaining tape residues. Thiswill eliminatethe | |
need to use dangerous solvents of any kind. |
|
3, Remove and discardthe cantilever shelf packing clips | |
located just above each shelf where they hook onto | |
the frame. TO remove the red plastic clip, wiggle it | |
sideways and pull straight out. |
|
4. Select a locationfor your new refrigeratoraway from any heat sources. Allow a free flow of air through the front base gdfle.
5. Your model should not be installed where the room temperature will go below
55oF. because it will not run frequently enough to maintain propertemperature in the freezer.
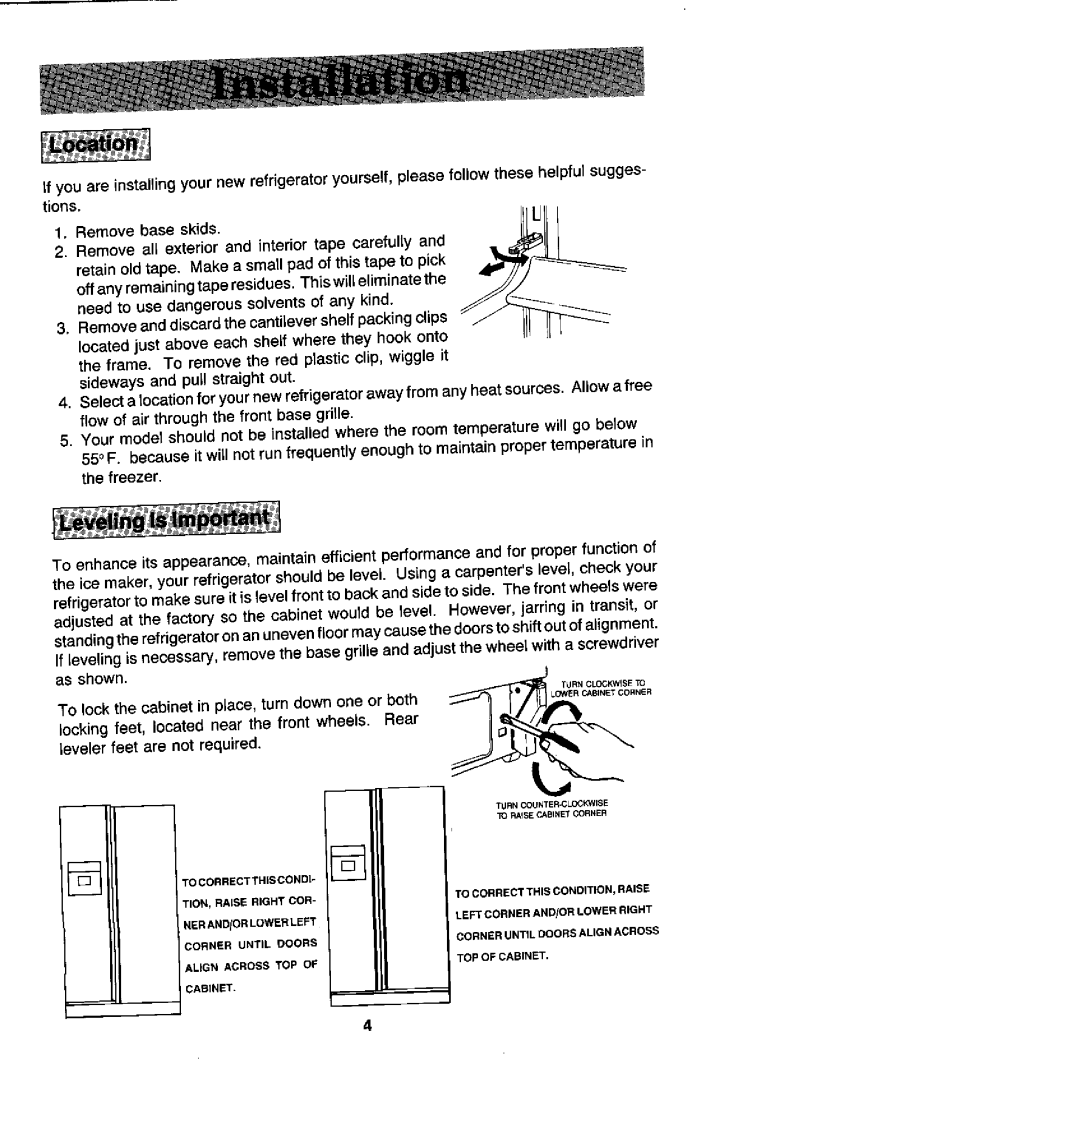
To enhance its appearance, maintain efficient performance and for proper function of the ice maker, your refdgerator should be level Using a carpenter'slevel, check your refrigerator to make sure it is levelfront to back and side to side. The front wheels were adjusted at the factory so the cabinet would be level. However, jarring in transit, or standingthe refrigerator on anuneven floor may causethe doors to shift out of alignment.
If levelingis necessary, remove the base grille and adjust the wheel with a screwdriver as shown.
TOlock the cabinet in place, turn down one or both |
| LOWER¢,o,,ECr O..E_ | ||||
locking feet, located near the front wheels. Rear |
|
|
| |||
leveler feet are not required. |
|
|
|
| ||
|
|
|
| 7_JRNCOUNTERCLCCKW_ |
| |
|
|
|
| 31_RAISECABINEt CORNER |
| |
[] | TO CORRECTTHIS | COND[- [] |
|
|
| |
| TION, RAISE RIGHT COR- | TO CORRECT | TN(S CONO(T(ON, | RAISE | ||
| HER AND fOR LOWER LEFT | LEFT CORNER | AND/OR LOWER | RIGHT | ||
| I CORNER | UNTIL | OOORS | CORNERUNTfLDQORSALIGNACROSS |
| |
| 'ALIGN | ACROSS | TOP OF | TOP OFCABINET. |
| |
CABINET.
4