4.Turn the cap counterclockwise until the cap slips into the attachment slot. Then, turn the cap clockwise until it is in a horizontal position.
NOTE: The cap will not be even with the base grille.
Ice Maker and Storage Bin
Turn the Ice Maker On/Off
The ice maker On/Off control is located on the
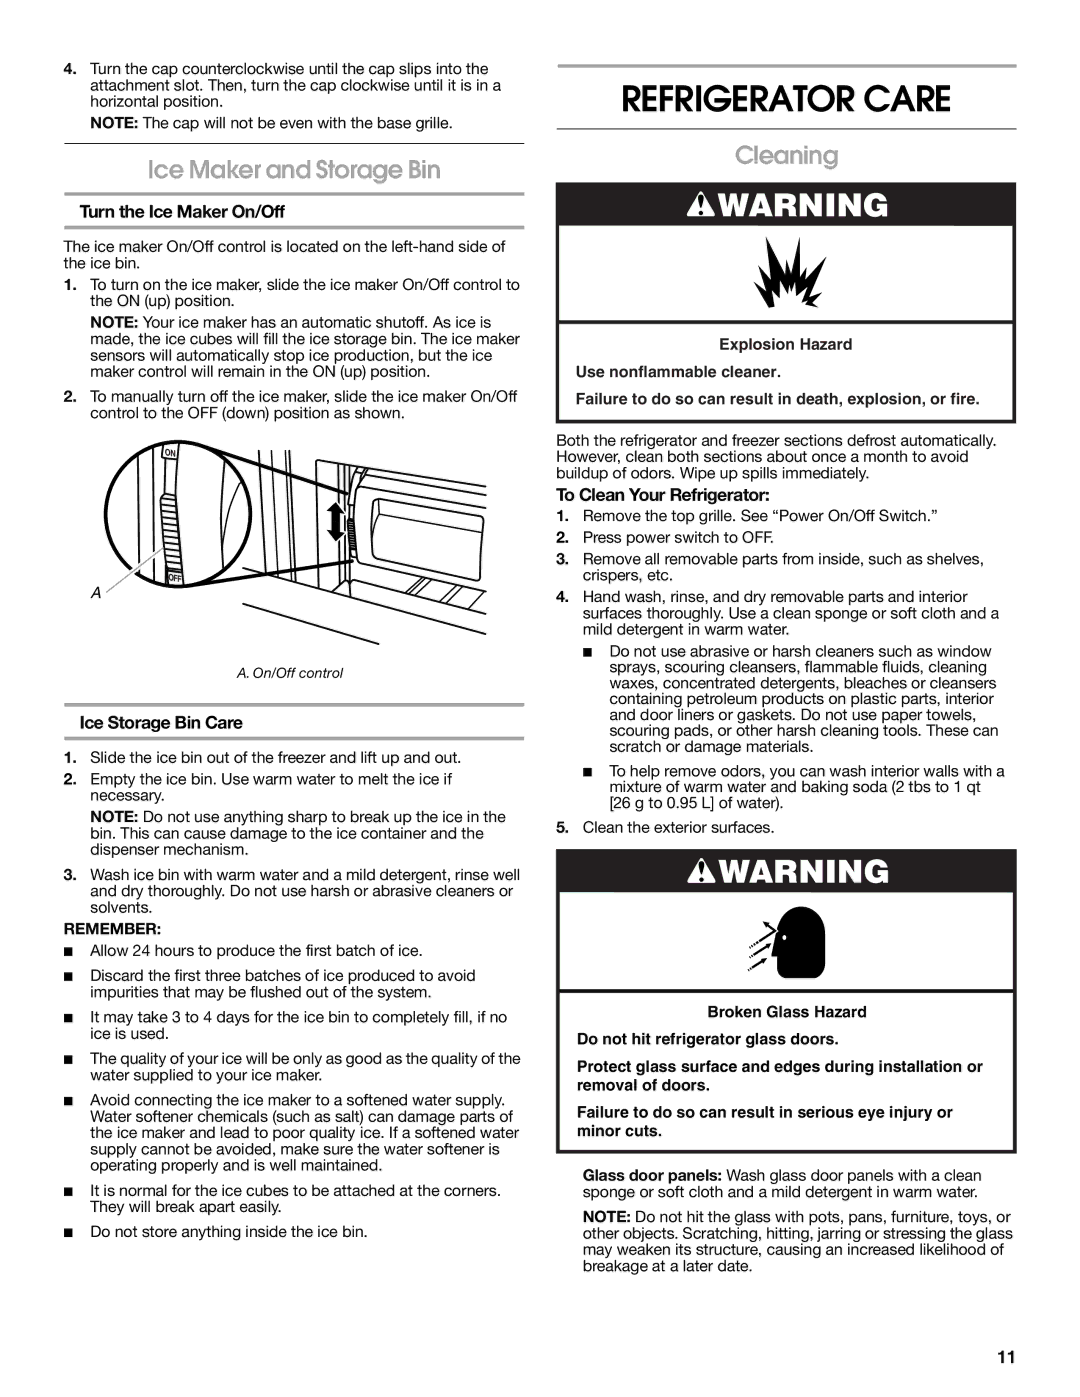
1.To turn on the ice maker, slide the ice maker On/Off control to the ON (up) position.
NOTE: Your ice maker has an automatic shutoff. As ice is made, the ice cubes will fill the ice storage bin. The ice maker sensors will automatically stop ice production, but the ice maker control will remain in the ON (up) position.
2.To manually turn off the ice maker, slide the ice maker On/Off control to the OFF (down) position as shown.
A
A. On/Off control
Ice Storage Bin Care
1.Slide the ice bin out of the freezer and lift up and out.
2.Empty the ice bin. Use warm water to melt the ice if necessary.
NOTE: Do not use anything sharp to break up the ice in the bin. This can cause damage to the ice container and the dispenser mechanism.
3.Wash ice bin with warm water and a mild detergent, rinse well and dry thoroughly. Do not use harsh or abrasive cleaners or solvents.
REMEMBER:
■Allow 24 hours to produce the first batch of ice.
■Discard the first three batches of ice produced to avoid impurities that may be flushed out of the system.
■It may take 3 to 4 days for the ice bin to completely fill, if no ice is used.
■The quality of your ice will be only as good as the quality of the water supplied to your ice maker.
■Avoid connecting the ice maker to a softened water supply. Water softener chemicals (such as salt) can damage parts of the ice maker and lead to poor quality ice. If a softened water supply cannot be avoided, make sure the water softener is operating properly and is well maintained.
■It is normal for the ice cubes to be attached at the corners. They will break apart easily.
■Do not store anything inside the ice bin.
REFRIGERATOR CARE
Cleaning
![]() WARNING
WARNING
Explosion Hazard
Use nonflammable cleaner.
Failure to do so can result in death, explosion, or fire.
Both the refrigerator and freezer sections defrost automatically. However, clean both sections about once a month to avoid buildup of odors. Wipe up spills immediately.
To Clean Your Refrigerator:
1.Remove the top grille. See “Power On/Off Switch.”
2.Press power switch to OFF.
3.Remove all removable parts from inside, such as shelves, crispers, etc.
4.Hand wash, rinse, and dry removable parts and interior surfaces thoroughly. Use a clean sponge or soft cloth and a mild detergent in warm water.
■Do not use abrasive or harsh cleaners such as window sprays, scouring cleansers, flammable fluids, cleaning waxes, concentrated detergents, bleaches or cleansers containing petroleum products on plastic parts, interior and door liners or gaskets. Do not use paper towels, scouring pads, or other harsh cleaning tools. These can scratch or damage materials.
■To help remove odors, you can wash interior walls with a mixture of warm water and baking soda (2 tbs to 1 qt [26 g to 0.95 L] of water).
5.Clean the exterior surfaces.
![]() WARNING
WARNING
Broken Glass Hazard
Do not hit refrigerator glass doors.
Protect glass surface and edges during installation or removal of doors.
Failure to do so can result in serious eye injury or minor cuts.
Glass door panels: Wash glass door panels with a clean sponge or soft cloth and a mild detergent in warm water.
NOTE: Do not hit the glass with pots, pans, furniture, toys, or other objects. Scratching, hitting, jarring or stressing the glass may weaken its structure, causing an increased likelihood of breakage at a later date.
11