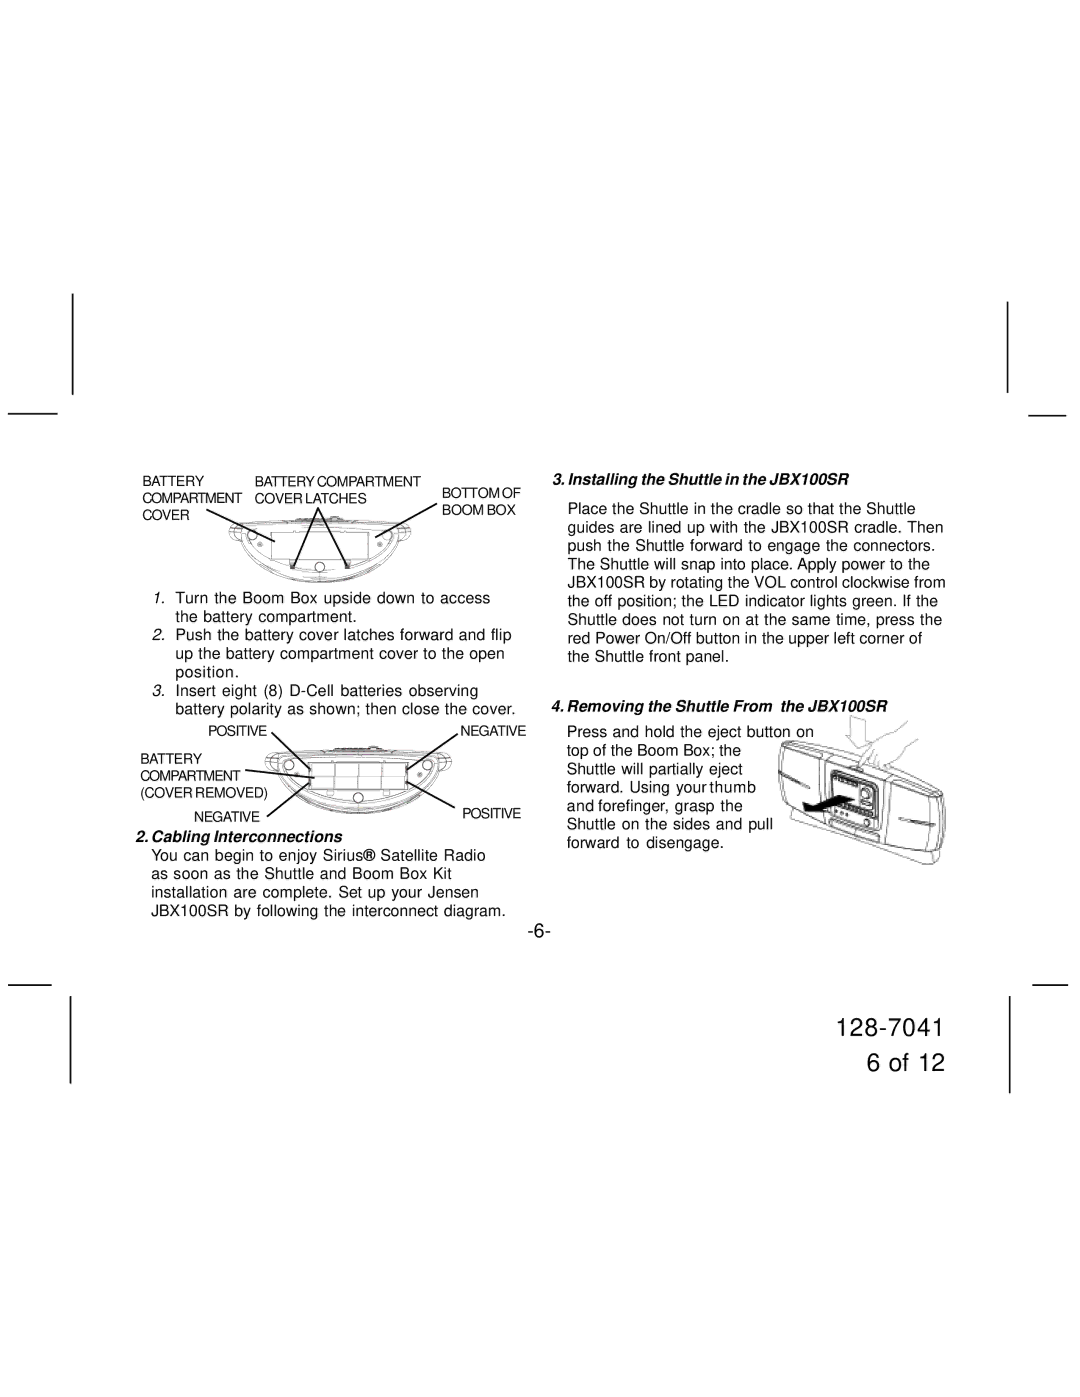
BATTERY | BATTERY COMPARTMENT | BOTTOM OF | |
COMPARTMENT | COVER LATCHES | ||
BOOM BOX | |||
COVER |
| ||
|
|
1.Turn the Boom Box upside down to access the battery compartment.
2.Push the battery cover latches forward and flip up the battery compartment cover to the open position.
3.Insert eight (8)
POSITIVE | NEGATIVE |
BATTERY
COMPARTMENT ![]() (COVER REMOVED)
(COVER REMOVED)
NEGATIVE | POSITIVE |
2.Cabling Interconnections
You can begin to enjoy Sirius® Satellite Radio as soon as the Shuttle and Boom Box Kit installation are complete. Set up your Jensen JBX100SR by following the interconnect diagram.
3.Installing the Shuttle in the JBX100SR
Place the Shuttle in the cradle so that the Shuttle guides are lined up with the JBX100SR cradle. Then push the Shuttle forward to engage the connectors. The Shuttle will snap into place. Apply power to the JBX100SR by rotating the VOL control clockwise from the off position; the LED indicator lights green. If the Shuttle does not turn on at the same time, press the red Power On/Off button in the upper left corner of the Shuttle front panel.
4.Removing the Shuttle From the JBX100SR
Press and hold the eject button on top of the Boom Box; the
Shuttle will partially eject forward. Using your thumb and forefinger, grasp the Shuttle on the sides and pull forward to disengage.
6 of 12
