VR182
Ford Vehicle Mount
1.Remove the mounting sleeve (see step 1 of “DIN Front Mount” on page 4). The mounting sleeve is not used in this application.
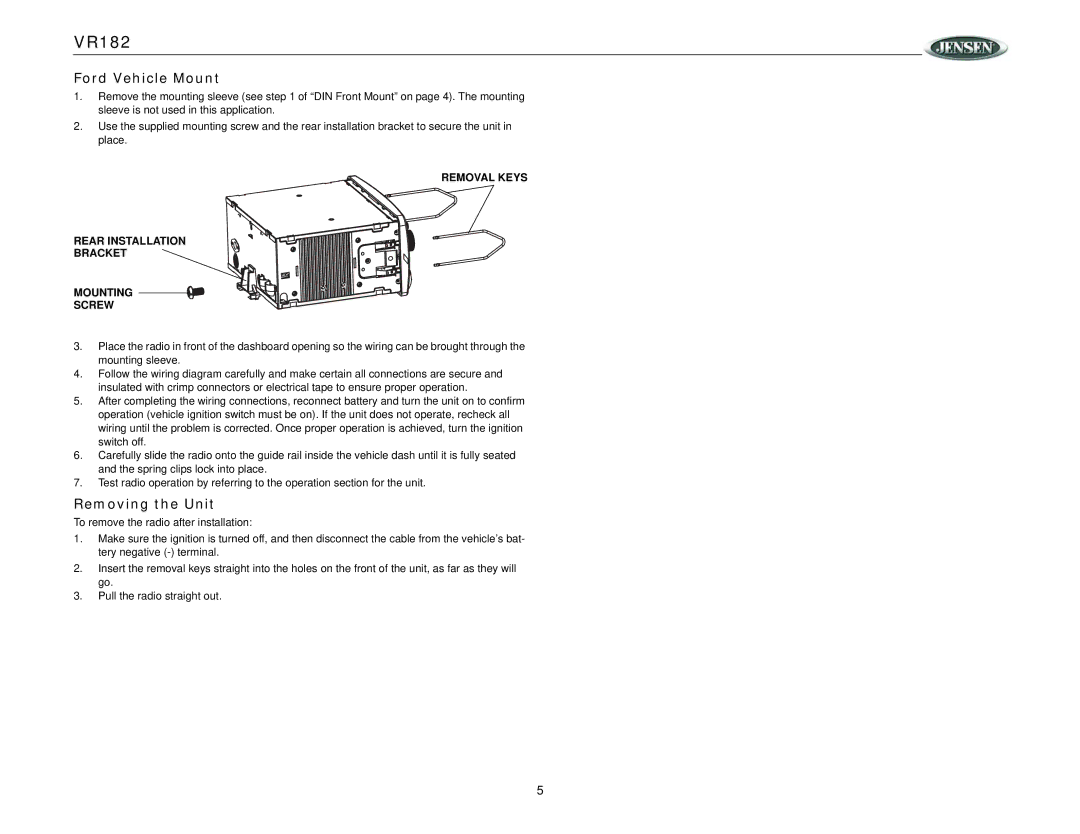
2.Use the supplied mounting screw and the rear installation bracket to secure the unit in place.
REMOVAL KEYS
REAR INSTALLATION
BRACKET
MOUNTING
SCREW
3.Place the radio in front of the dashboard opening so the wiring can be brought through the mounting sleeve.
4.Follow the wiring diagram carefully and make certain all connections are secure and insulated with crimp connectors or electrical tape to ensure proper operation.
5.After completing the wiring connections, reconnect battery and turn the unit on to confirm operation (vehicle ignition switch must be on). If the unit does not operate, recheck all wiring until the problem is corrected. Once proper operation is achieved, turn the ignition switch off.
6.Carefully slide the radio onto the guide rail inside the vehicle dash until it is fully seated and the spring clips lock into place.
7.Test radio operation by referring to the operation section for the unit.
Removing the Unit
To remove the radio after installation:
1.Make sure the ignition is turned off, and then disconnect the cable from the vehicle’s bat- tery negative
2.Insert the removal keys straight into the holes on the front of the unit, as far as they will go.
3.Pull the radio straight out.
5