
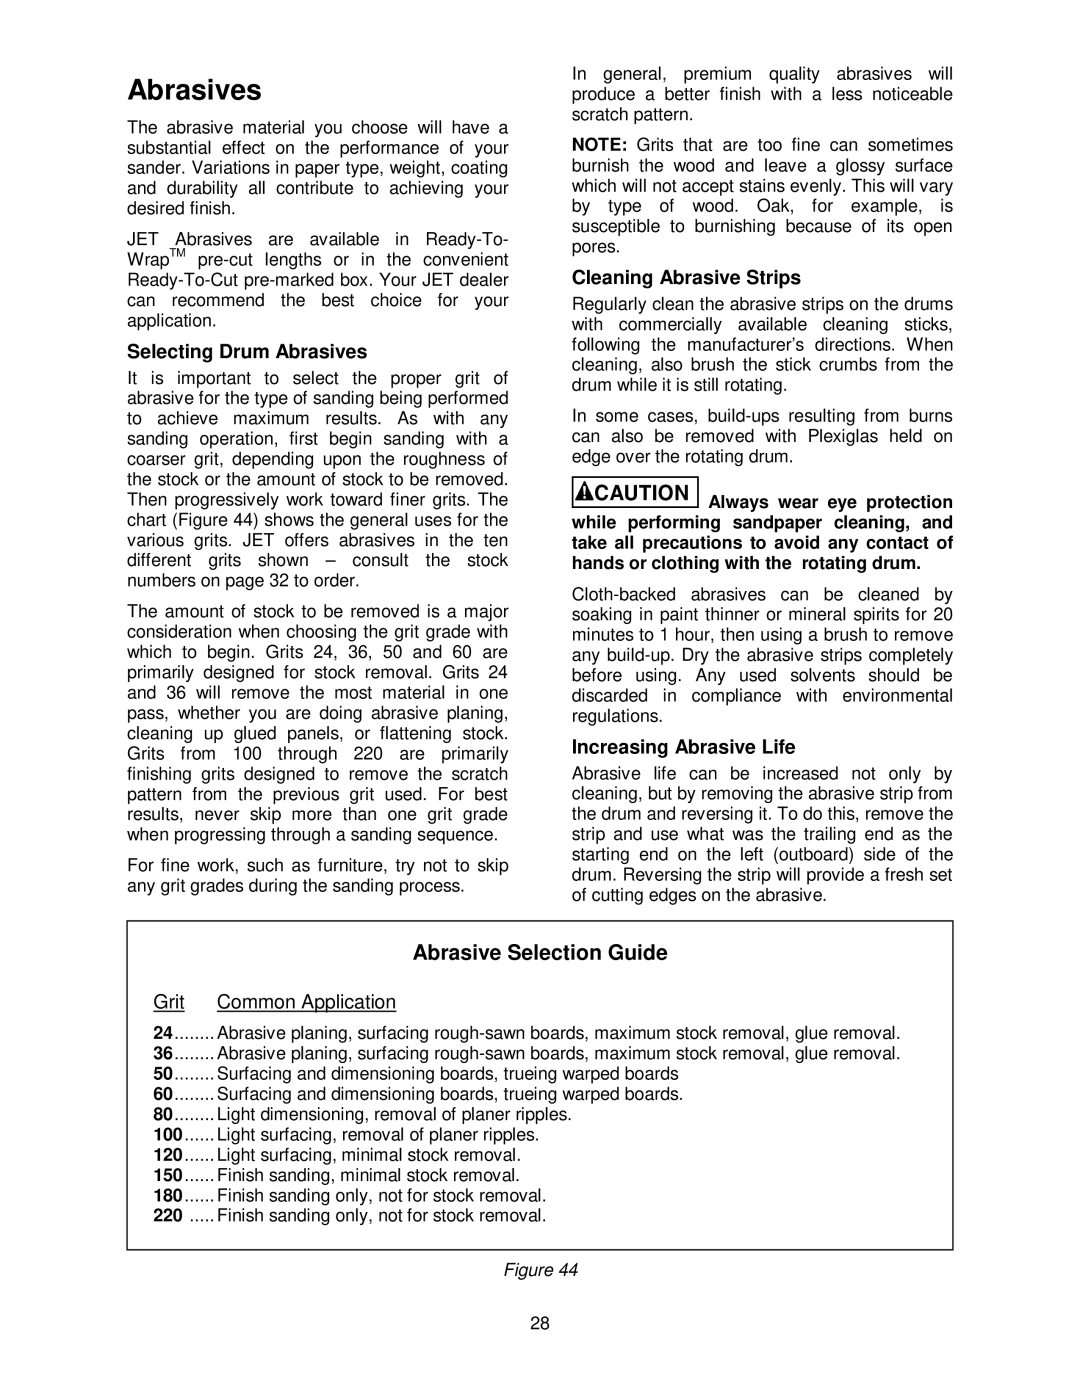
22-44 Pro specifications
The Jet Tools 22-44 Pro drum sander stands out as one of the leading machines in the woodworking industry, known for its exceptional performance and durability. Aimed at both professional woodworkers and serious hobbyists, this tool boasts a range of features that enhance efficiency and precision, making it a valuable addition to any workshop.One of the primary features of the Jet 22-44 Pro is its powerful 1.75 HP motor. This motor ensures consistent and reliable operation, allowing users to tackle a variety of sanding tasks with ease. The machine operates at 1,800 RPM, providing quick and efficient material removal. The adjustable table height allows for a maximum sanding width of 22 inches, accommodating larger workpieces for versatility in projects.
In terms of technology, the Jet 22-44 Pro employs a unique, patented drum design that ensures even sanding across the entire surface. This design minimizes the risk of snipe, a common problem in sanders that can result in uneven finish on workpieces. The 44-inch long sanding drum provides ample surface area, which aids in achieving a flawless finish without the need for excessive passes.
The tool features an adjustable infeed and outfeed table, ensuring optimal material support and stability during sanding operations. This feature is particularly beneficial for larger boards, as it prevents warping and allows for more accurate sanding. Additionally, the integrated dust collection system enhances cleanliness by efficiently capturing dust and debris, promoting a healthier working environment.
The Jet 22-44 Pro is equipped with a micro-adjustable sanding drum, allowing users to make precise depth adjustments for different applications. This functionality makes it easy to switch between various grits without sacrificing accuracy. Furthermore, the machine’s sturdy construction and robust frame reduce vibration during operation, contributing to improved accuracy and reduced fatigue during prolonged use.
The user-friendly design of the Jet 22-44 Pro also includes safety features such as an emergency stop button and integrated overload protection. This ensures that the machine can be operated safely, with features in place to prevent damage to both the tool and the user.
In summary, the Jet Tools 22-44 Pro drum sander combines power, versatility, and advanced technology to deliver an outstanding finishing tool for woodworkers. Its robust motor, unique drum design, and user-friendly features make it a top choice for anyone looking to enhance their woodworking capabilities.