Resaw Guide
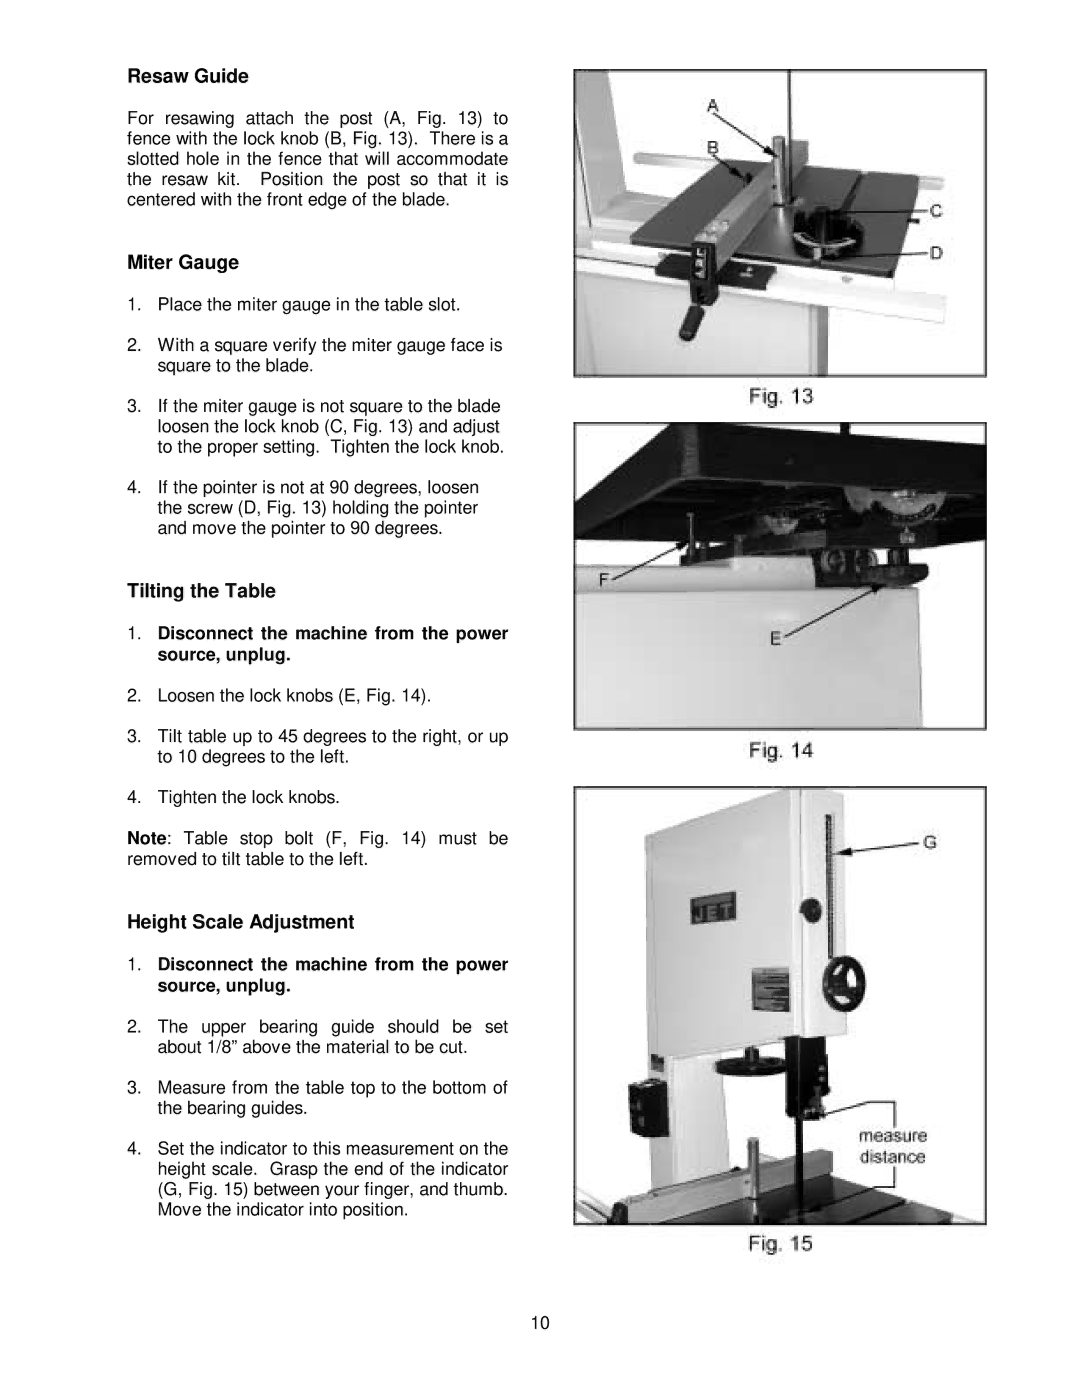
For resawing attach the post (A, Fig. 13) to fence with the lock knob (B, Fig. 13). There is a slotted hole in the fence that will accommodate the resaw kit. Position the post so that it is centered with the front edge of the blade.
Miter Gauge
1.Place the miter gauge in the table slot.
2.With a square verify the miter gauge face is square to the blade.
3.If the miter gauge is not square to the blade loosen the lock knob (C, Fig. 13) and adjust to the proper setting. Tighten the lock knob.
4.If the pointer is not at 90 degrees, loosen the screw (D, Fig. 13) holding the pointer and move the pointer to 90 degrees.
Tilting the Table
1.Disconnect the machine from the power source, unplug.
2.Loosen the lock knobs (E, Fig. 14).
3.Tilt table up to 45 degrees to the right, or up to 10 degrees to the left.
4.Tighten the lock knobs.
Note: Table stop bolt (F, Fig. 14) must be removed to tilt table to the left.
Height Scale Adjustment
1.Disconnect the machine from the power source, unplug.
2.The upper bearing guide should be set about 1/8” above the material to be cut.
3.Measure from the table top to the bottom of the bearing guides.
4.Set the indicator to this measurement on the height scale. Grasp the end of the indicator (G, Fig. 15) between your finger, and thumb. Move the indicator into position.
10