Stealthbox®
I N S T A L L A T I O N G U I D E
for the
SB-GM-CLREXT/10W3v2
(2004-Up Chevrolet Colorado &
GMC Canyon Extended Cab)
This Stealthbox is a product which requires professional installation skills and tools.
Please read this installation guide thor- oughly before beginning the project. It will guide you step by step through the installation. Several of the steps in this process may require two people to accomplish.
START |
|
| 2 ➔ |
|
|
HERE |
|
|
|
|
|
➔ | ➔ | ➔ | 1 ➔ | ➔ | 3 |
|
|
|
| ||
|
|
|
|
| |
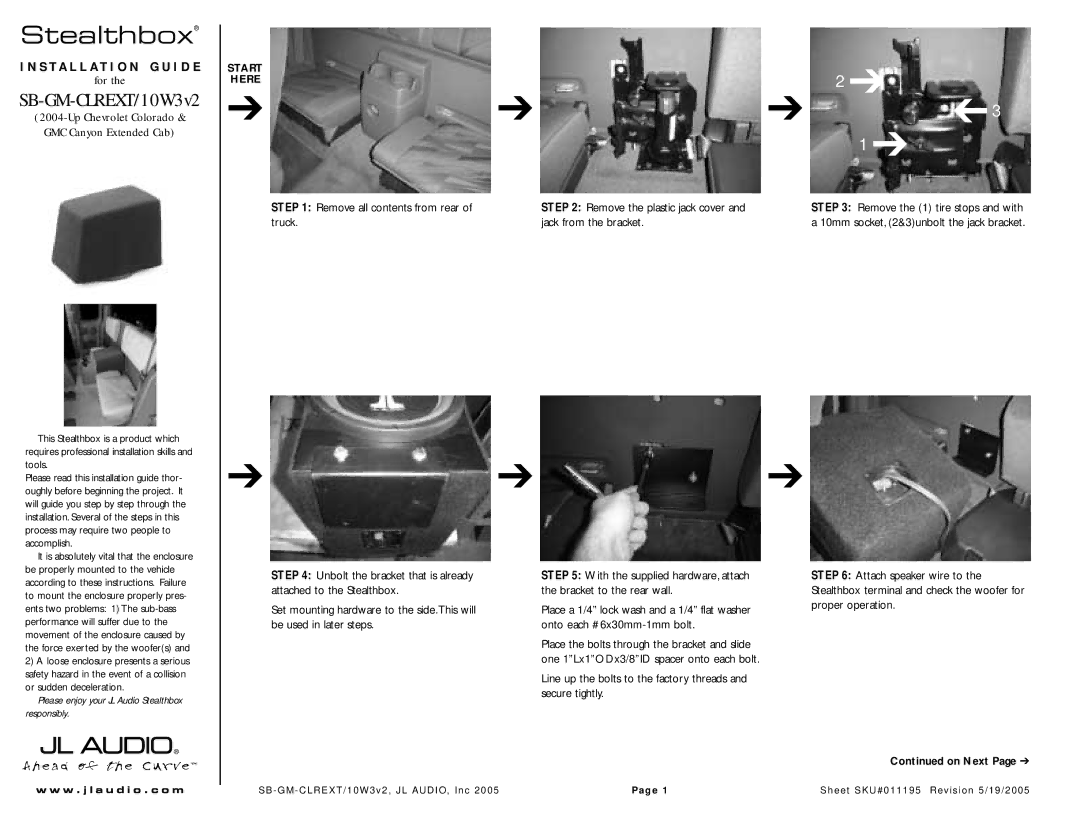
STEP 1: Remove all contents from rear of | STEP 2: Remove the plastic jack cover and |
| STEP 3: Remove the (1) tire stops and with | ||
truck. | jack from the bracket. |
| a 10mm socket, (2&3)unbolt the jack bracket. | ||
➔ ➔ ➔
It is absolutely vital that the enclosure be properly mounted to the vehicle according to these instructions. Failure to mount the enclosure properly pres- ents two problems: 1) The
2)A loose enclosure presents a serious safety hazard in the event of a collision or sudden deceleration.
Please enjoy your JL Audio Stealthbox responsibly.
STEP 4: Unbolt the bracket that is already attached to the Stealthbox.
Set mounting hardware to the side.This will be used in later steps.
STEP 5: With the supplied hardware, attach the bracket to the rear wall.
Place a 1/4” lock wash and a 1/4” flat washer onto each
Place the bolts through the bracket and slide one 1”Lx1”ODx3/8”ID spacer onto each bolt.
Line up the bolts to the factory threads and secure tightly.
STEP 6: Attach speaker wire to the Stealthbox terminal and check the woofer for proper operation.
Continued on Next Page ➔
w w w . j l a u d i o . c o m | SB - GM - CLREXT/10W3v2, JL AUDIO, Inc 2005 | Pag e 1 | Sheet SKU#011195 Revision 5/19/2005 |