Cont.
From
Previous
Page
➔
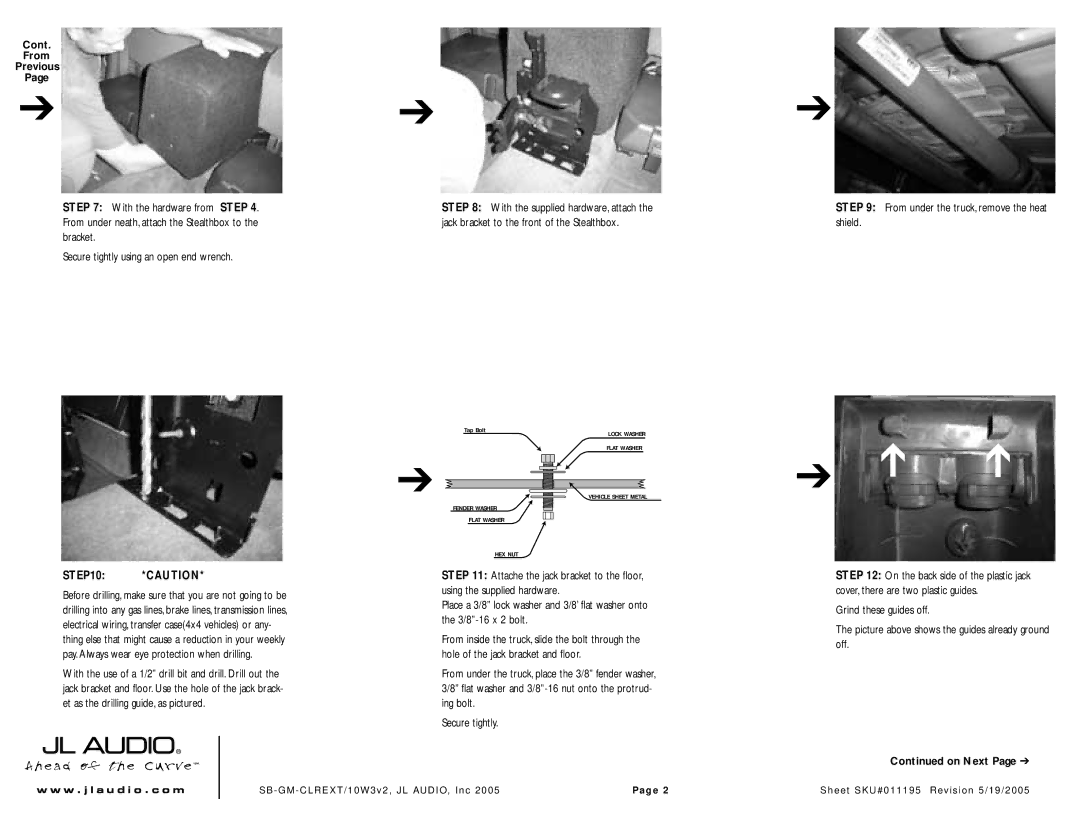
STEP 7: With the hardware from STEP 4. From under neath, attach the Stealthbox to the bracket.
Secure tightly using an open end wrench.
➔
STEP 8: With the supplied hardware, attach the jack bracket to the front of the Stealthbox.
➔
STEP 9: From under the truck, remove the heat shield.
Tap Bolt
LOCK WASHER
FLAT WASHER
➔
FENDER WASHER
FLAT WASHER
HEX NUT
VEHICLE SHEET METAL
STEP10: *CAUTION*
Before drilling, make sure that you are not going to be drilling into any gas lines, brake lines, transmission lines, electrical wiring, transfer case(4x4 vehicles) or any- thing else that might cause a reduction in your weekly pay. Always wear eye protection when drilling.
With the use of a 1/2” drill bit and drill. Drill out the jack bracket and floor. Use the hole of the jack brack- et as the drilling guide, as pictured.
STEP 11: Attache the jack bracket to the floor, using the supplied hardware.
Place a 3/8” lock washer and 3/8’ flat washer onto the
From inside the truck, slide the bolt through the hole of the jack bracket and floor.
From under the truck, place the 3/8” fender washer, 3/8” flat washer and
Secure tightly.
➔ | ➔ | ➔ |
|
|
STEP 12: On the back side of the plastic jack cover, there are two plastic guides.
Grind these guides off.
The picture above shows the guides already ground off.
Continued on Next Page ➔
w w w . j l a u d i o . c o m | SB - GM - CLREXT/10W3v2, JL AUDIO, Inc 2005 | Pag e 2 |
Sheet SKU#011195 Revision 5/19/2005