S T E P 4
With a Phillips screw driver, remove the two screws that secure the driver’s side
S T E P 5
Pull off the driver’s side rear door sill plate.
S T E P 6
Pop the c-pillars off the wall.
Stretch out the seat belts and carefully place both
S T E P 7
With a
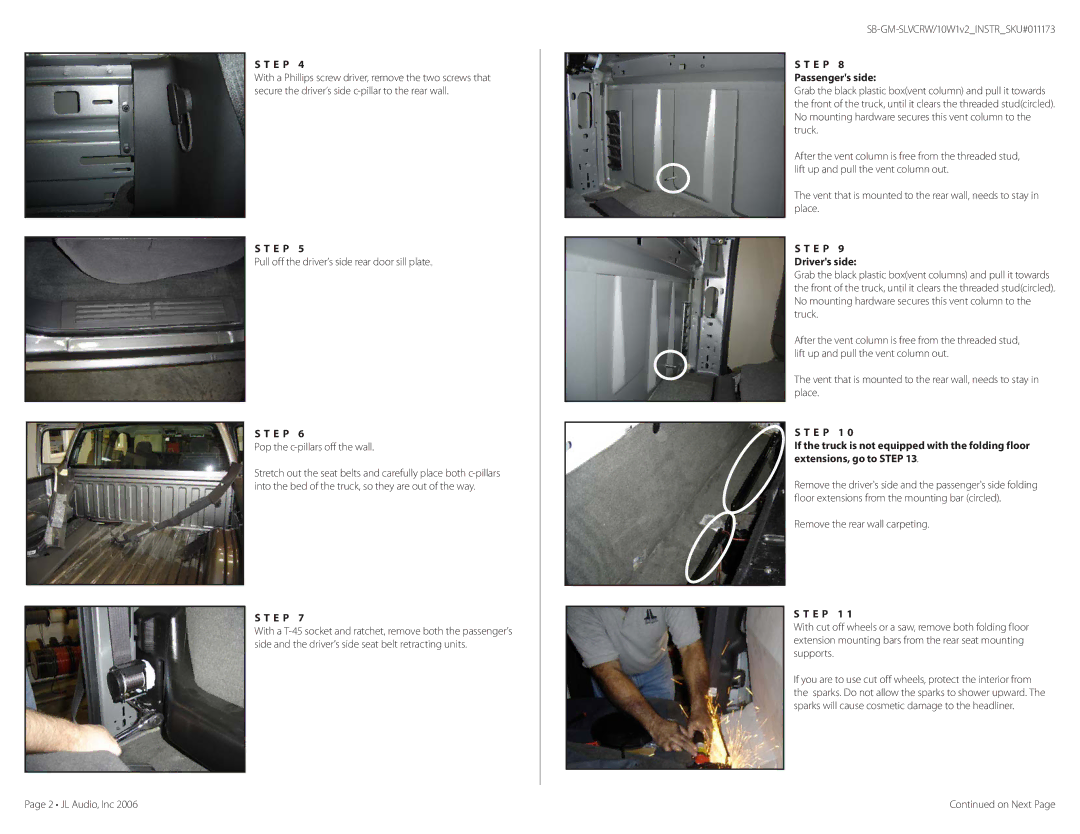
S T E P 8
Passenger's side:
Grab the black plastic box(vent column) and pull it towards the front of the truck, until it clears the threaded stud(circled). No mounting hardware secures this vent column to the truck.
After the vent column is free from the threaded stud, lift up and pull the vent column out.
The vent that is mounted to the rear wall, needs to stay in place.
S T E P 9
Driver's side:
Grab the black plastic box(vent columns) and pull it towards the front of the truck, until it clears the threaded stud(circled). No mounting hardware secures this vent column to the truck.
After the vent column is free from the threaded stud, lift up and pull the vent column out.
The vent that is mounted to the rear wall, needs to stay in place.
S T E P 1 0
If the truck is not equipped with the folding floor extensions, go to STEP 13.
Remove the driver's side and the passenger's side folding floor extensions from the mounting bar (circled).
Remove the rear wall carpeting.
S T E P 1 1
With cut off wheels or a saw, remove both folding floor extension mounting bars from the rear seat mounting supports.
If you are to use cut off wheels, protect the interior from the sparks. Do not allow the sparks to shower upward. The sparks will cause cosmetic damage to the headliner.
Page 2 • JL Audio, Inc 2006 | Continued on Next Page |