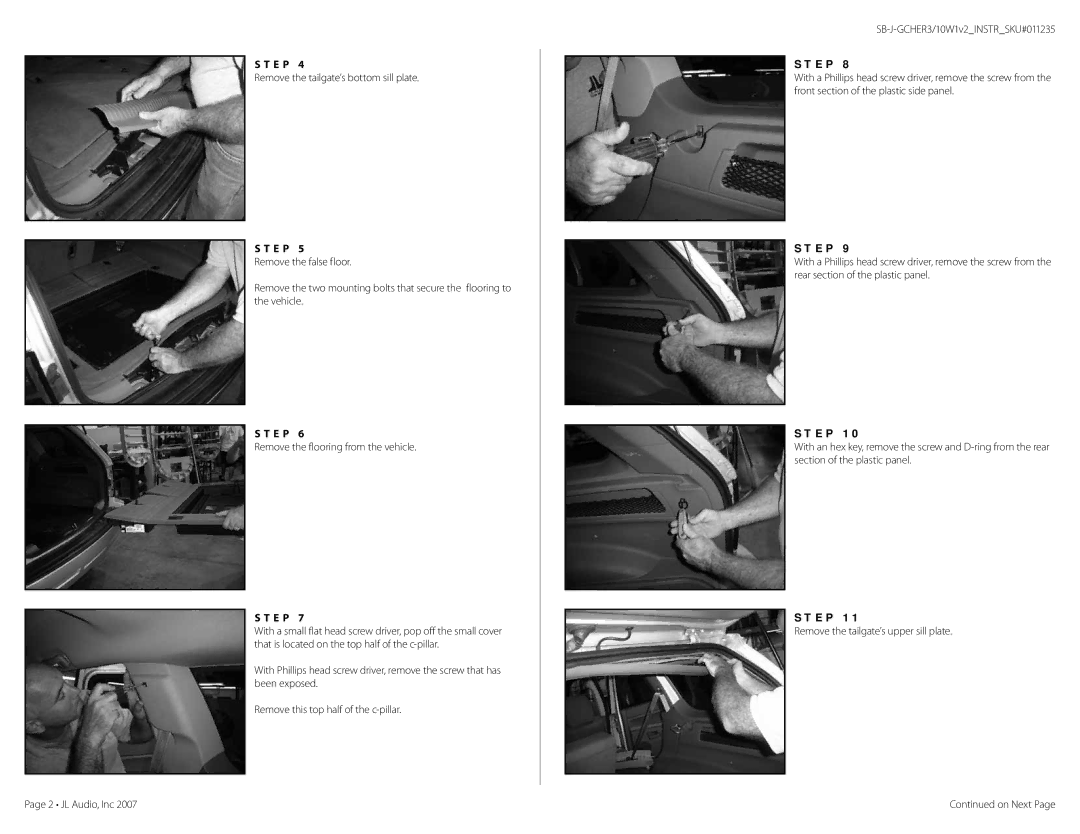
S T E P 4
Remove the tailgate’s bottom sill plate.
S T E P 5
Remove the false floor.
Remove the two mounting bolts that secure the flooring to the vehicle.
S T E P 6
Remove the flooring from the vehicle.
S T E P 7
With a small flat head screw driver, pop off the small cover that is located on the top half of the
With Phillips head screw driver, remove the screw that has been exposed.
Remove this top half of the
S T E P 8
With a Phillips head screw driver, remove the screw from the front section of the plastic side panel.
S T E P 9
With a Phillips head screw driver, remove the screw from the rear section of the plastic panel.
S T E P 1 0
With an hex key, remove the screw and
S T E P 1 1
Remove the tailgate’s upper sill plate.
Page 2 • JL Audio, Inc 2007 | Continued on Next Page |