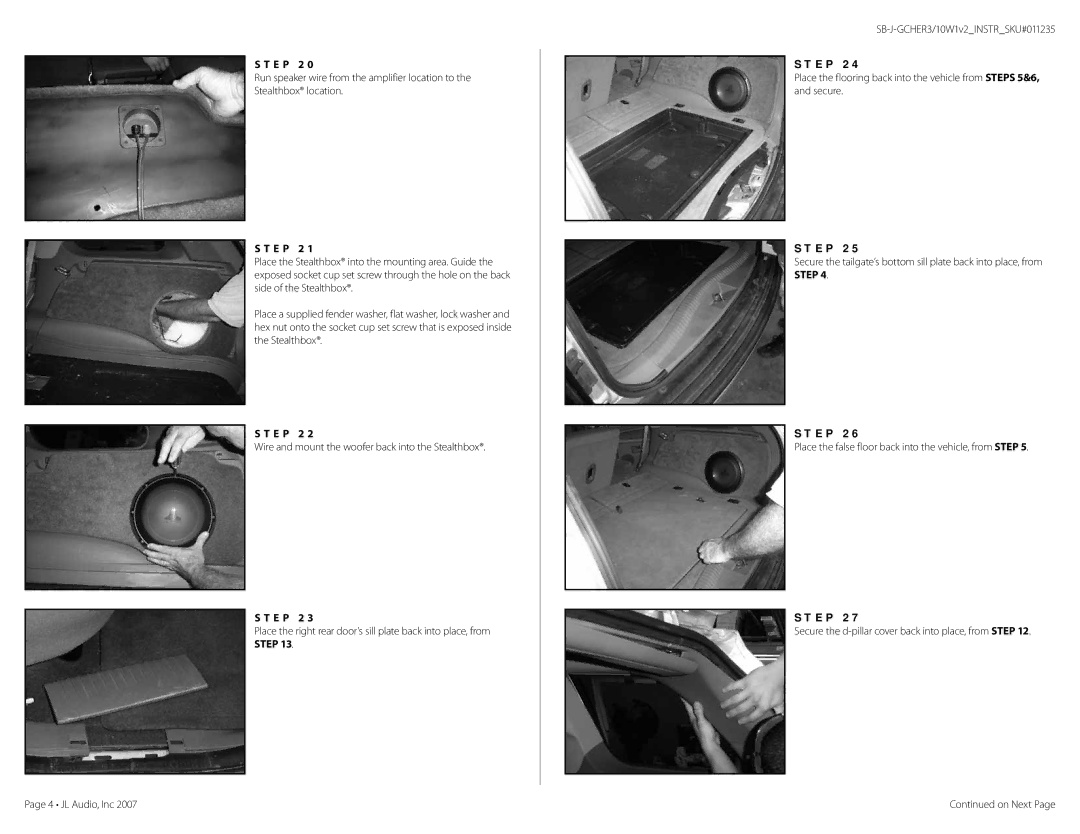
S T E P 2 0
Run speaker wire from the amplifier location to the Stealthbox® location.
S T E P 2 1
Place the Stealthbox® into the mounting area. Guide the exposed socket cup set screw through the hole on the back side of the Stealthbox®.
Place a supplied fender washer, flat washer, lock washer and hex nut onto the socket cup set screw that is exposed inside the Stealthbox®.
S T E P 2 2
Wire and mount the woofer back into the Stealthbox®.
S T E P 2 3
Place the right rear door’s sill plate back into place, from STEP 13.
S T E P 2 4
Place the flooring back into the vehicle from STEPS 5&6, and secure.
S T E P 2 5
Secure the tailgate’s bottom sill plate back into place, from STEP 4.
S T E P 2 6
Place the false floor back into the vehicle, from STEP 5.
S T E P 2 7
Secure the
Page 4 • JL Audio, Inc 2007 | Continued on Next Page |