Stealthbox®
I N S T A L L A T I O N G U I D E
for the
SB-N-TTNCRW/210W3v2
(04-Up Nissan Titan Crew Cab)
START
HERE
➔ ➔ ➔
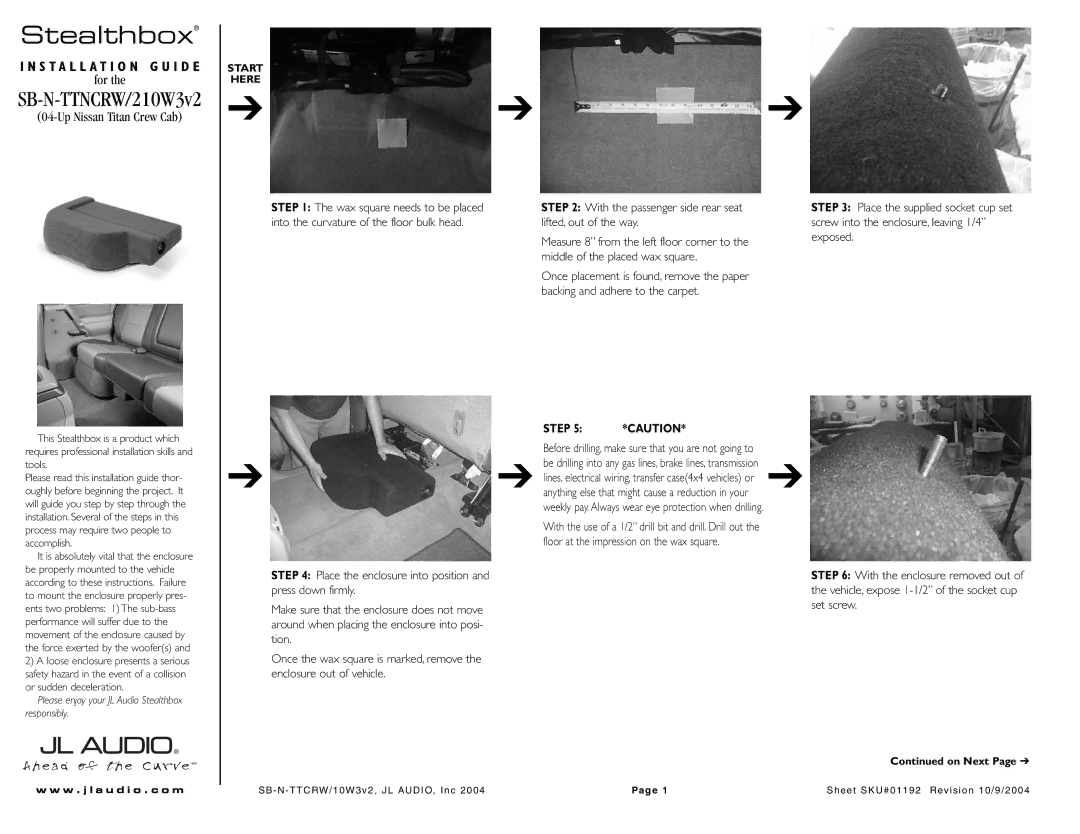
STEP 1: The wax square needs to be placed into the curvature of the floor bulk head.
STEP 2: With the passenger side rear seat lifted, out of the way.
Measure 8” from the left floor corner to the middle of the placed wax square.
Once placement is found, remove the paper backing and adhere to the carpet.
STEP 3: Place the supplied socket cup set screw into the enclosure, leaving 1/4” exposed.
This Stealthbox is a product which requires professional installation skills and tools.
Please read this installation guide thor- oughly before beginning the project. It will guide you step by step through the installation. Several of the steps in this process may require two people to accomplish.
| STEP 5: | *CAUTION* |
|
| Before drilling, make sure that you are not going to |
| |
➔ | be drilling into any gas lines, brake lines, transmission | ➔ | |
lines, electrical wiring, transfer case(4x4 vehicles) or | |||
➔ anything else that might cause a reduction in your | |||
weekly pay. Always wear eye protection when drilling.
With the use of a 1/2” drill bit and drill. Drill out the floor at the impression on the wax square.
It is absolutely vital that the enclosure be properly mounted to the vehicle according to these instructions. Failure to mount the enclosure properly pres- ents two problems: 1) The
2)A loose enclosure presents a serious safety hazard in the event of a collision or sudden deceleration.
Please enjoy your JL Audio Stealthbox responsibly.
STEP 4: Place the enclosure into position and press down firmly.
Make sure that the enclosure does not move around when placing the enclosure into posi- tion.
Once the wax square is marked, remove the enclosure out of vehicle.
STEP 6: With the enclosure removed out of the vehicle, expose
Continued on Next Page ➔
w w w . j l a u d i o . c o m | SB - N - TTCRW/10W3v2, JL AUDIO, Inc 2004 | Pag e 1 | Sheet SKU#01192 Revision 10/9/2004 |