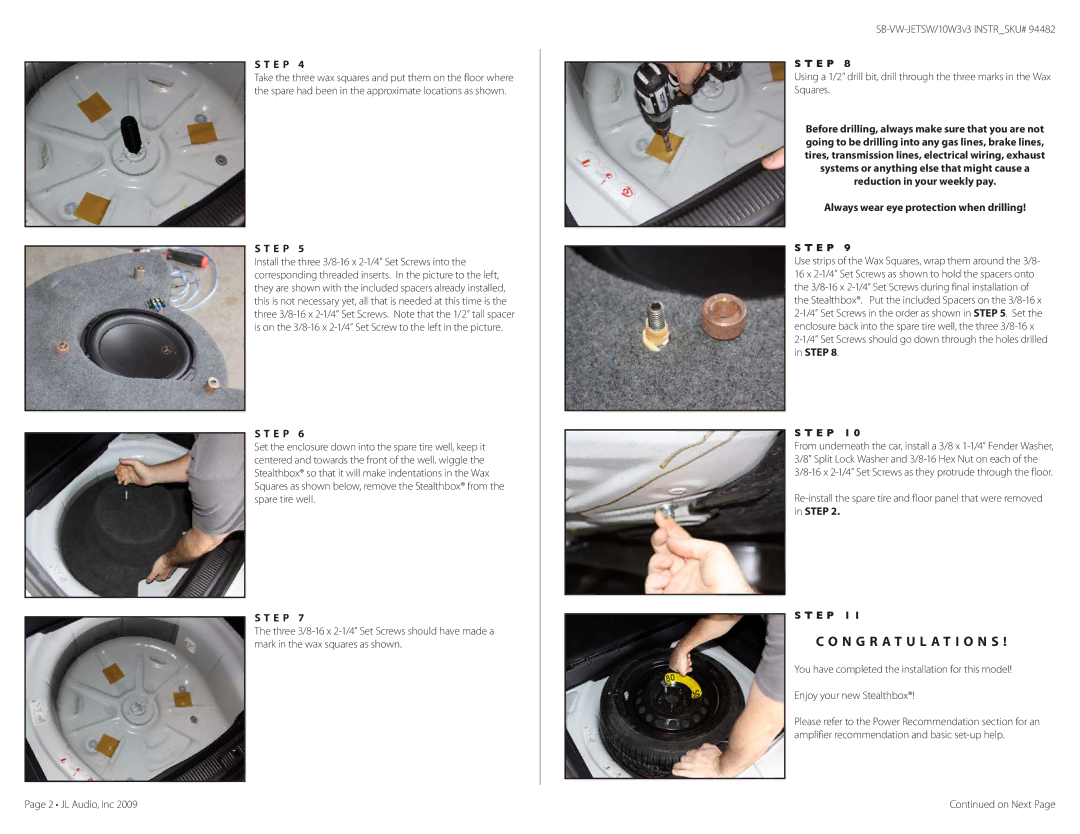
JL Audio SB-VW-JETSW/10W3v3 warranty N G R a T U L a T I O N S, E P 1

Models: SB-VW-JETSW/10W3v3

1 3
Download 3 pages 49.67 Kb
Page 2
Image 2

S T E P 4

Take the three wax squares and put them on the floor where the spare had been in the approximate locations as shown.

S T E P 5

Install the three 3/8-16 x 2-1/4” Set Screws into the corresponding threaded inserts. In the picture to the left, they are shown with the included spacers already installed, this is not necessary yet, all that is needed at this time is the three 3/8-16 x 2-1/4” Set Screws. Note that the 1/2” tall spacer is on the 3/8-16 x 2-1/4” Set Screw to the left in the picture.

S T E P 6

Set the enclosure down into the spare tire well, keep it centered and towards the front of the well. wiggle the Stealthbox® so that it will make indentations in the Wax Squares as shown below, remove the Stealthbox® from the spare tire well.

S t e p 7

The three 3/8-16 x 2-1/4” Set Screws should have made a mark in the wax squares as shown.

SB-VW-JETSW/10W3v3 INSTR_SKU# 94482

S T E P 8

Using a 1/2” drill bit, drill through the three marks in the Wax Squares.

Before drilling, always make sure that you are not going to be drilling into any gas lines, brake lines, tires, transmission lines, electrical wiring, exhaust systems or anything else that might cause a reduction in your weekly pay.

Always wear eye protection when drilling!

S T E P 9

Use strips of the Wax Squares, wrap them around the 3/8- 16 x 2-1/4” Set Screws as shown to hold the spacers onto the 3/8-16 x 2-1/4” Set Screws during final installation of the Stealthbox®. Put the included Spacers on the 3/8-16 x

2-1/4” Set Screws in the order as shown in STEP 5. Set the enclosure back into the spare tire well, the three 3/8-16 x

2-1/4” Set Screws should go down through the holes drilled in STEP 8.

S T E P 1 0

From underneath the car, install a 3/8 x 1-1/4” Fender Washer, 3/8” Split Lock Washer and 3/8-16 Hex Nut on each of the 3/8-16 x 2-1/4” Set Screws as they protrude through the floor.

Re-install the spare tire and floor panel that were removed in STEP 2.

S T E P 1 1

C O N G R A T U L A T I O N S !

You have completed the installation for this model!

Enjoy your new Stealthbox®!

Please refer to the Power Recommendation section for an amplifier recommendation and basic set-up help.

Page 2 • JL Audio, Inc 2009

Continued on Next Page

Page 2
Image 2
JL Audio SB-VW-JETSW/10W3v3 warranty N G R a T U L a T I O N S, Always wear eye protection when drilling E P, E P 1