Setting up your TV
CAUTION
•Turn off the equipment including the TV before connecting.
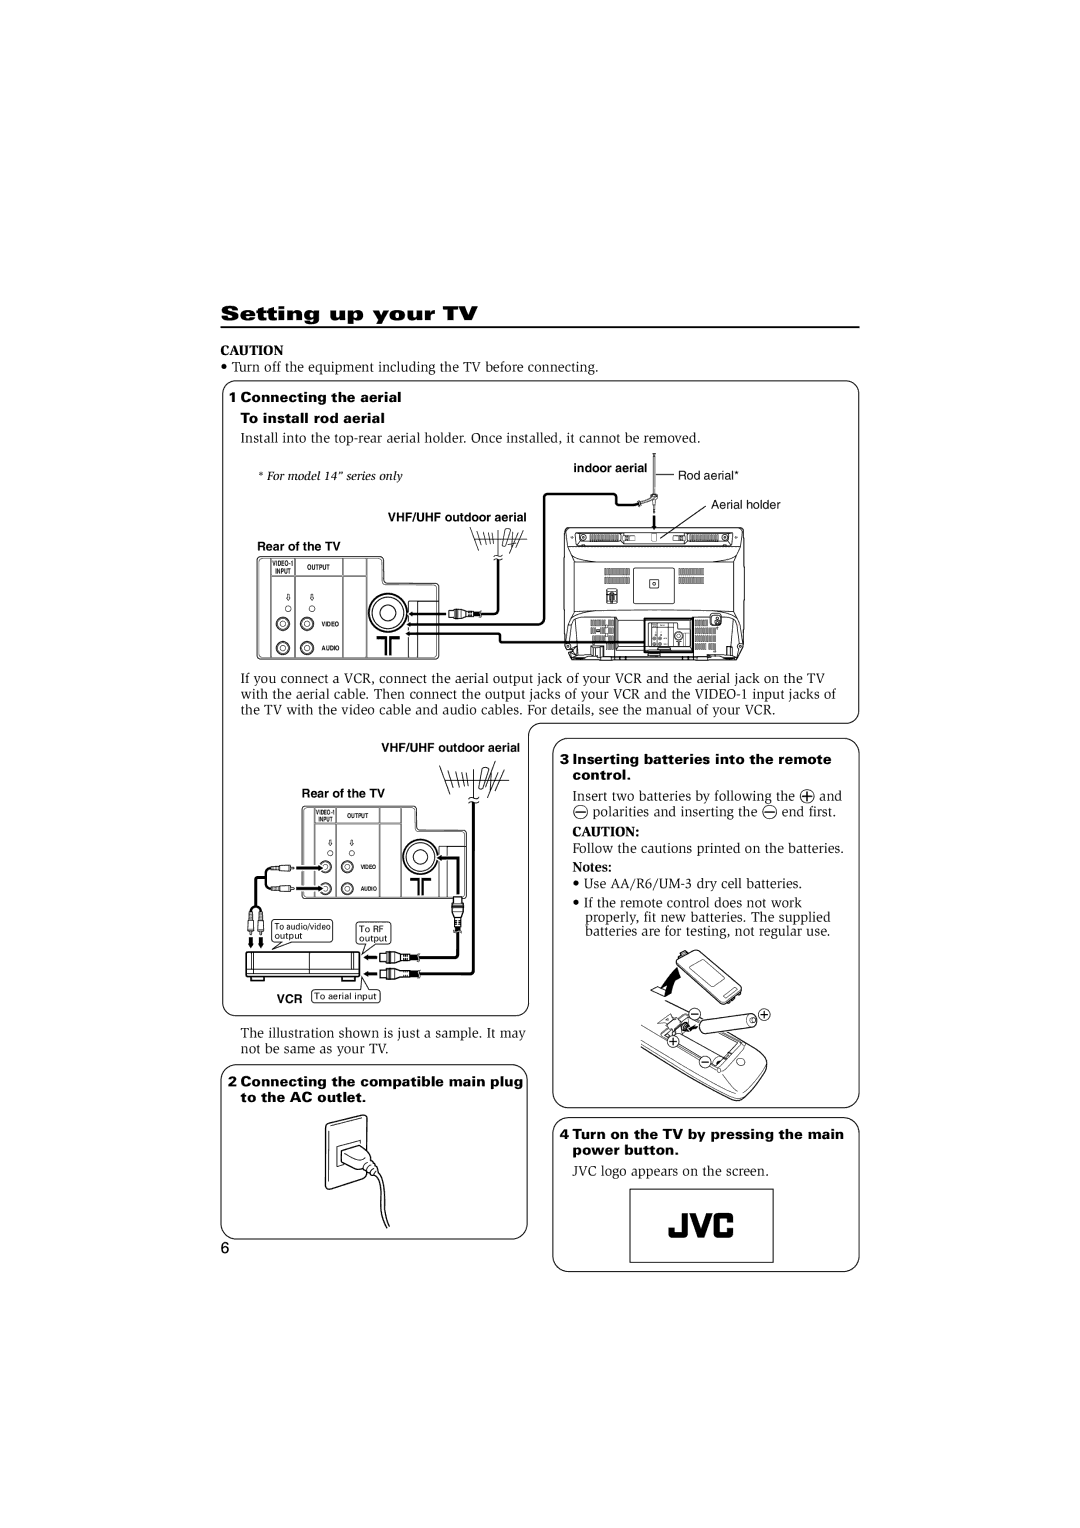
1Connecting the aerial To install rod aerial
Install into the
* For model 14” series only | indoor aerial | Rod aerial* |
|
Aerial holder
VHF/UHF outdoor aerial
Rear of the TV
INPUT
OUTPUT
VIDEO
AUDIO
If you connect a VCR, connect the aerial output jack of your VCR and the aerial jack on the TV with the aerial cable. Then connect the output jacks of your VCR and the
VHF/UHF outdoor aerial
Rear of the TV
OUTPUT | ||
INPUT | ||
| ||
| VIDEO | |
| AUDIO | |
To audio/video | To RF | |
output | output | |
VCR To aerial input | ||
The illustration shown is just a sample. It may not be same as your TV.
2 Connecting the compatible main plug to the AC outlet.
3 Inserting batteries into the remote control.
Insert two batteries by following the ª and
·polarities and inserting the · end first.
CAUTION:
Follow the cautions printed on the batteries.
Notes:
•Use
•If the remote control does not work properly, fit new batteries. The supplied batteries are for testing, not regular use.
4 Turn on the TV by pressing the main power button.
JVC logo appears on the screen.
6